Automate your Cyber Security Lab with Ludus

As much as I love setting up and installing various VMs, I would also not be upset if I had a dedicated engineer at home doing these tasks for me. Since this exceeds my Homelab budget, I invested countless hours setting up various VMs I used for a couple of weeks, only to destroy them after.
Having worked with Proxmox for a while now, I was wishing for a solution to automate this setup-phase for training environments. I wanted to quickly configure and setup a vulnerable Active Directory environment, for example.
Ludus is just what I have been looking for.
Why I chose Ludus
Ludus is easy to install and spares me the hours it took me in the past to setup all the testing environments I needed. Built on Proxmox, it not only provides me with Infrastructure-as-Code (IaC) capabilities, it also allows me to quickly deploy environments created by other people.
Ludus utilizes Templates, which in it's essence, are configuration files defining VMs, which are built (template-VMs created) and then can be copied as many times as needed. You can use the pre-configured templates, use templates created by others, and even create your very own, customized templates. The builtin templates include:
- debian11
- debian12
- kali
- win11-22h2-x64-enterprise
- win2022-server-x64
Ranges are pre-configured environments. They are defined by a single configuration file (YAML), which enables you to configure your own environment and re-use as you wish. The comfort of configuring a range, and then being able to deploy it over and over again is absolute luxury. Also, you can use ranges made by other people or create your own. You could exchange ranges with your collegues or share them over the internet. Some of the capabilities offered by the configuration files include:
- Setting up VMs
- Setting up Network Configurations (including subnetting)
- Setting up Users and Groups (using Ansible)
- Setting up applications and configurations (using Ansible)
Setup
Now that you decided to start your journey, let me guide you through the installation process.
0 - Choose your Deployment Option
Ludus can be deployed on:
- Bare-Metal (Debian 12)
- Azure
- Google Cloud Platform (GCP)
- Hyper-V
- Proxmox
- VMware Fusion
I chose the Bare-Metal option, so I installed Debian 12 on my Intel NUC (which I use as my little homeserver).
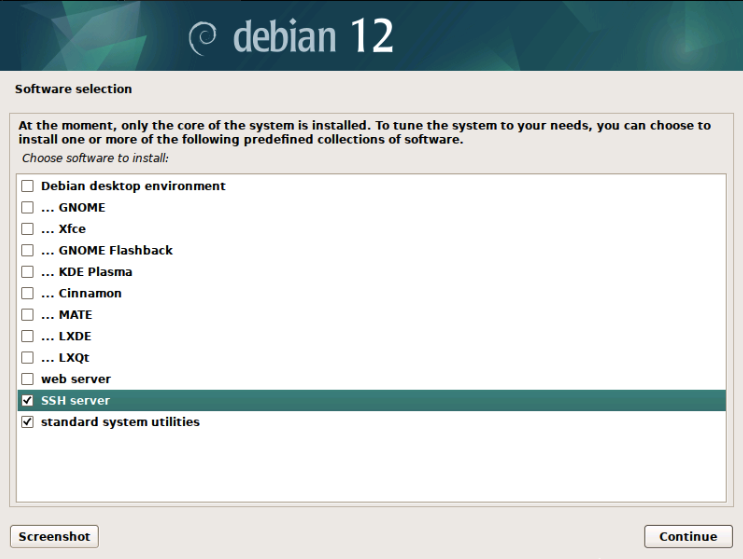
1 - Install Debian 12
The installation of Debian 12 is out-of-scope for this blog post, also there are multiple tutorials available online.
2 - Install Ludus
Installing Ludus is pretty simple. Login to your Debian Machine and switch to the root user using the following command:
su -Enter your root-password which you configured during the installation of Debian 12. After that, run the following command to install Ludus Server:
curl -s https://ludus.cloud/install | bashYou will be prompted to configure the default settings. I did not change any default settings and just hit "Enter" until the end.
The installation will take a while and your device will reboot 2 times. If your SSH Client disconnects, you can reconnect and check the installation status with the following command:
ludus-install-statusludus-install-status as root, even long after the installation!3 - Create a User
After the installation has succeeded, you will create a user. This is done mainly for security purposes.
When you work with Ludus Server, you will need your API Key. The key should have shown up when you typed ludus-install-status after the installation finished.
Copy the following command in a text editor and replace the <placeholders> as needed:
LUDUS_API_KEY='<YOUR-ROOT-API-KEY>' \
 ludus user add --name "<NAME-OF-YOUR-USER>" --userid <IDENTIFIER-LETTERS-OR-NUMBERS> --admin --url https://127.0.0.1:8081
Example provided by Ludus Documentation:
LUDUS_API_KEY='ROOT.o>T3BMm!^\As_0Fhve8B\VrD&zqc#kCk&B&?e|aF' \
 ludus user add --name "John Doe" --userid JD --admin --url https://127.0.0.1:8081


+--------+------------------+-------+---------------------------------------------+
| USERID | PROXMOX USERNAME | ADMIN |                   API KEY                   |
+--------+------------------+-------+---------------------------------------------+
| JD     | john-doe         | true  | JD._7Gx2T5kTUSD%uTWZ*lFi=Os6MpFR^OrG+yT94Xt |
+--------+------------------+-------+---------------------------------------------+
After the command finished (it can take a while), you will be provided with the configuration for your new user.
ludus user apikey --user <USER-ID>4 - Choose your Management Solution
From here on, you can choose between two paths:
- Continue the configuration using SSH/Bash
- Continue the configuration using Ludus CLI
I personally chose to stick to my SSH session since I was not in the mood to install the CLI yet. If you also want to go down that path, you need to store your API key inside the environment variable LUDUS_API_KEY in order to be able to communicate with ludus server.
export LUDUS_API_KEY="USERID.KEY"4 - Access Proxmox
While root-login to Proxmox is possible, it is generally recommended to apply the principle of least privilege. Having created your user, you can display the corresponding credentials using the following command:
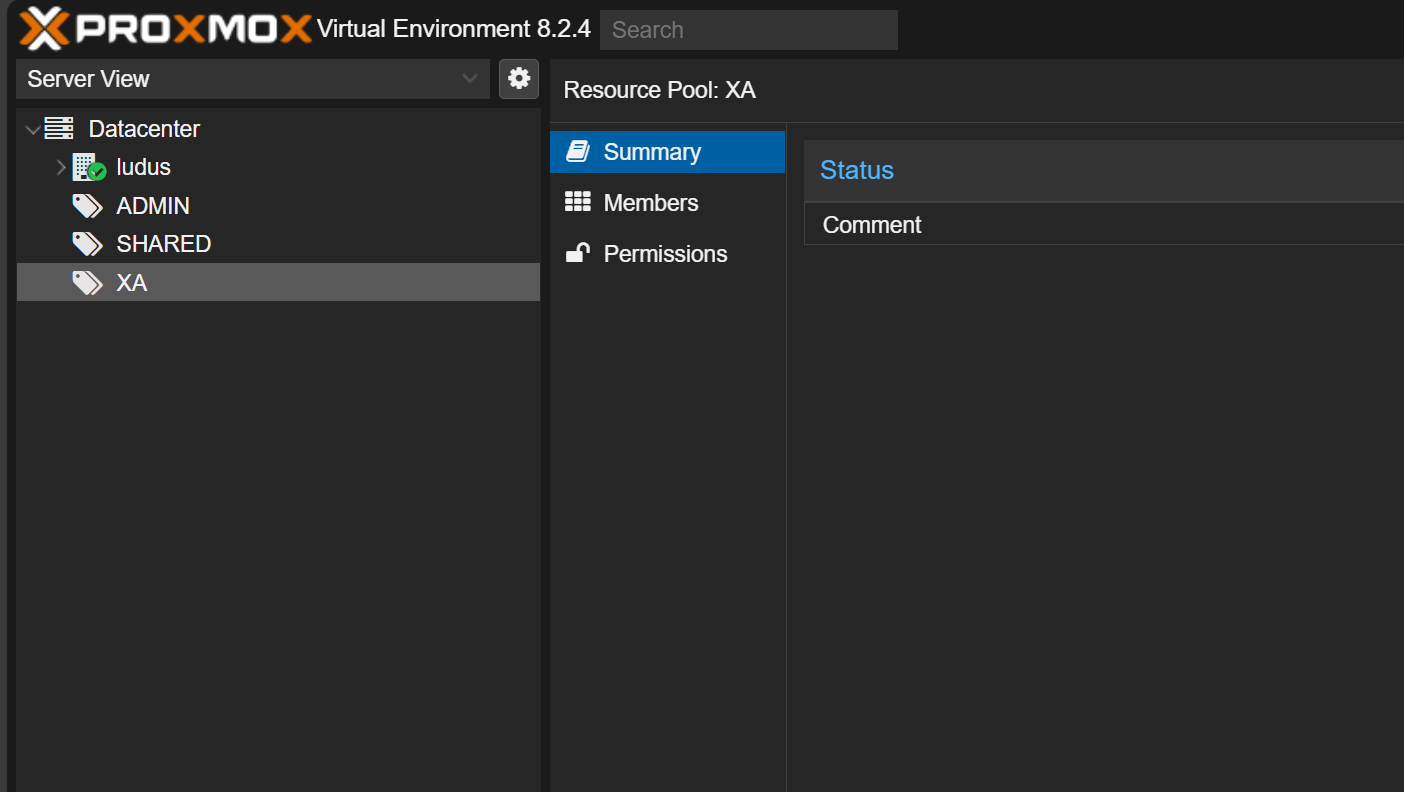
ludus user creds getYou can use these credentials to authenticate to the Proxmox Web Portal. The URL should follow the following format:
https://<IP-OF-YOUR-SERVER>:8006And welcome to Proxmox!
5 - Build the default Templates
While this is technically speaking optional, and you could go straight ahead and just build your own templates, I highly recommend building the default templates. For once, you will see if the template building process actually works and you setup everything correctly, and additionally have a basic arsenal ov VMs.
You can list the builtin templates using the following command:
ludus templates listYou start the building process with the following command (it will take a while):
ludus templates buildYou can check on the status using the following command:
ludus templates statusAnd you can get a live output of the progress using this command:
ludus templates logs -fYou can follow the progress on your Proxmox Web Interface (it is quite satisfying). Once done, access your Proxmox web interface. The created configuration should look something like this:
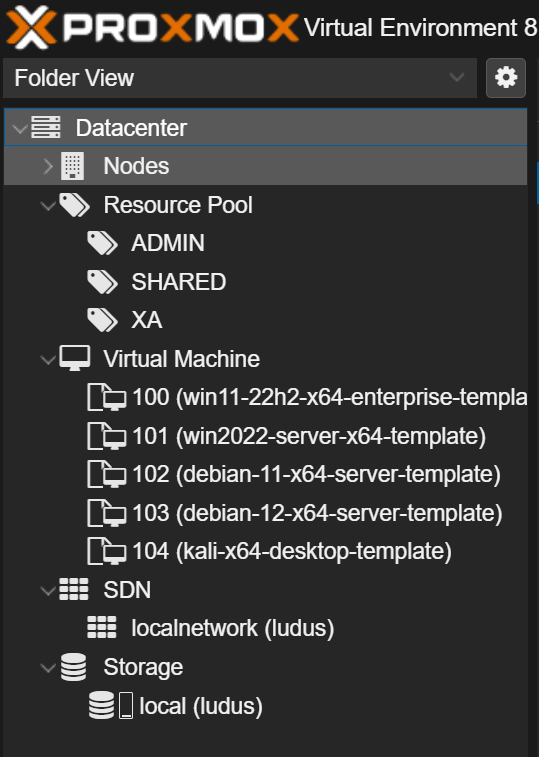
And voilà, 4 VMs have been built while you were able to do whatever you want!
Fun fact: After the VM has been setup, Ludus connects to the hosts using SSH/WinRM for further configuration.
6 - Deploy a Range
Now that you have a base setup of Ludus, you can either create your own ranges or use some of the pre-built ranges provided online.
For general configuration, see: https://docs.ludus.cloud/docs/quick-start/deploy-range
For environment setup-guides, see: https://docs.ludus.cloud/docs/category/environment-guides
You can see your current configuration using:
ludus range config getDefault Machine Credentials
- Kali
kali:kali(OS)kali:password(KasmVNC - https port 8444)
- Windows
localuser:password(local Administrator)LUDUS\domainuser:passwordLUDUS\domainadmin:password(Domain Admin)
- Debian based boxes
debian:debian
- Others
localuser:password
Final Words
Having a low-budget, tiny Intel NUC with an Intel Pentium processor as a server was not the best choice. I would highly recommend you to have a stronger setup.
But so far, Ludus has already tremendously simplified the creation and management of my virtual environment. I am currently working with an Active Directory environment which I deployed using Ludus, and I'm planning on making a post on that project in the future.
Thank you very much for reading and have fun!