Building a Purple Teaming Test Environment with Ludus

Introduction
In my previous post, I demonstrated how to install Ludus on Debian 12.
In this blog post, I want to go beyond the initial setup and show you how I automated my Home Lab using Ludus.
How Ludus builds Environments
Before we can start building, we need to understand some concepts first, which will not only help us in this project, but also in upcoming ones.
Ludus - Ranges
Ranges are environments configured in a single YAML file and then deployed. After the deployment has started, you can watch Ludus create Virtual Machines in Proxmox.
You can find everything you need to know in the Ludus Documentation:


- Create a configuration file and save it
- Load the file using:
ludus range config set -f </path/to/file.yml>- Deploy the loaded Range using:
ludus range deploy- Check the progress by tailing the logs:
ludus range logs -f- Check if the deployment was successful using:
ludus range status- If you're done and wish to setup another range, delete your current range using:
ludus range destroyAfter the deletion, you can create a new config.yml file (or use an already existing one) and deploy the next range.
This makes all of my testing environments copy-pastable text!
Ludus - Roles
While deploying a virtual environment with the press of a button sounds amazing enough, you can even assign roles to the hosts.
Roles are Ansible roles that are applied to VMs in Ludus after they are deployed and configured. While you can create your own, there are already some to choose from.
You can literally tell a host to play the role of a MSSQL Server, Elastic Server, Wazuh Server and much more!
Building the Dream Lab
What we need to do:
- Create a Configuration File for our desired Environment
- Deploy the Range
- Verify that the Deployment completed successfully
- Access Kibana and onboard the Windows Server
- Setup our VPN to access the hosts/Kibana
The Lab I'm setting up today looks as follows:
- Router (automatically configured)
- Windows Server 2022 as Domain Controller
- Windows 11 Workstation
- Debian 12 server as Elastic Server
You can also go ahead and add a Kali Linux host to the mix, but since my server runs on 32 GB RAM (non-upgradable), I will use a separate VM running on my laptop.
1 - Adding the necessary Roles
Before we start building our Yaml-File, we need to add the desired Ansible roles. Enter the two commands to prepare the elastic server and agent roles [1]:
ludus ansible roles add badsectorlabs.ludus_elastic_containerludus ansible roles add badsectorlabs.ludus_elastic_agentIn Case you also would like to play around with Wazuh in the future, also install these:
ludus ansible roles add aleemladha.wazuh_server_installludus ansible roles add aleemladha.ludus_wazuh_agentBig thanks to Aleemladha who created these amazing roles!
 aleemladhaaleemladha
2 - Creating a Configuration File
Now it is time to construct the building plan of our lab. Refer to the Ludus documentation if you wish to create your own. In this blog post, I will showcase the one I created.
Having read enough about the documentation, I was ready to build my own configuration file:
  - vm_name: "{{ range_id }}-elastic"
    hostname: "{{ range_id }}-elastic"
    template: debian-12-x64-server-template
    vlan: 10
    ip_last_octet: 2
    ram_gb: 8
    cpus: 4
    linux: true
    testing:
      snapshot: false
      block_internet: false
    roles:
      - badsectorlabs.ludus_elastic_container
    role_vars:
      ludus_elastic_password: "elastic123"

  - vm_name: "{{ range_id }}-dc01"
    hostname: "{{ range_id }}-dc01"
    template: win2022-server-x64-template
    vlan: 10
    ip_last_octet: 12
    ram_gb: 8
    cpus: 4
    windows:
      sysprep: false
    domain:
      fqdn: minder-security.local
      role: primary-dc

  - vm_name: "{{ range_id }}-ws01"
    hostname: "{{ range_id }}-ws01"
    template: win11-22h2-x64-enterprise-template
    vlan: 10
    ip_last_octet: 22
    ram_gb: 8
    cpus: 8
    windows:
      sysprep: true
      install_additional_tools: true
      visual_studio_version: 2019
    domain:
      fqdn: minder-security.local
      role: member
    roles:
      - badsectorlabs.ludus_elastic_agent


defaults:
  router_vm_name: "{{ range_id }}-router-debian11-x64"
  snapshot_with_RAM: false
  stale_hours: 0
  ad_domain_functional_level: Win2012R2
  ad_forest_functional_level: Win2012R2
  ad_domain_admin: domainadmin
  ad_domain_admin_password: password123
  ad_domain_user: domainuser
  ad_domain_user_password: password
  ad_domain_safe_mode_password: safepassword
  timezone: Europe/Zurich
3 - Deploying the Range
The steps are explained in How Ludus builds Environments. You can just follow along:
- Set the configuration
ludus range config set -f config.yml- Deploy the Range:
ludus range deploy- Track the Progress:
ludus range logs -f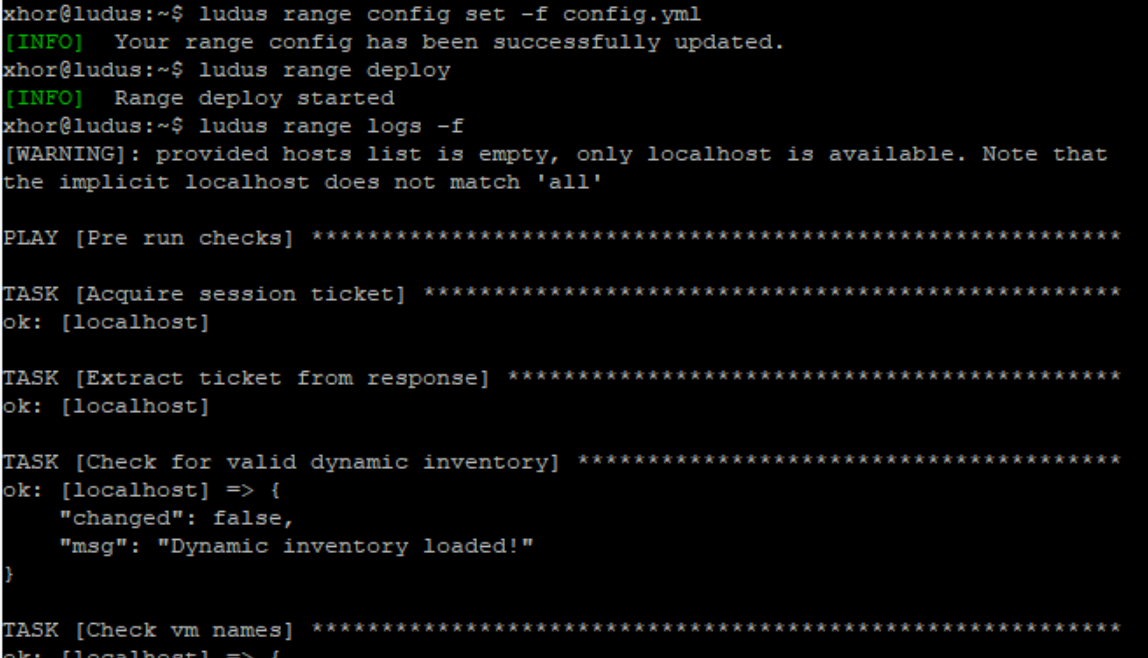
This process will take a while. In the meantime, you can relax, grab a coffee, and spend some time with your loved ones.
After it's done, you should be able to see something like this:
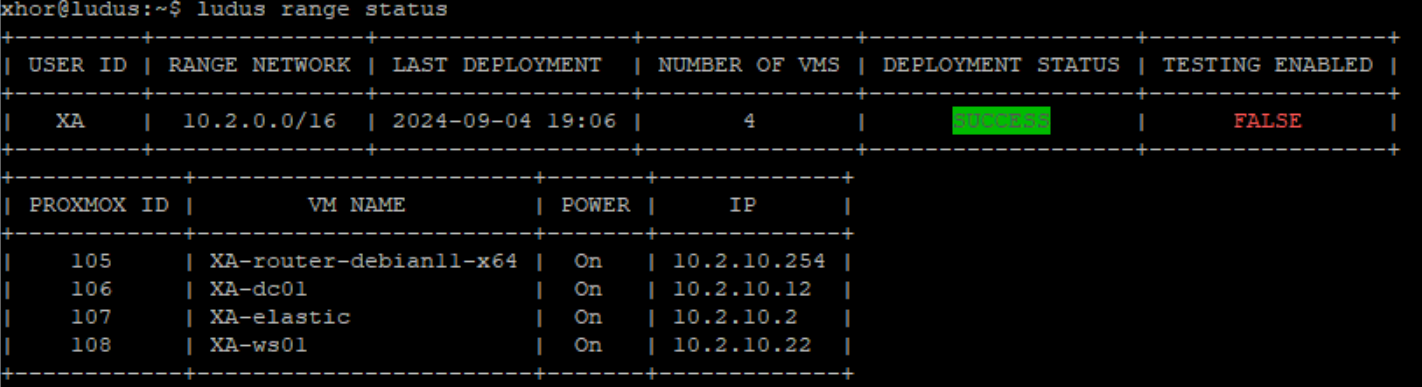
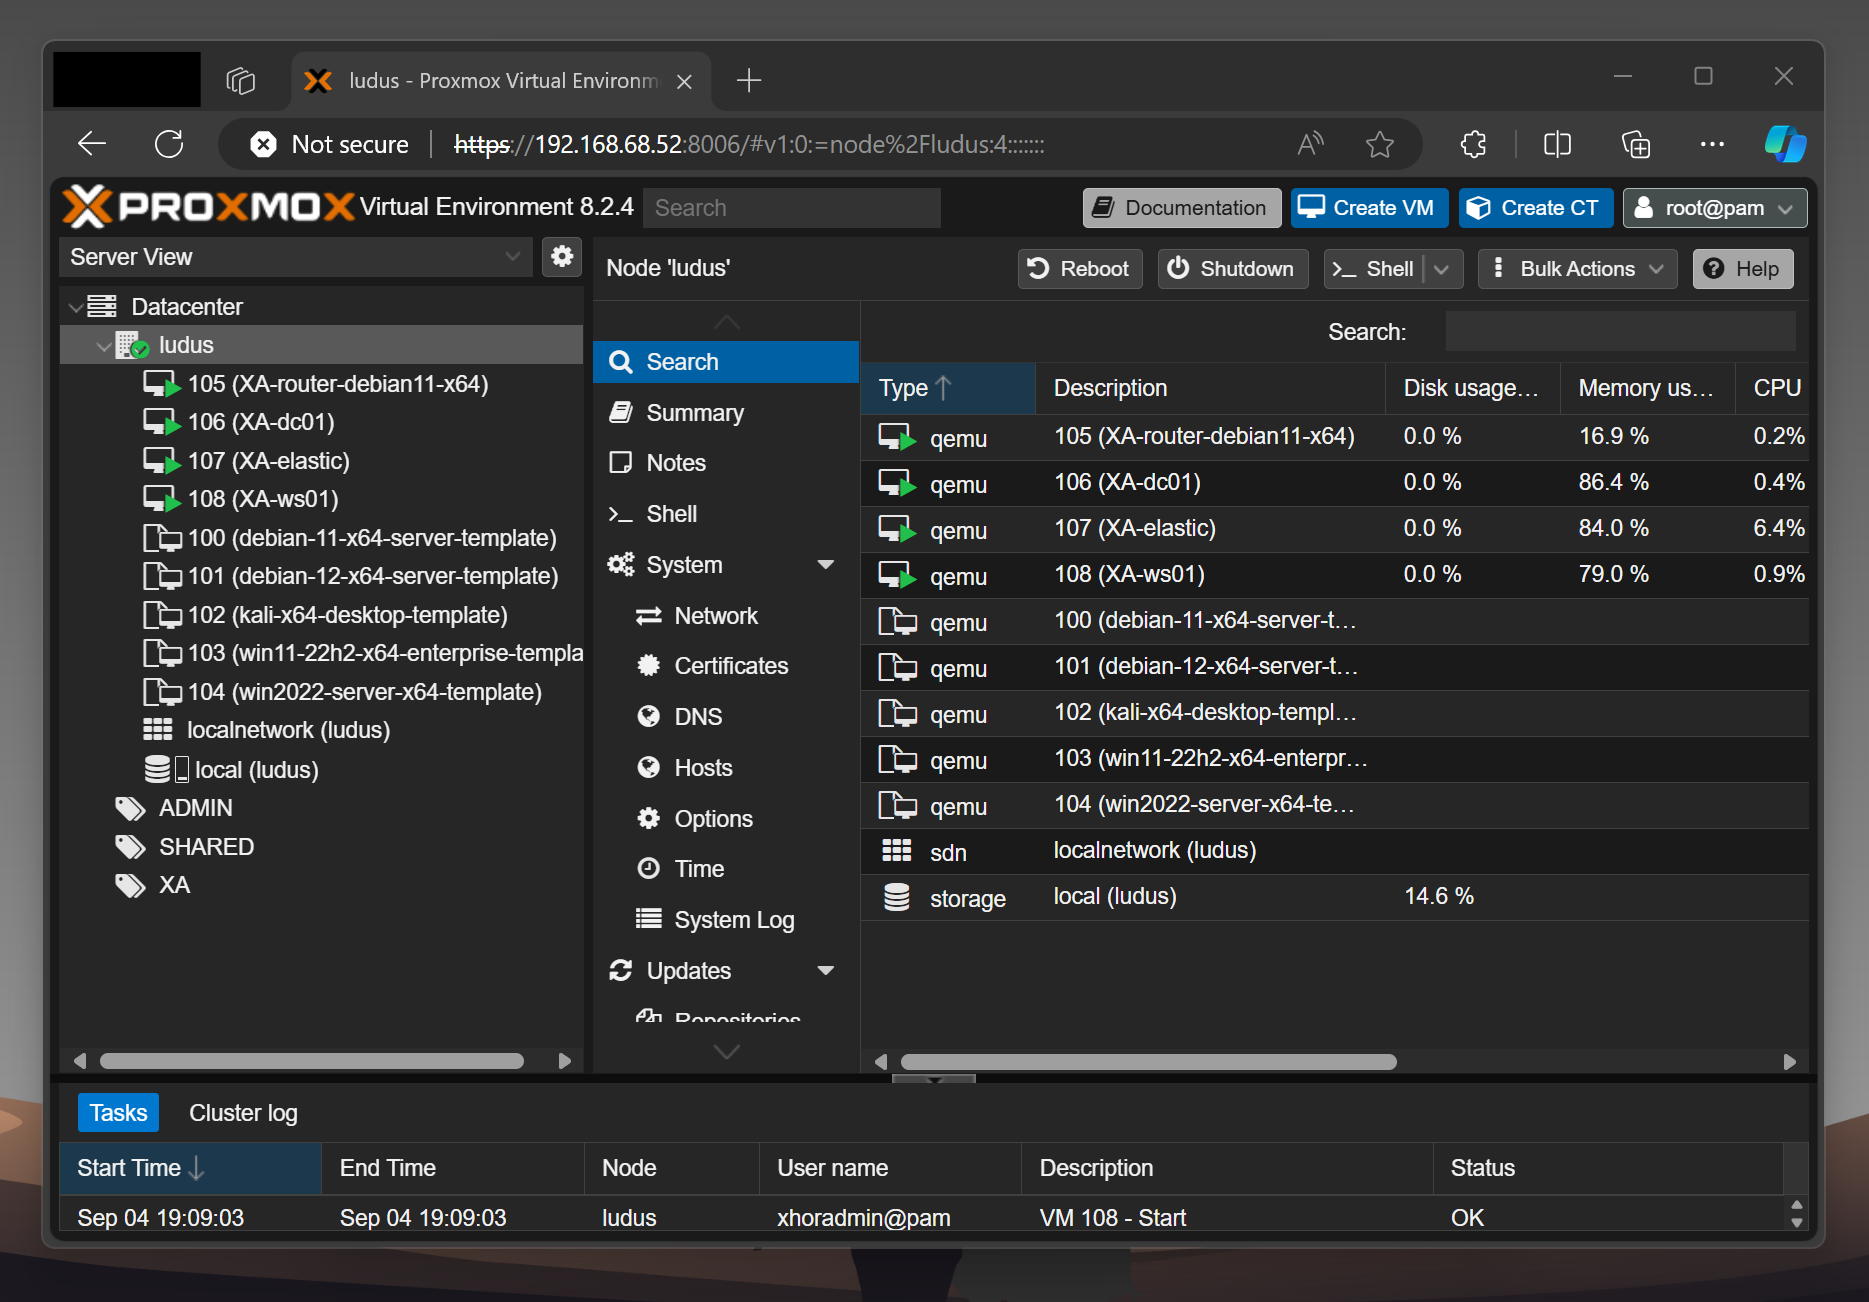
4 - Verifying the Deployment
The default credentials are documented by Ludus [2]. We will need the following:
- Windows
localuser:password(local Administrator)LUDUS\domainuser:passwordLUDUS\domainadmin:password(Domain Admin)
- Others
localuser:password
The Windows 11 Workstation was properly set up and runs bginfo which shows, that the domain join was successful. I authenticated using domainuser, but you can also just use localuser if you wish:
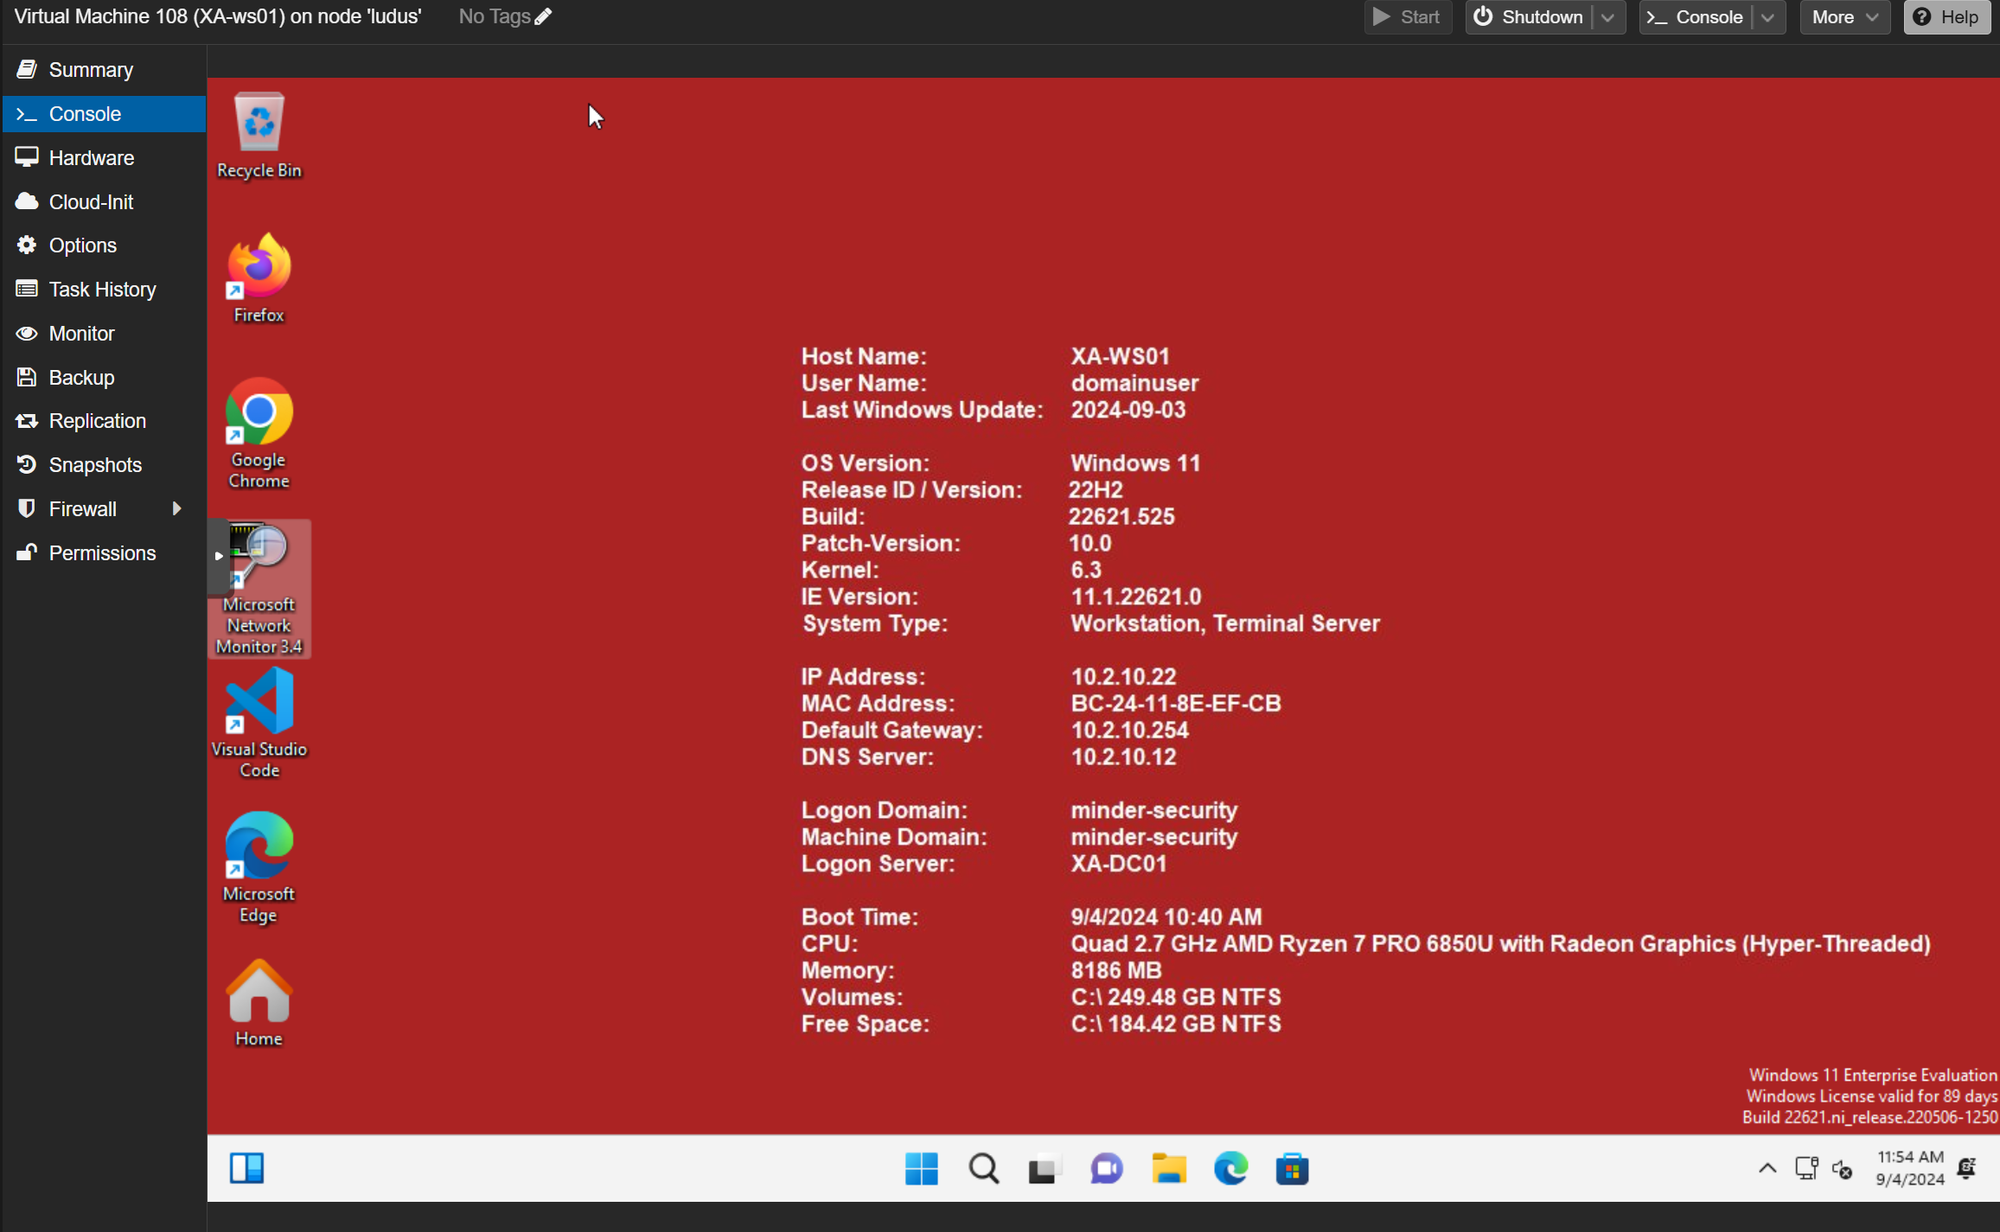
As you can see, due to install_additional_tools: true, we now have a Windows 11 Host fully equipped with Firefox, Chrome, VSCode, Burp Suite, 7Zip, Process Hacker, Ilspy and other useful utilities.
The Windows Server 2022 (Domain Controller) also seemed to have been set up correctly:
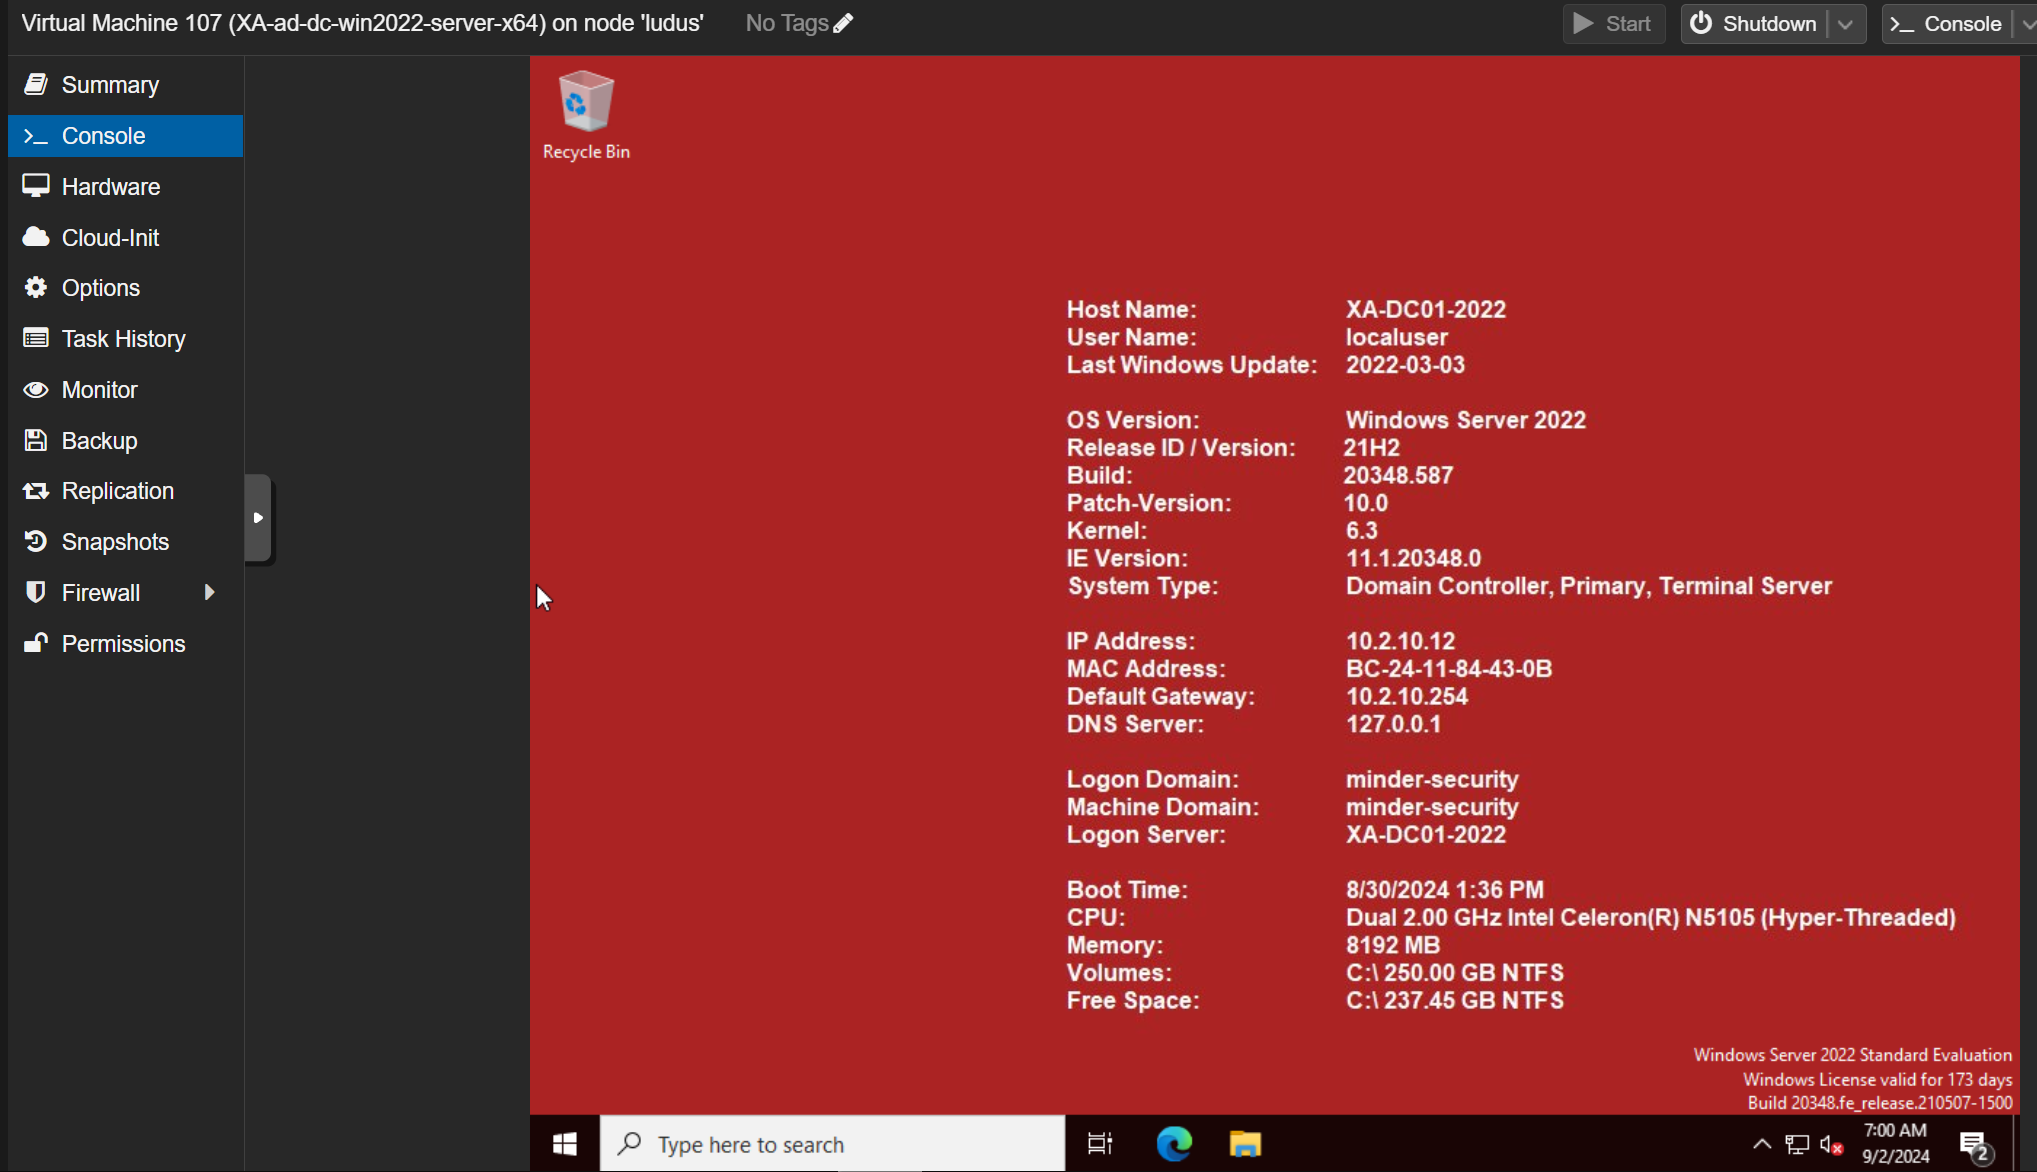
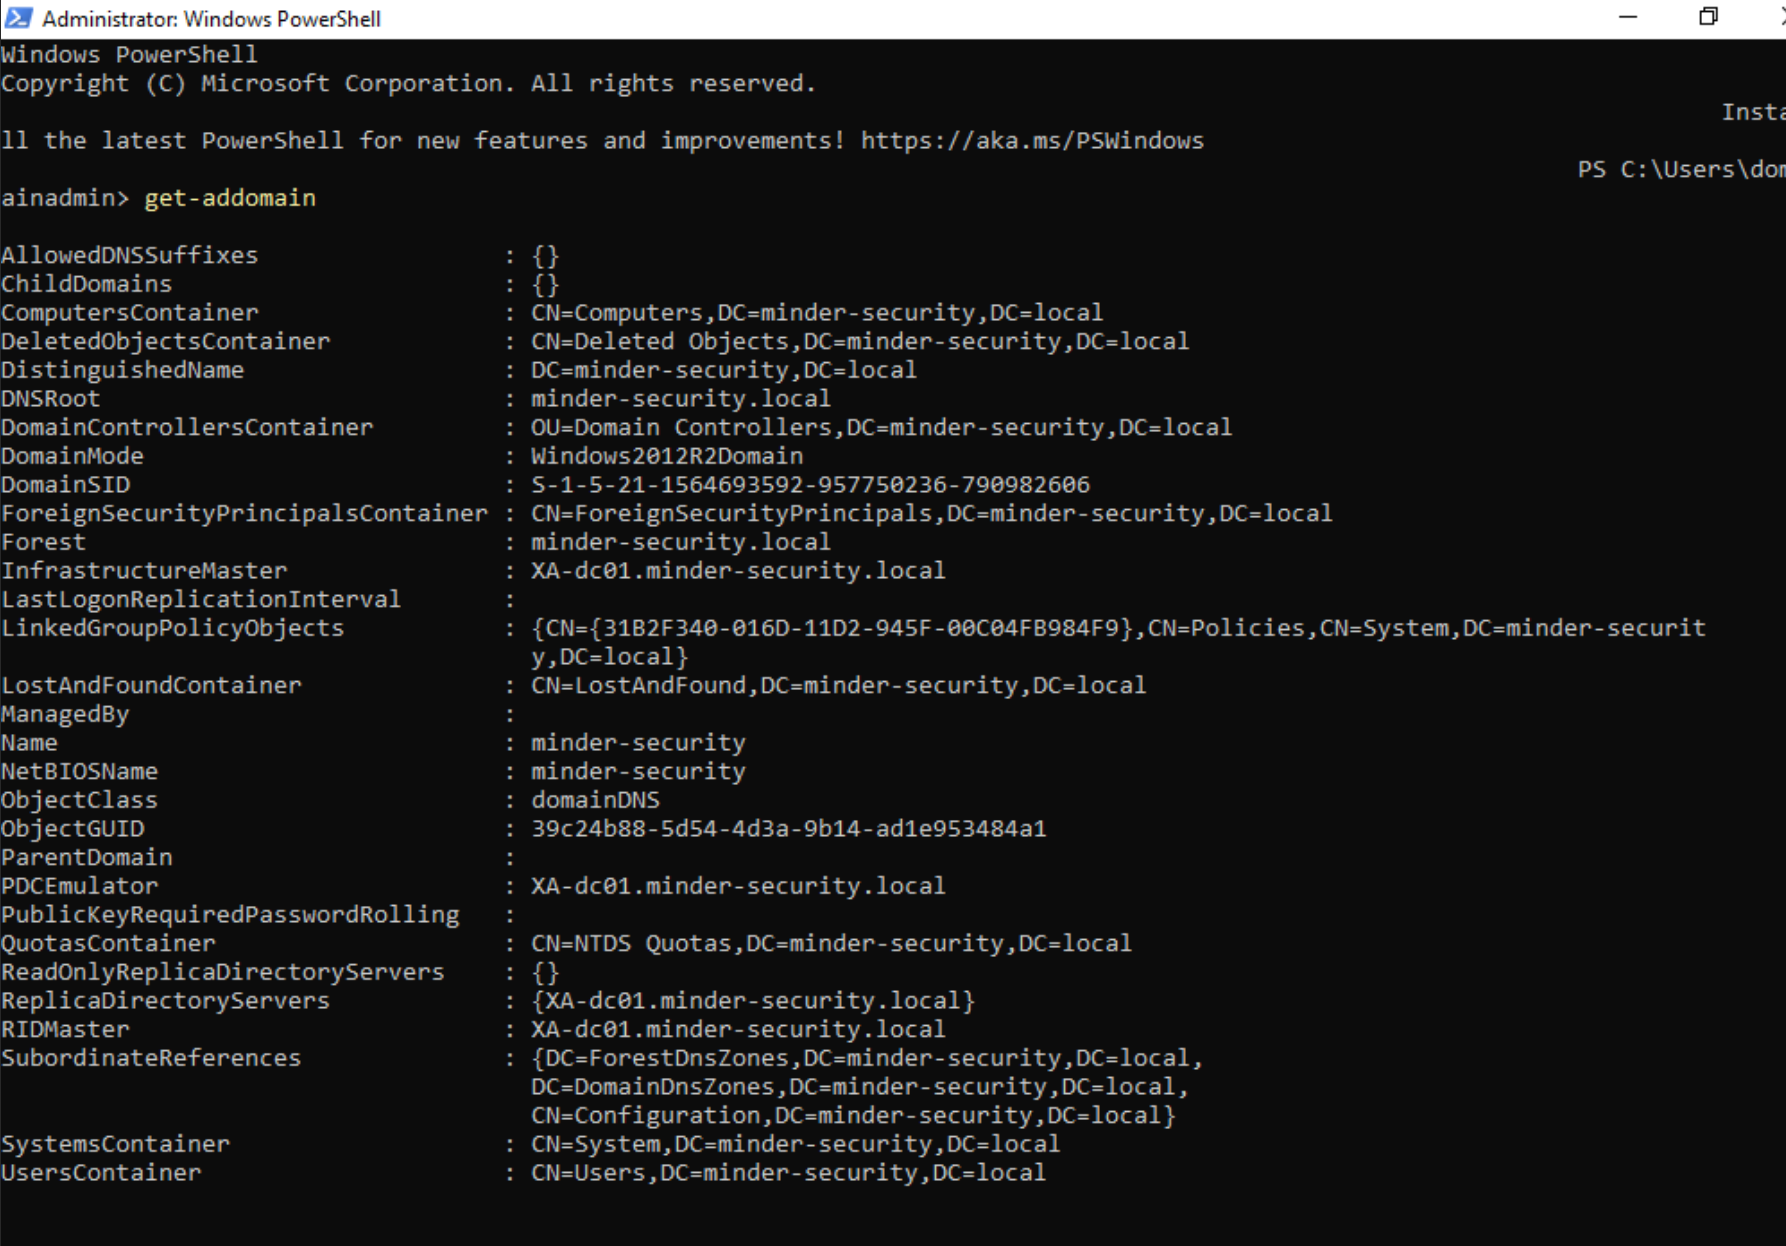
I quickly checked if the domain was configured as intended, and it seems to have worked perfectly!
As you might want to analyze malware in such an environment, a red background tells you that testing mode is disabled.
As soon as testing mode is enabled, the background will turn green.

5 - Installing Elastic Agent on the Domain Controller
Since the automated installation of the Elastic Agent was not possible in my case, I installed it manually:
- Open Edge on the Domain Controller/Windows Server
- Access Kibana using the web:
https://<IP_OF_ELASTIC_SERVER>:5601/, click on "Advanced" and "Continue to <IP>"
- Authenticate with the credentials you configured in
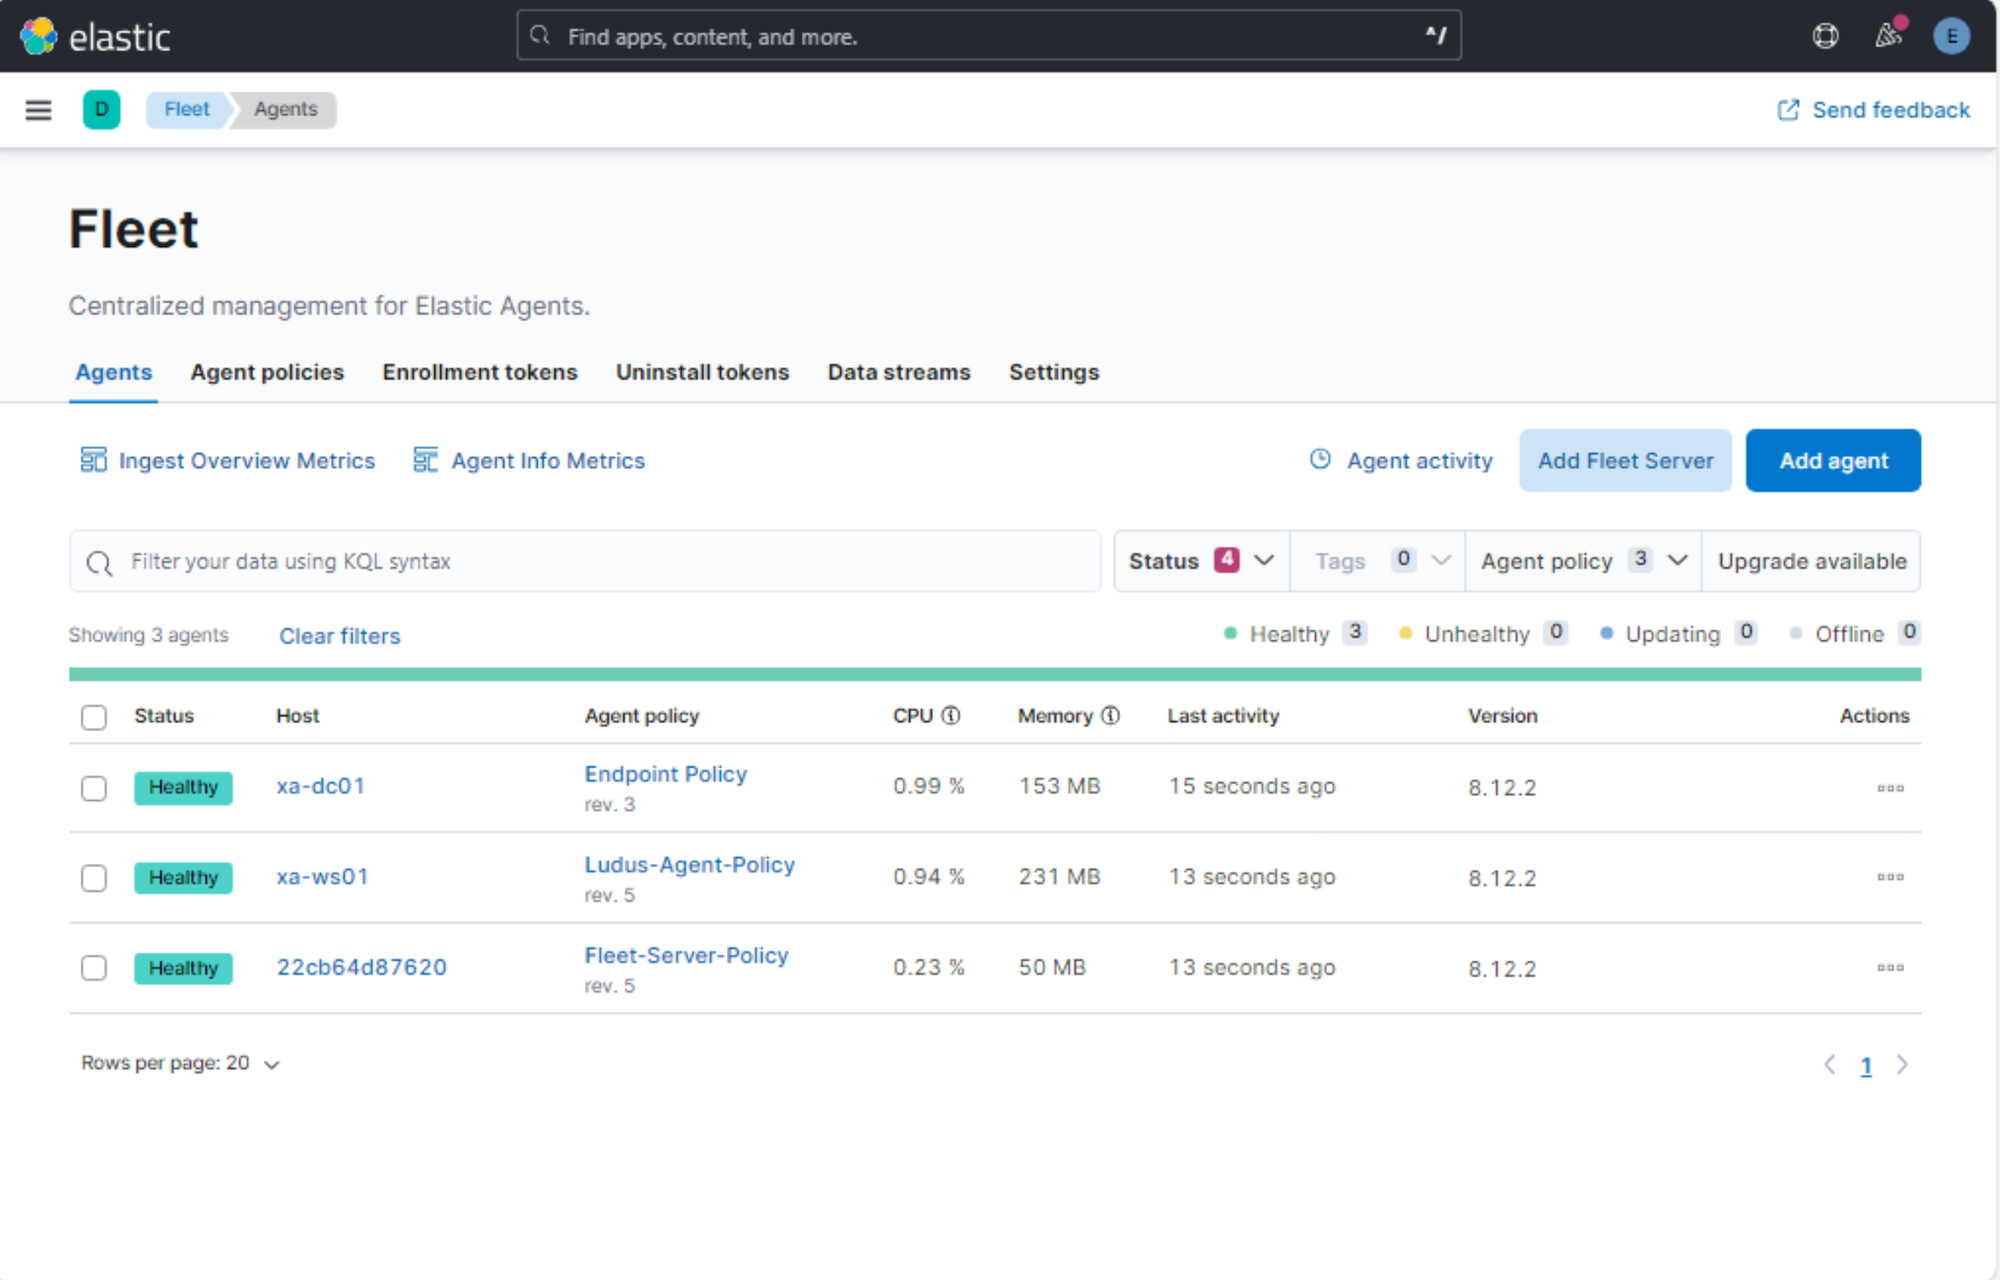
config.yml, or whatever you named your configuration file - On the left menu, scroll down and go to Management > Fleet
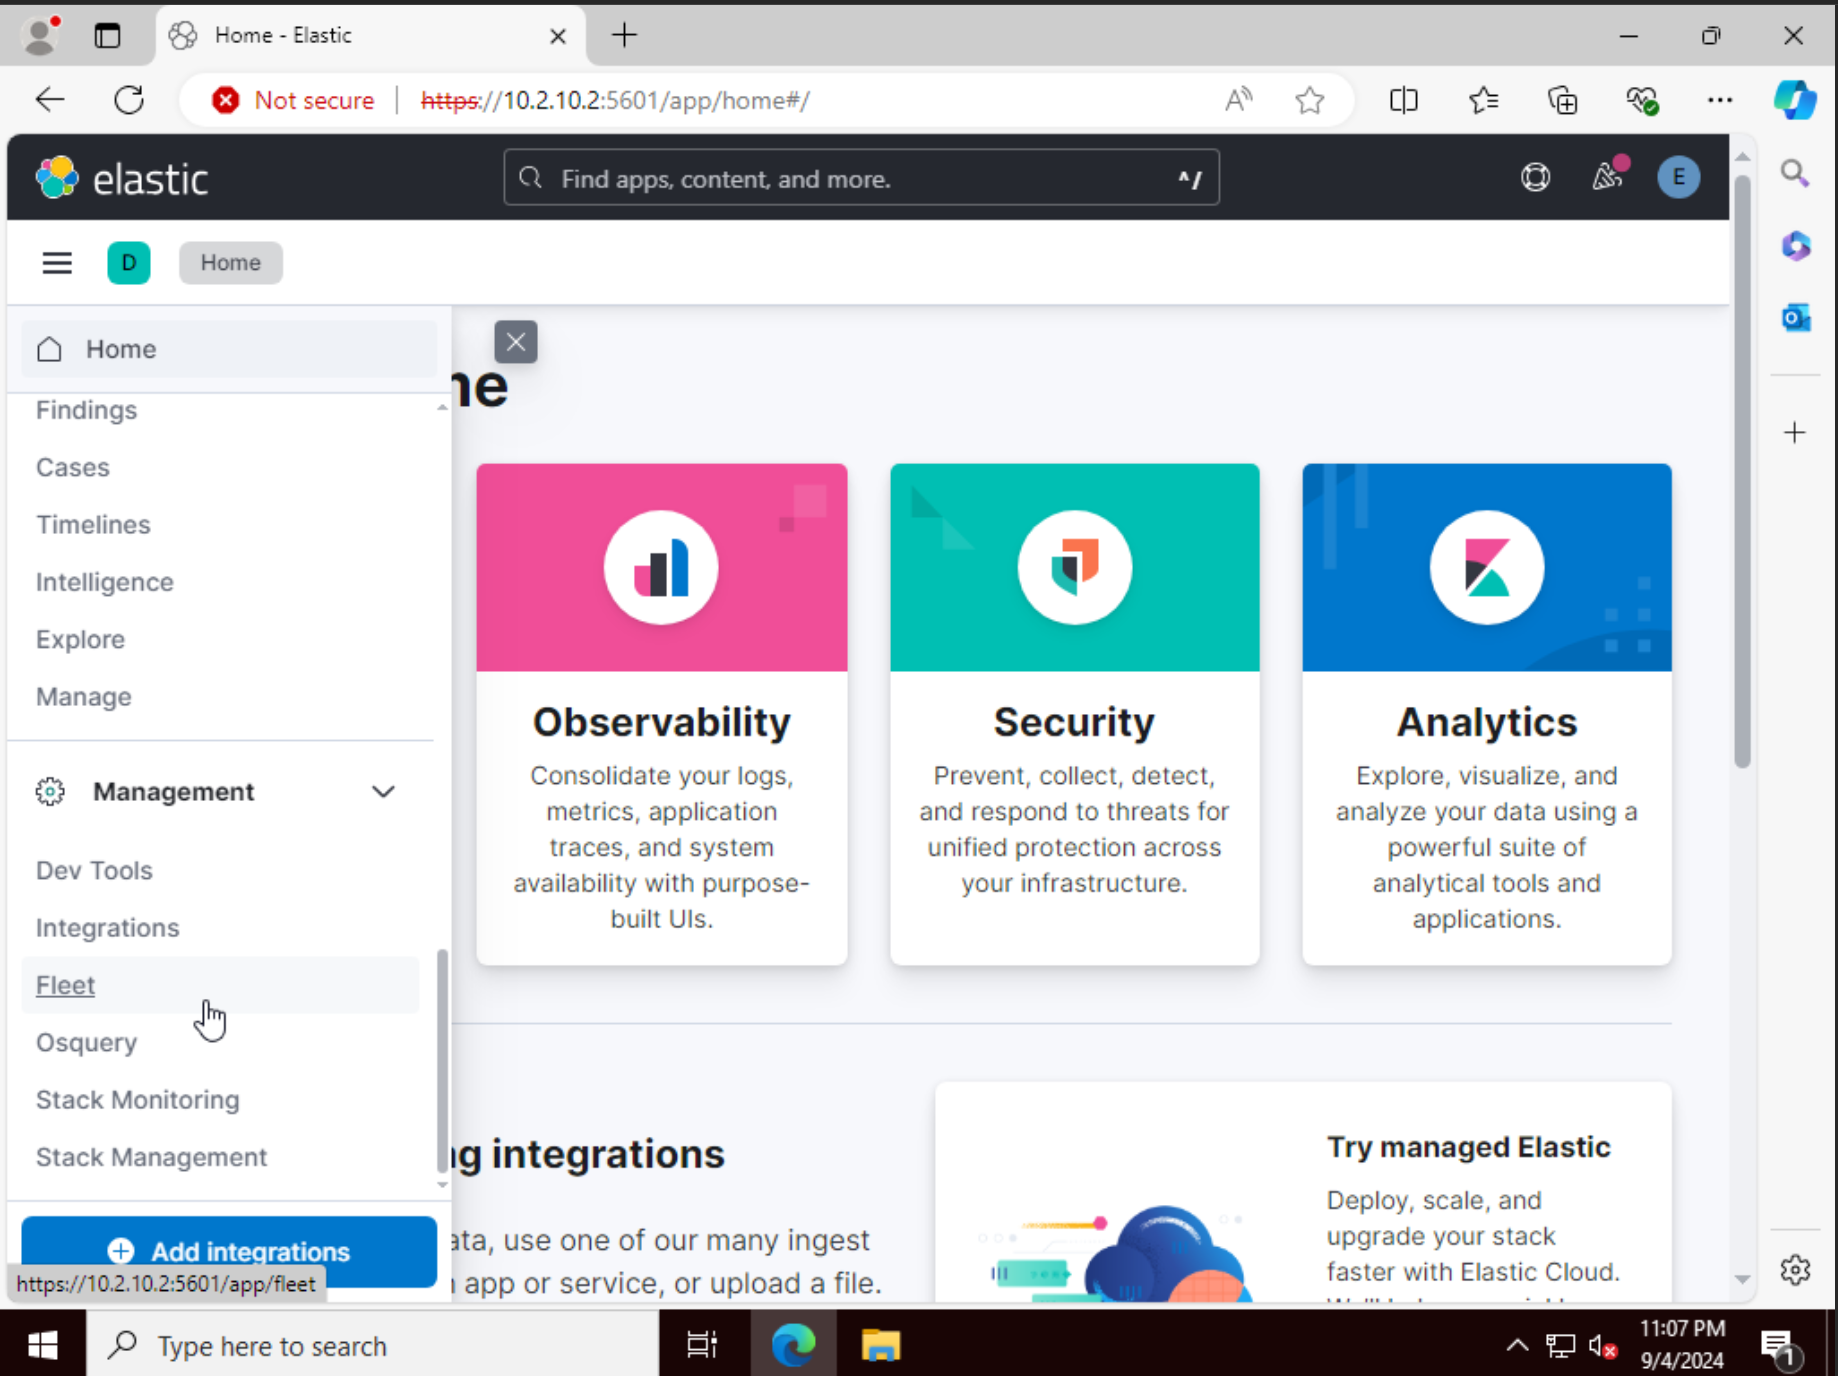
- Confirm that the Windows 11 Host is onboarded:
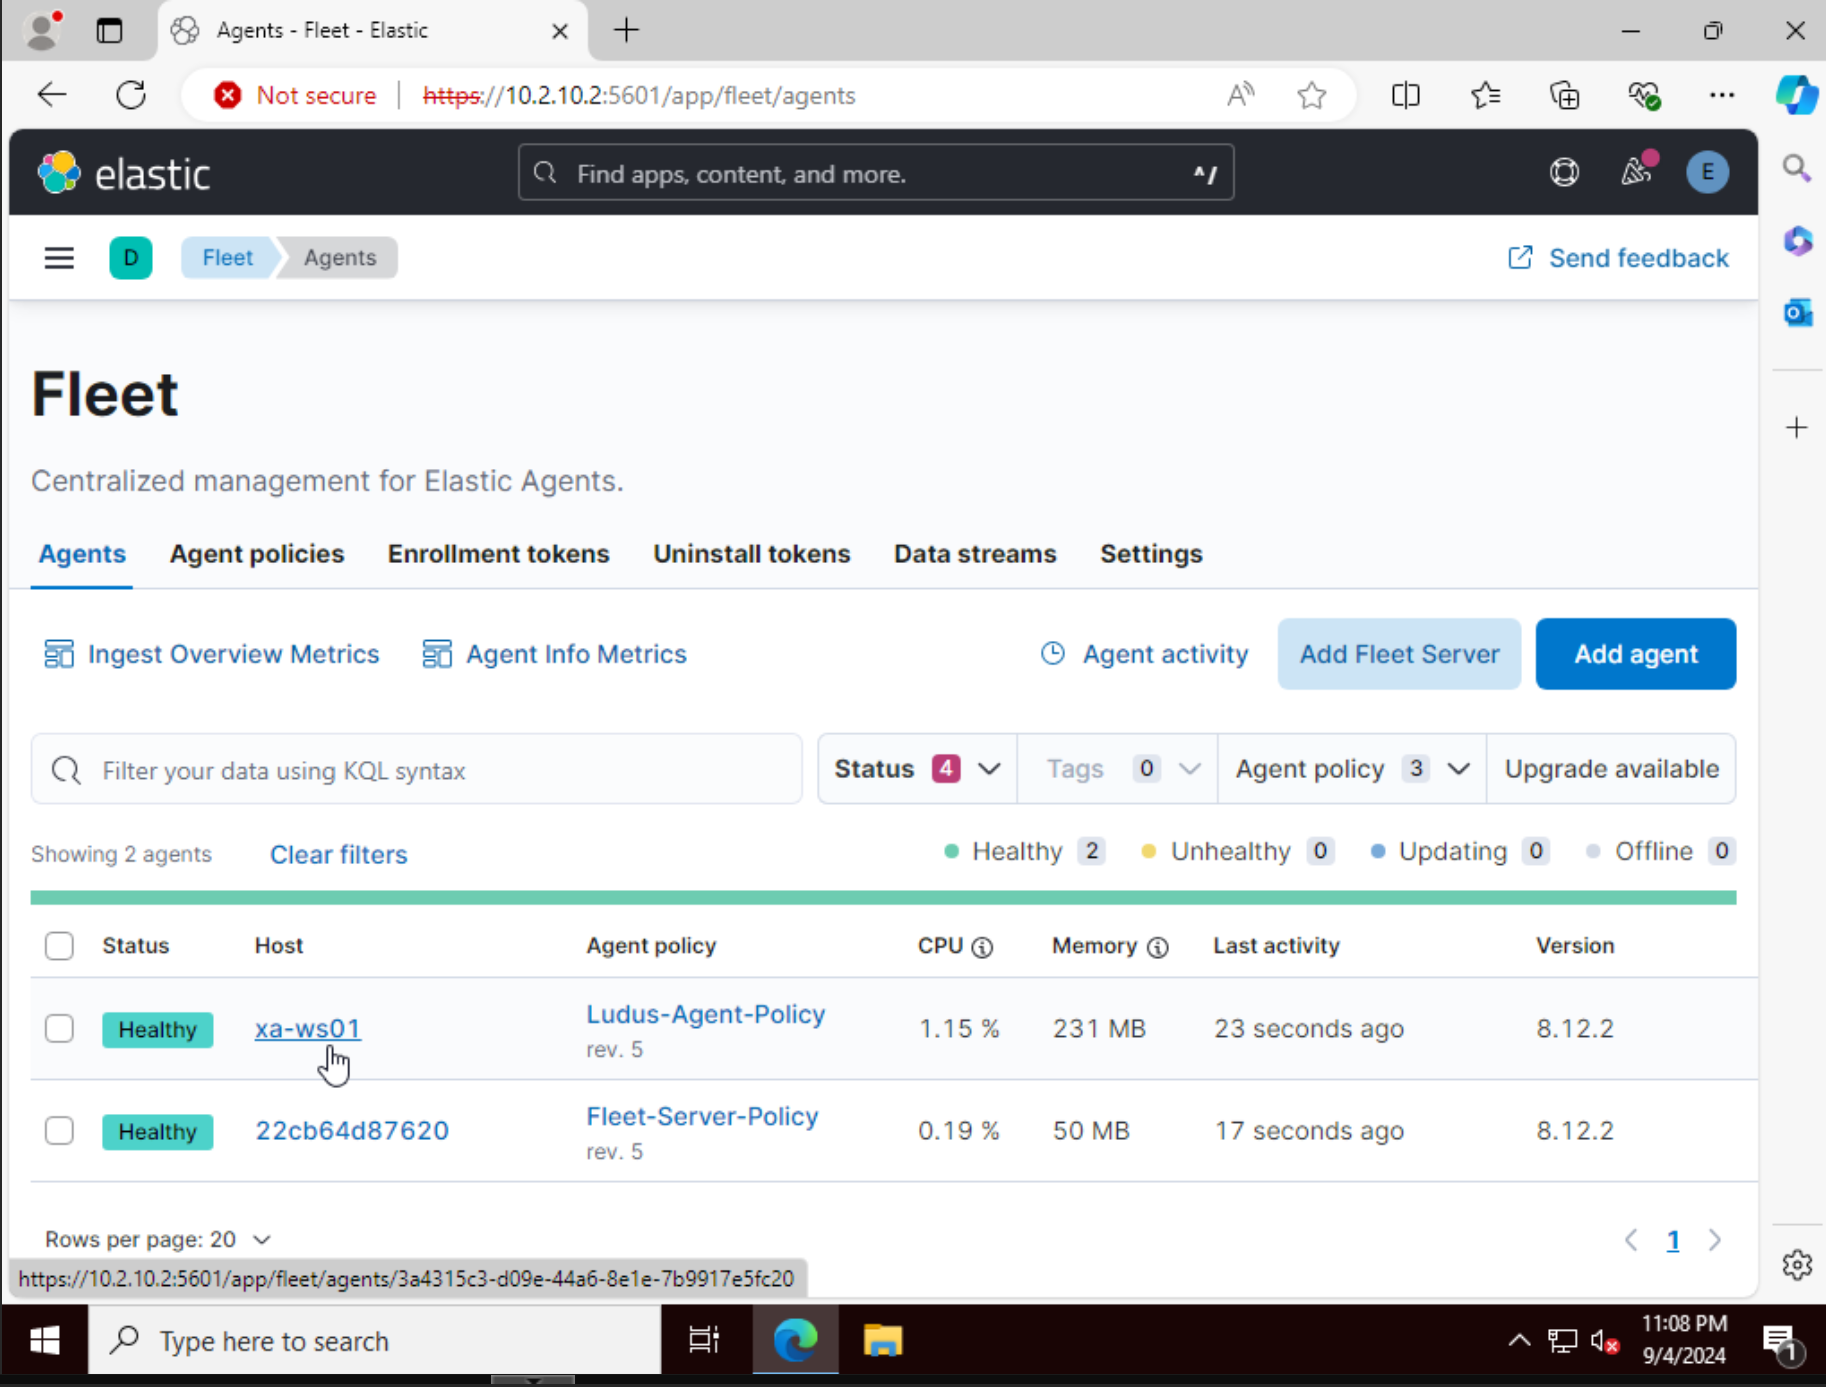
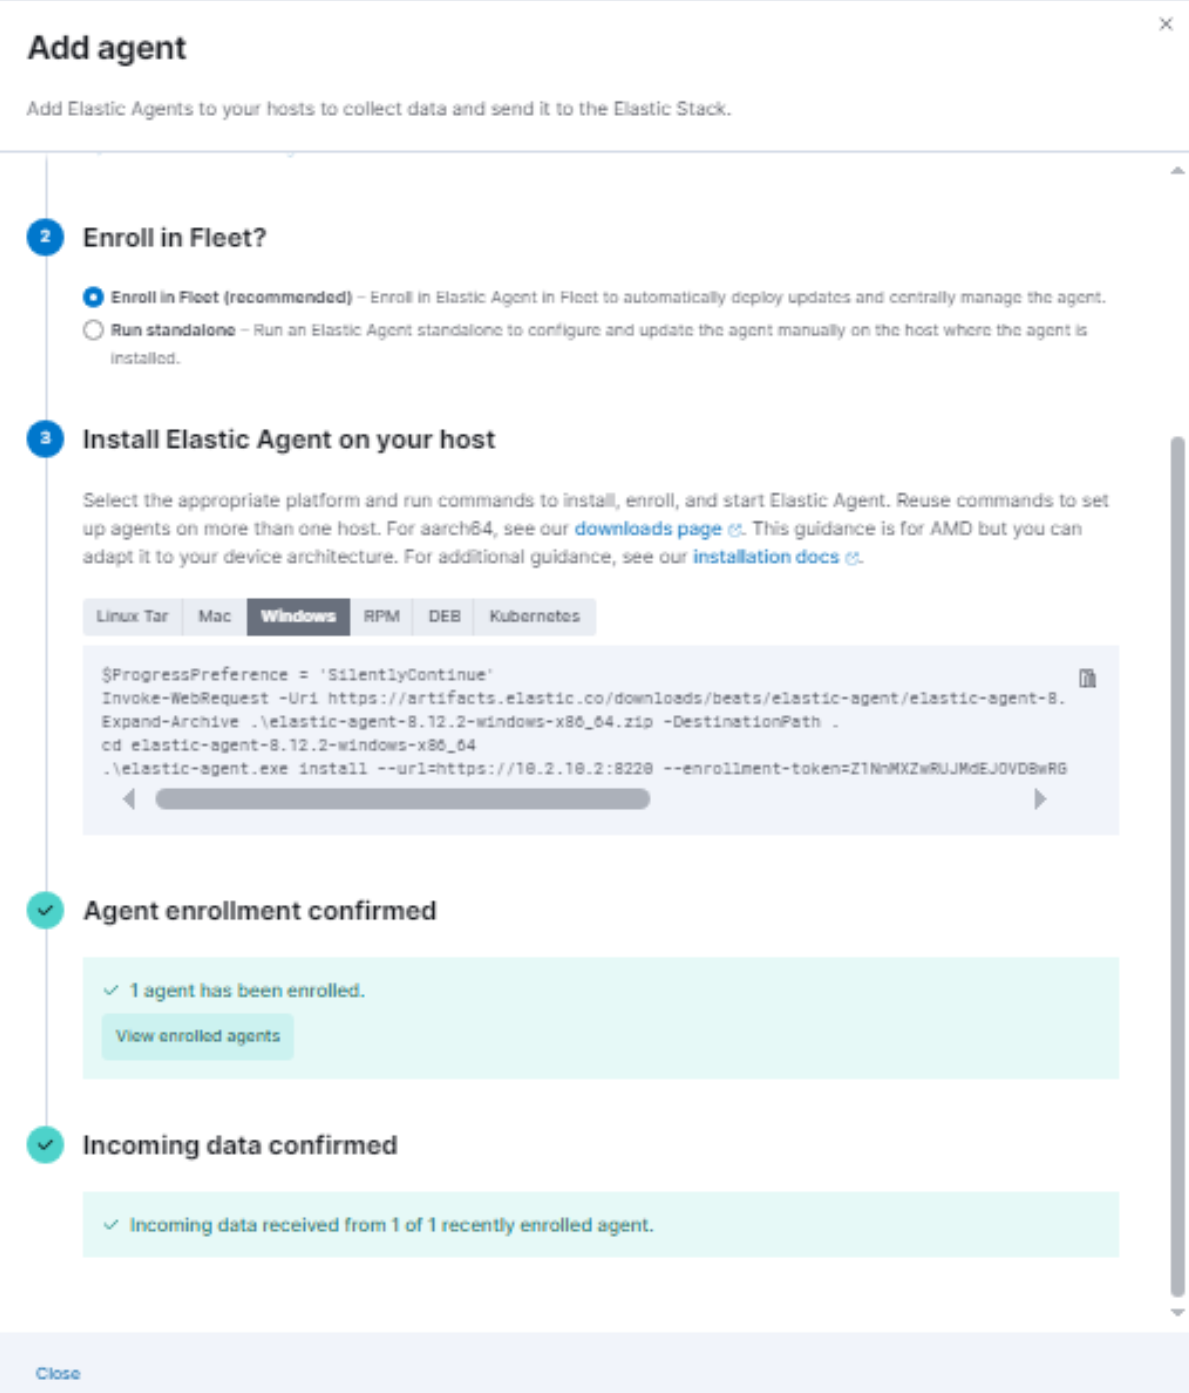
- Then click on Add agent
- Select Endpoint Policy
- Check Enroll in Fleet
- Then copy the PowerShell code provided
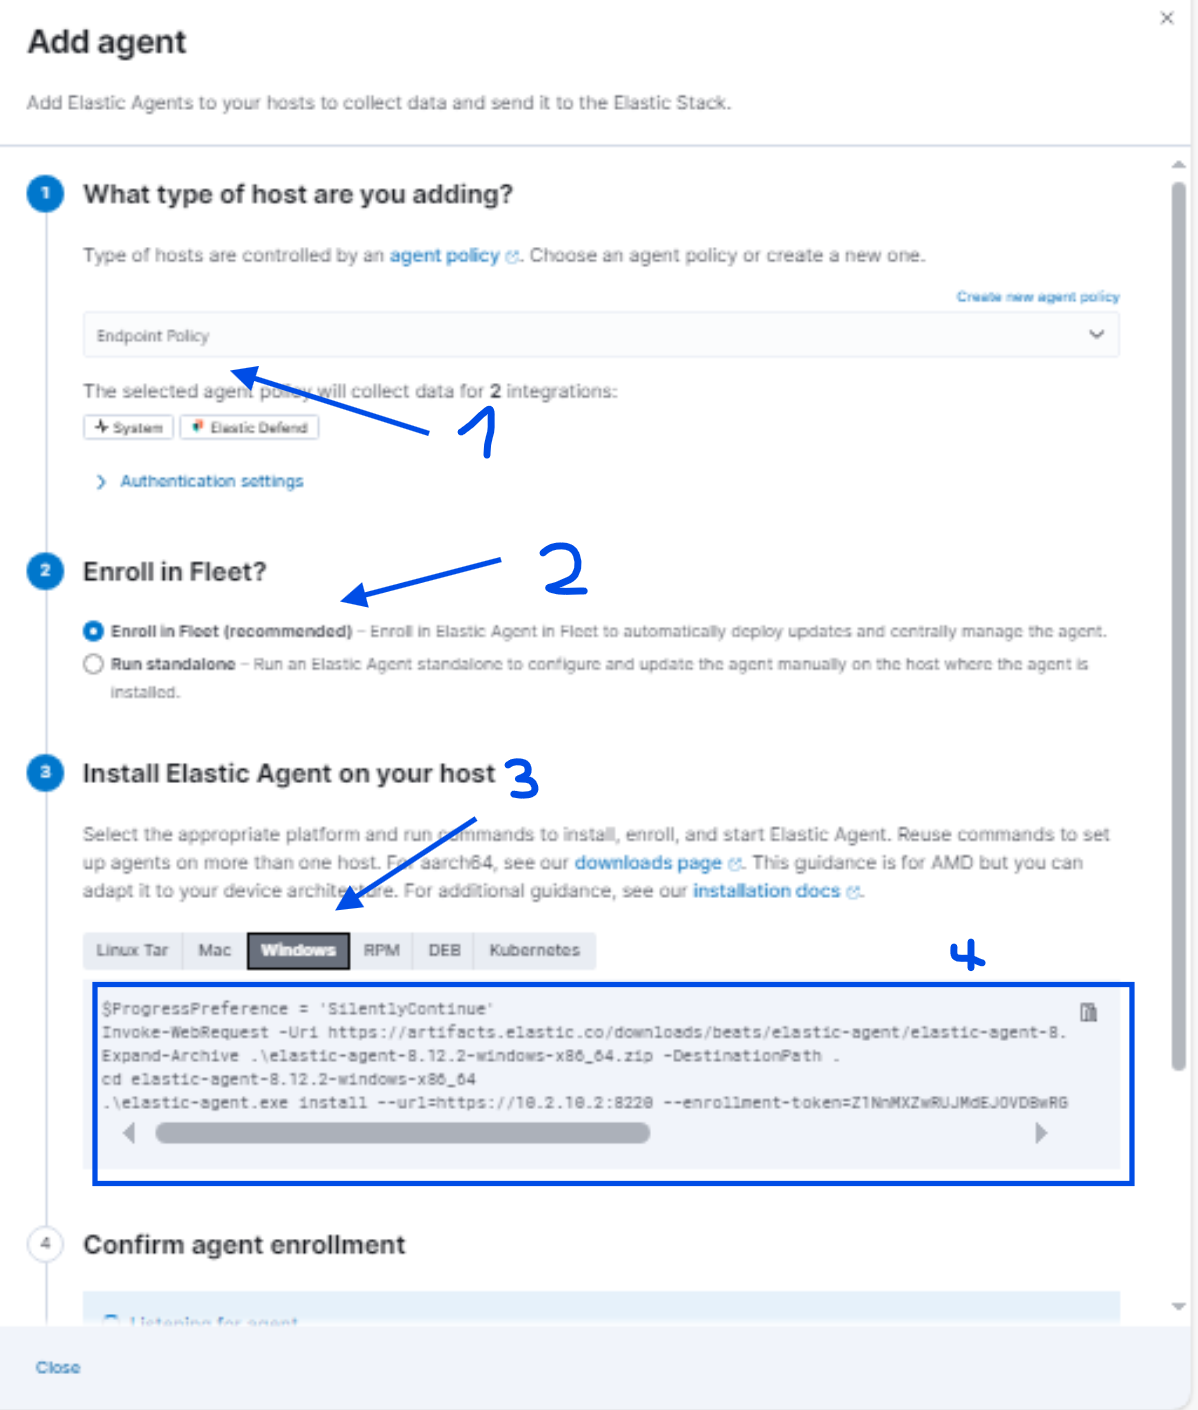
- Paste the contents line by line into PowerShell
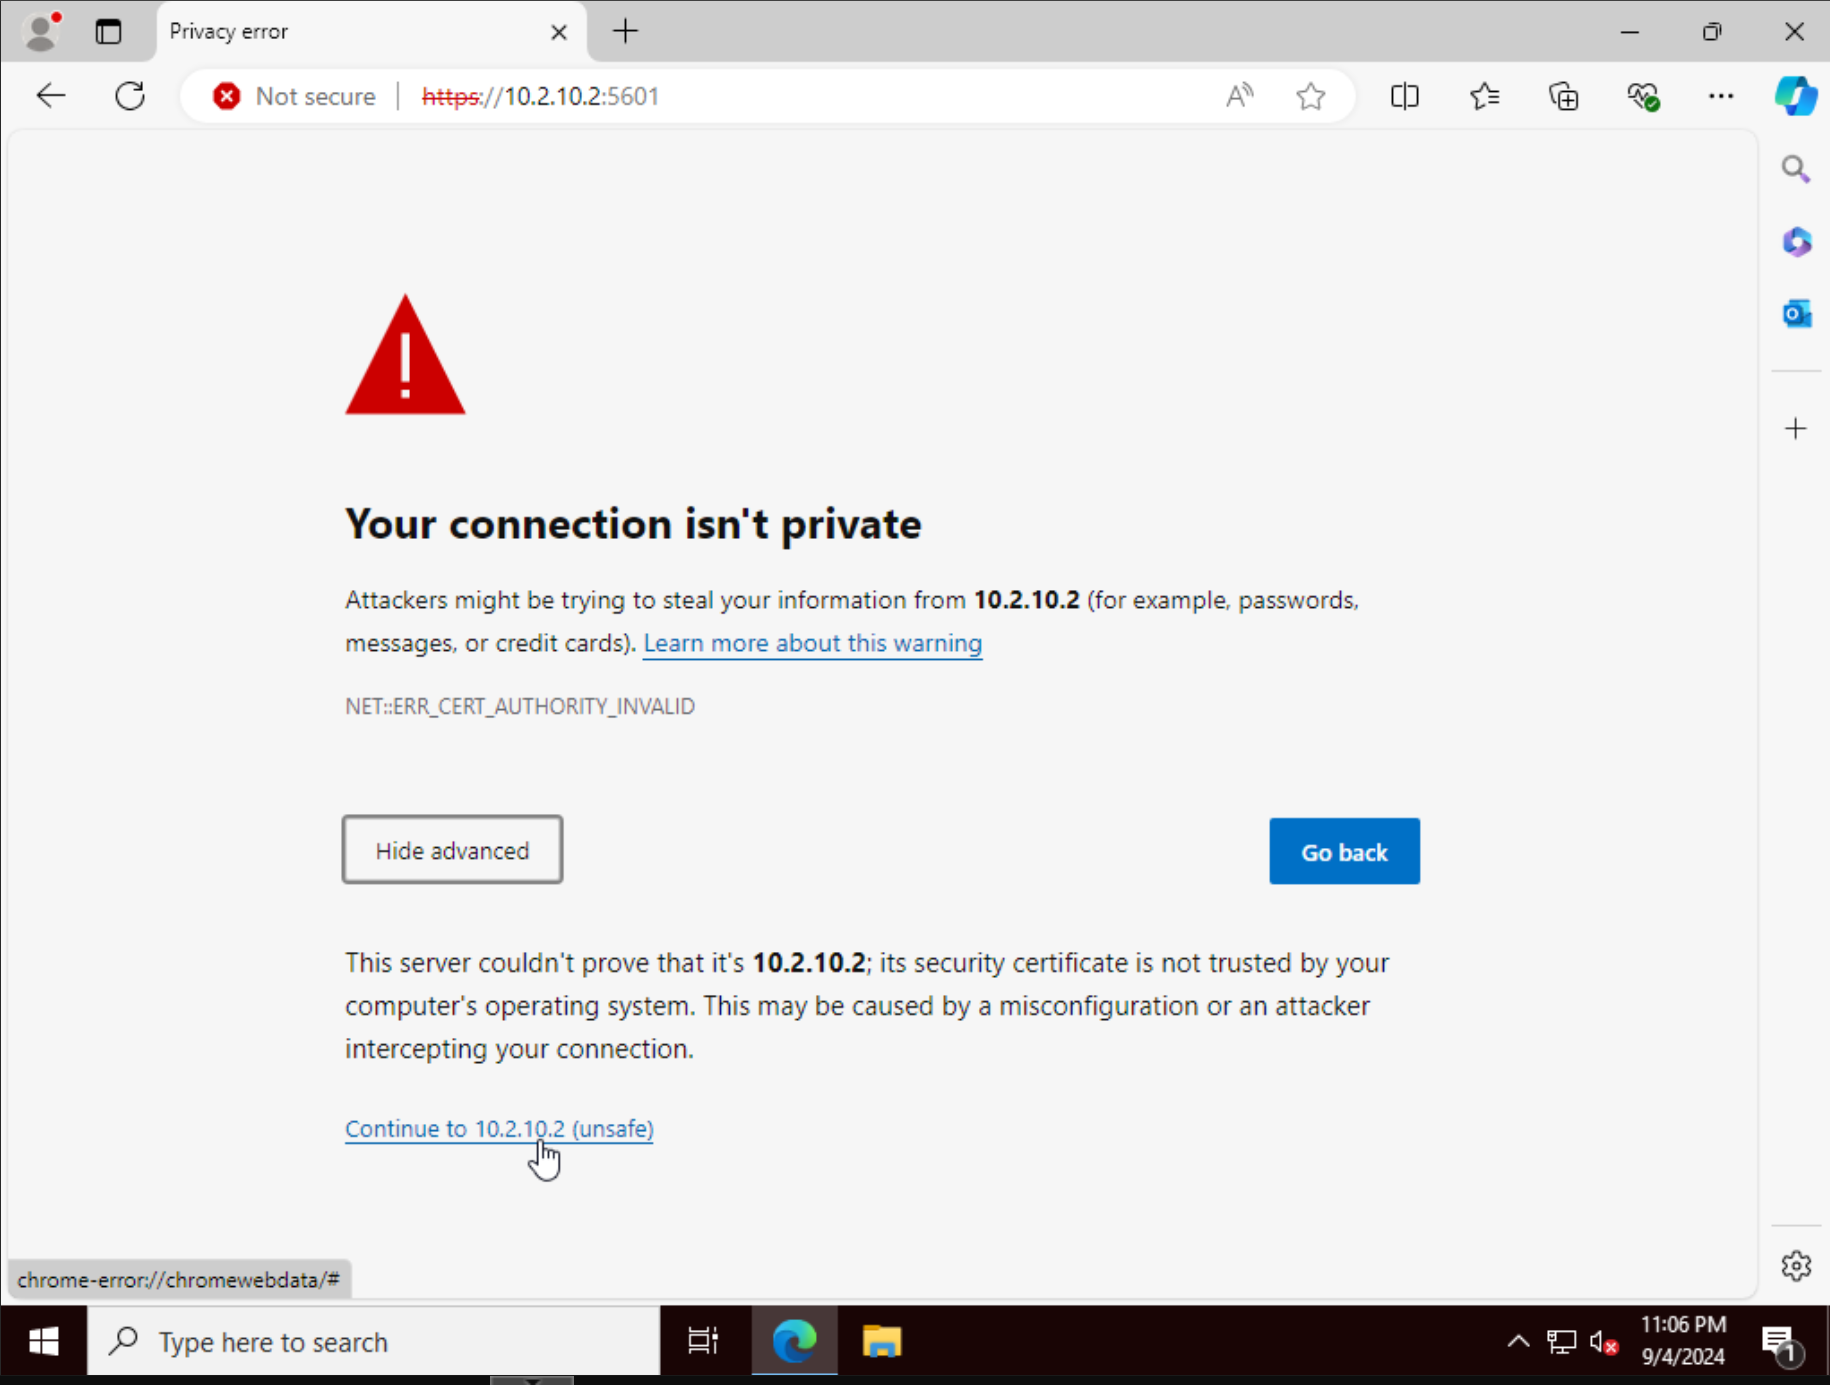
- Add
--insecureat the end of the line executing the installation binary to avoid running into an error caused by the certificate being untrusted:
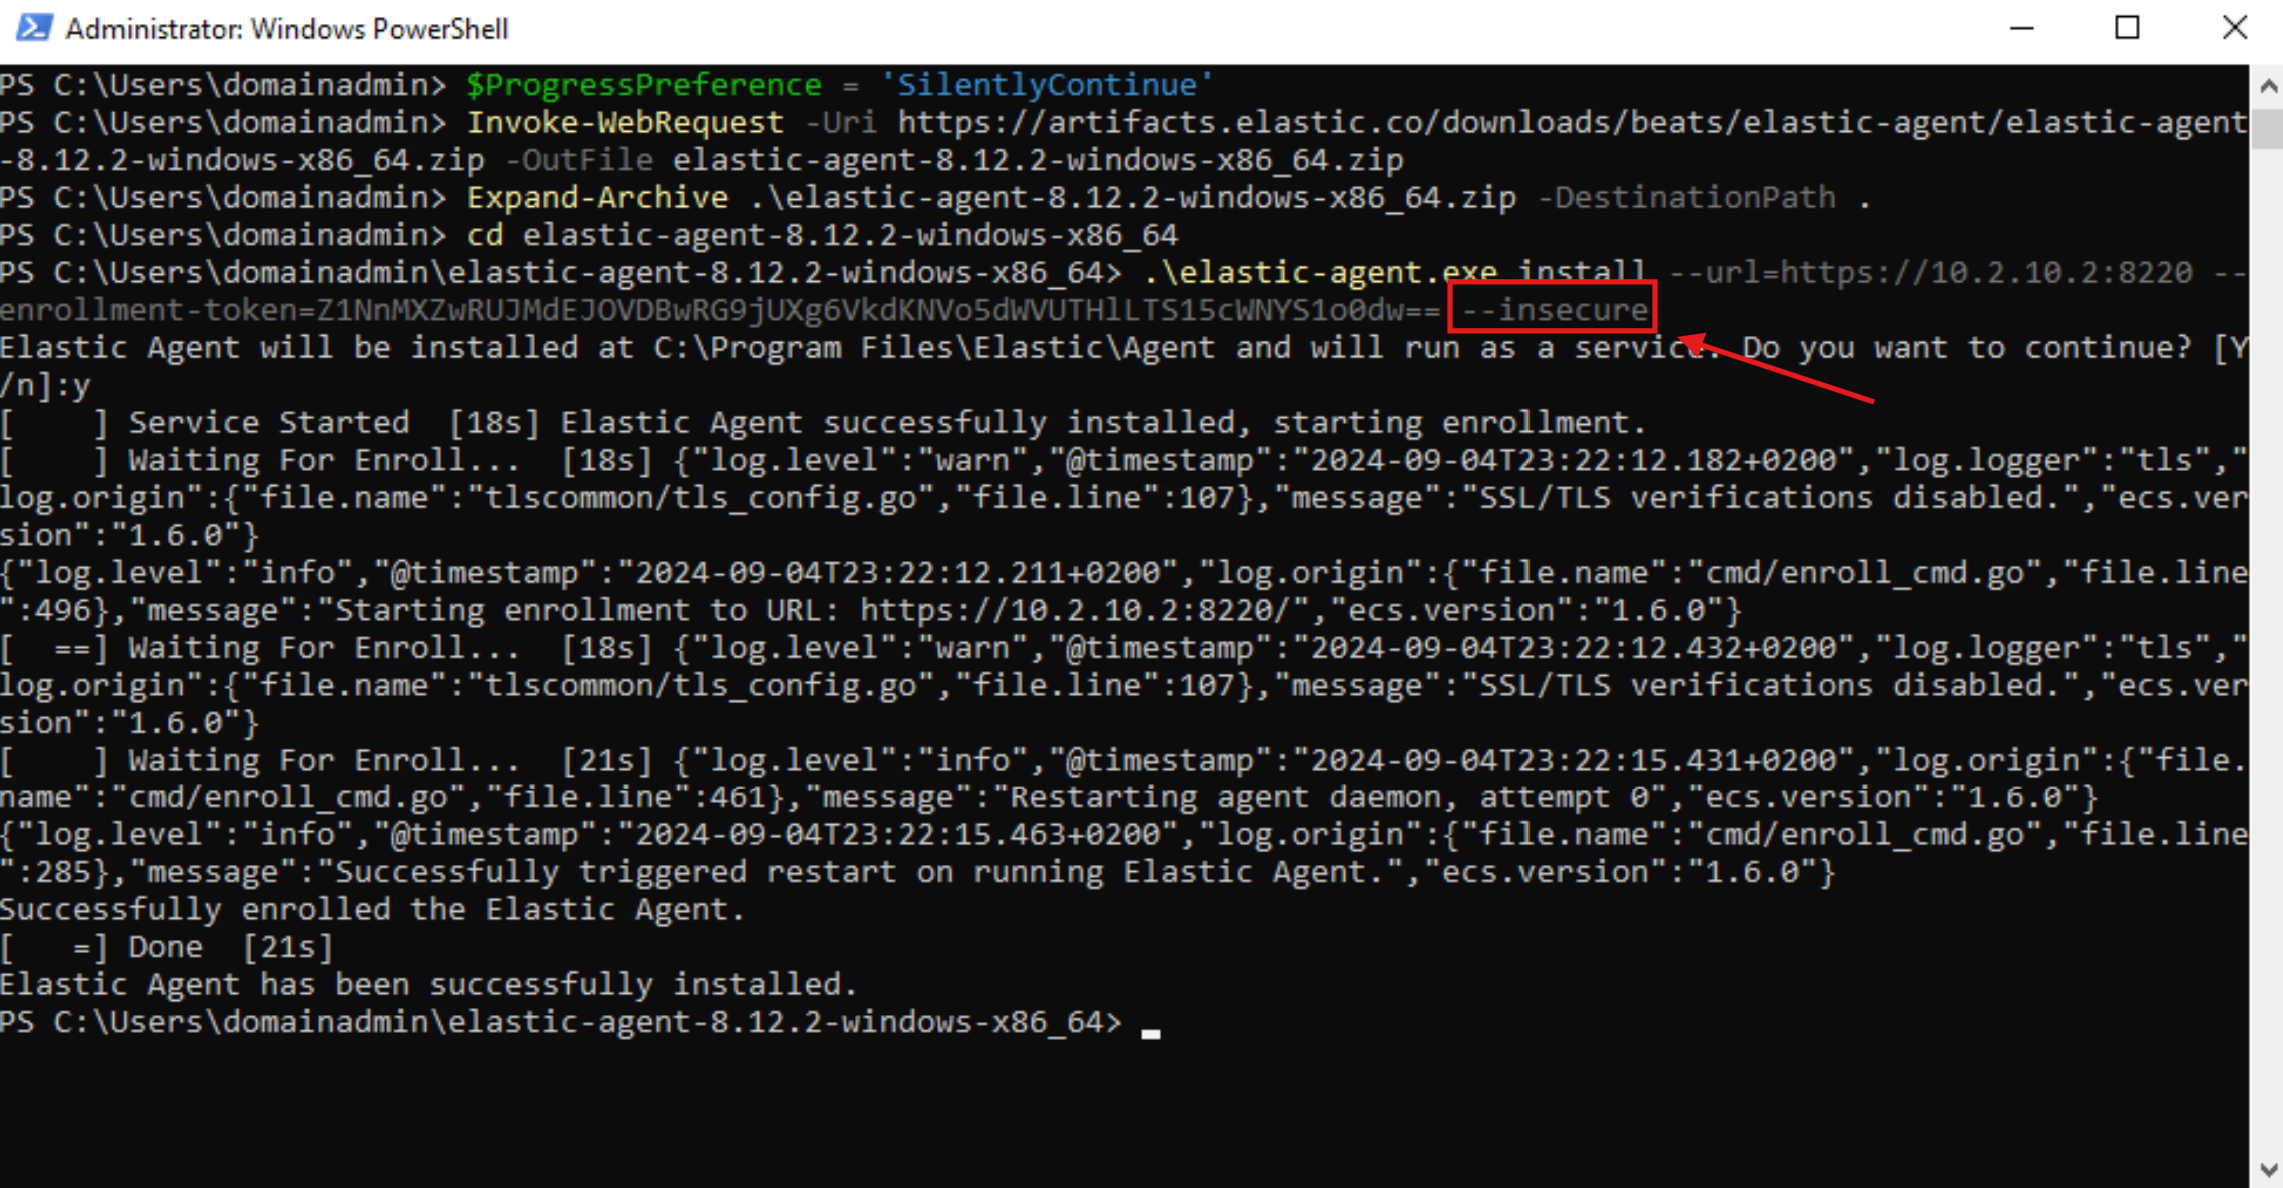
- Now, you should see that our DC has successfully been onboarded!
6 - Setting up the VPN Connection
If you wish to connect to the environment from outside, you need to install and configure WireGuard. I chose the GUI version:
- Download and install the WireGuard GUI on your local machine from which you wish to interact with the testing environment:

- Display your configuration by using the command line below on your Ludus server (Replace
<ID>with your user-id. In my case it wasXA):
ludus user wireguard --user <ID> --url https://127.0.0.1:8081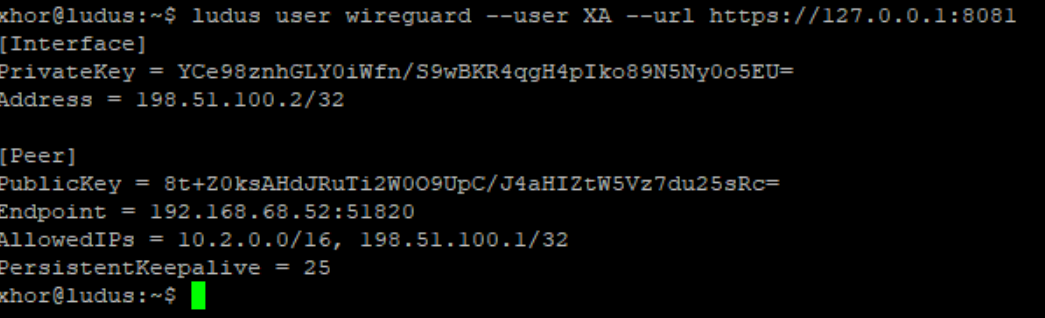
- Create a file on your local machine and post the output from above:
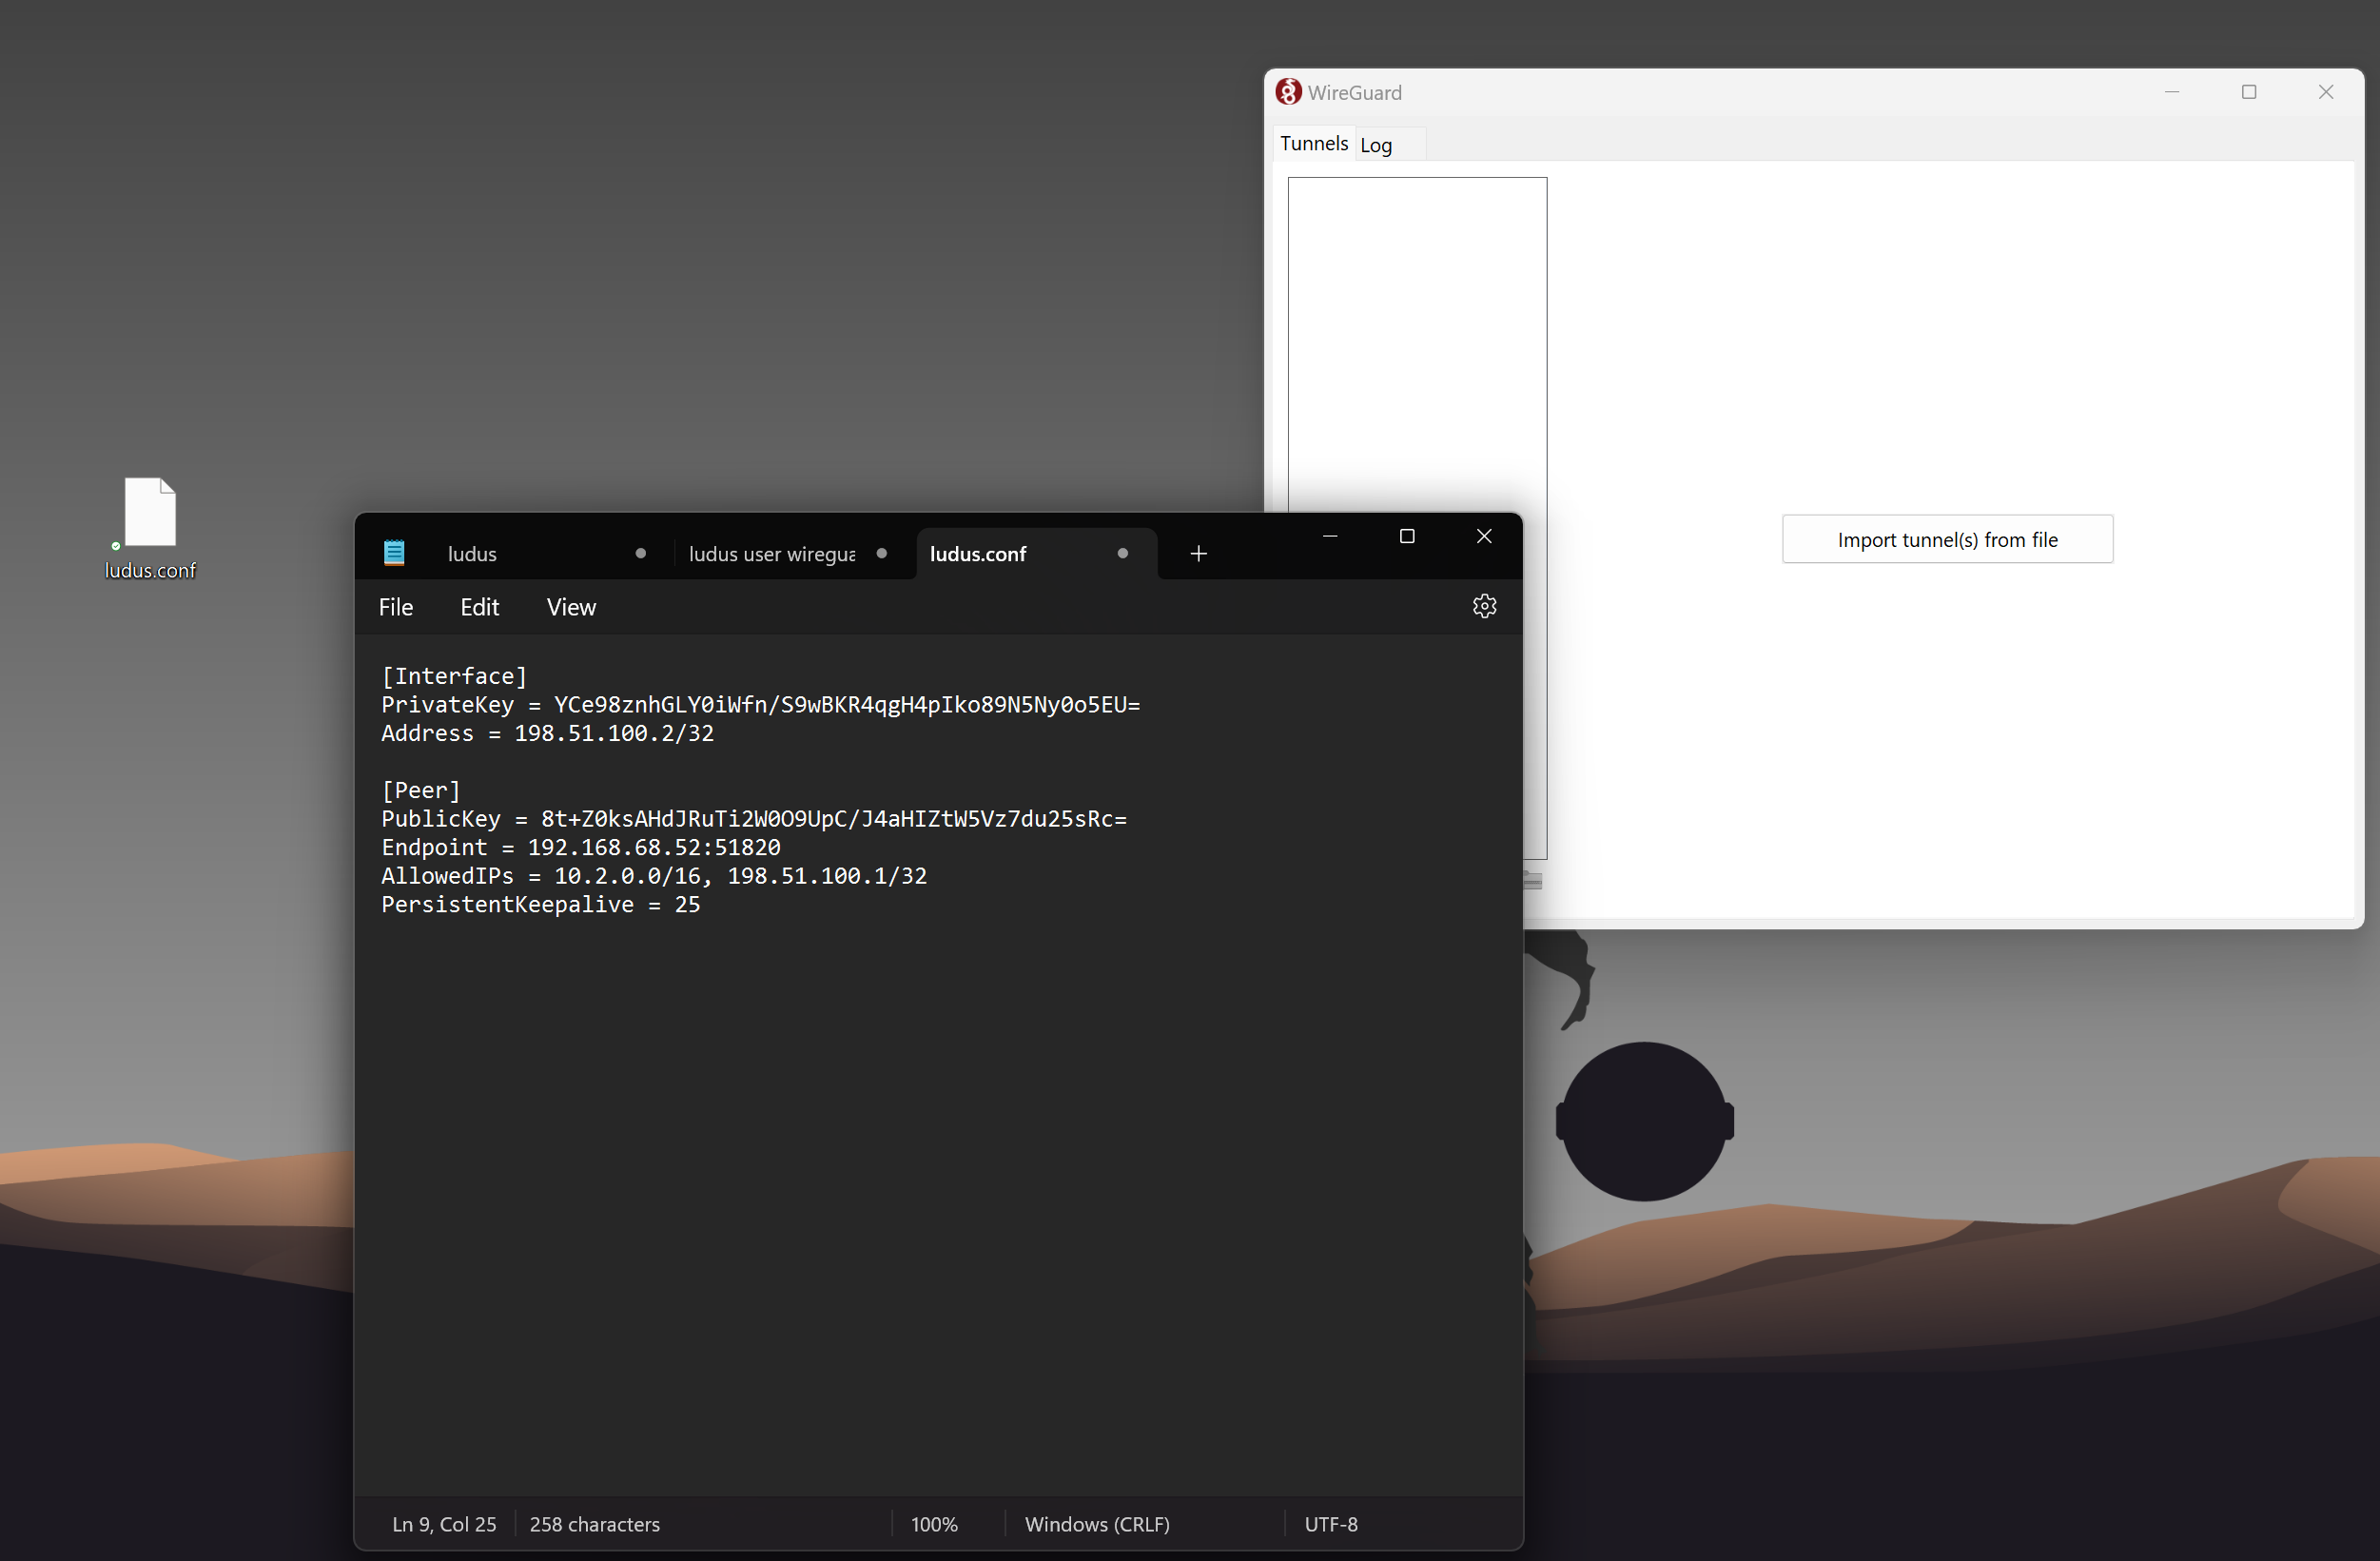
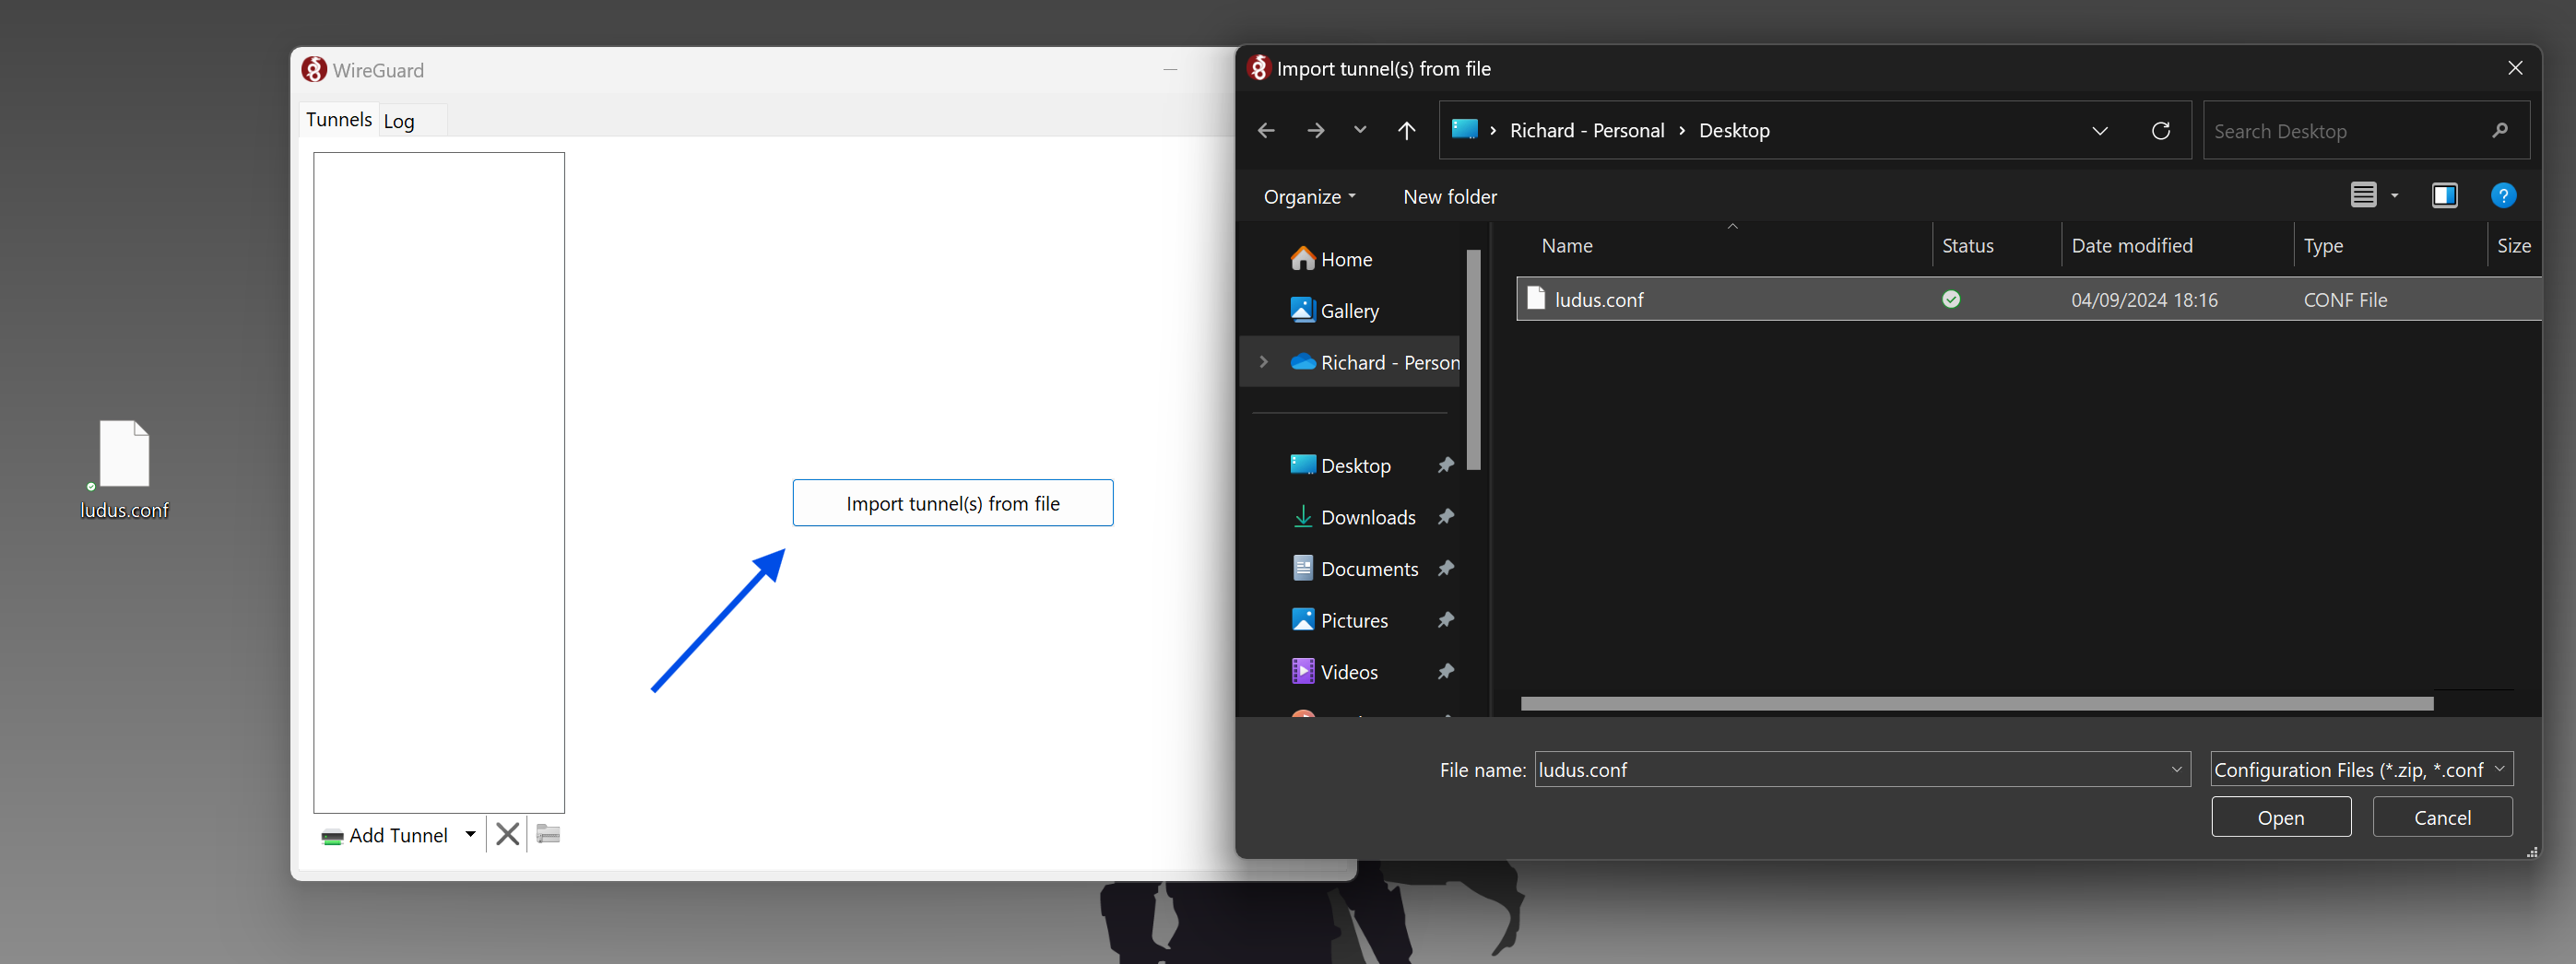
- Import the file to WireGuard:
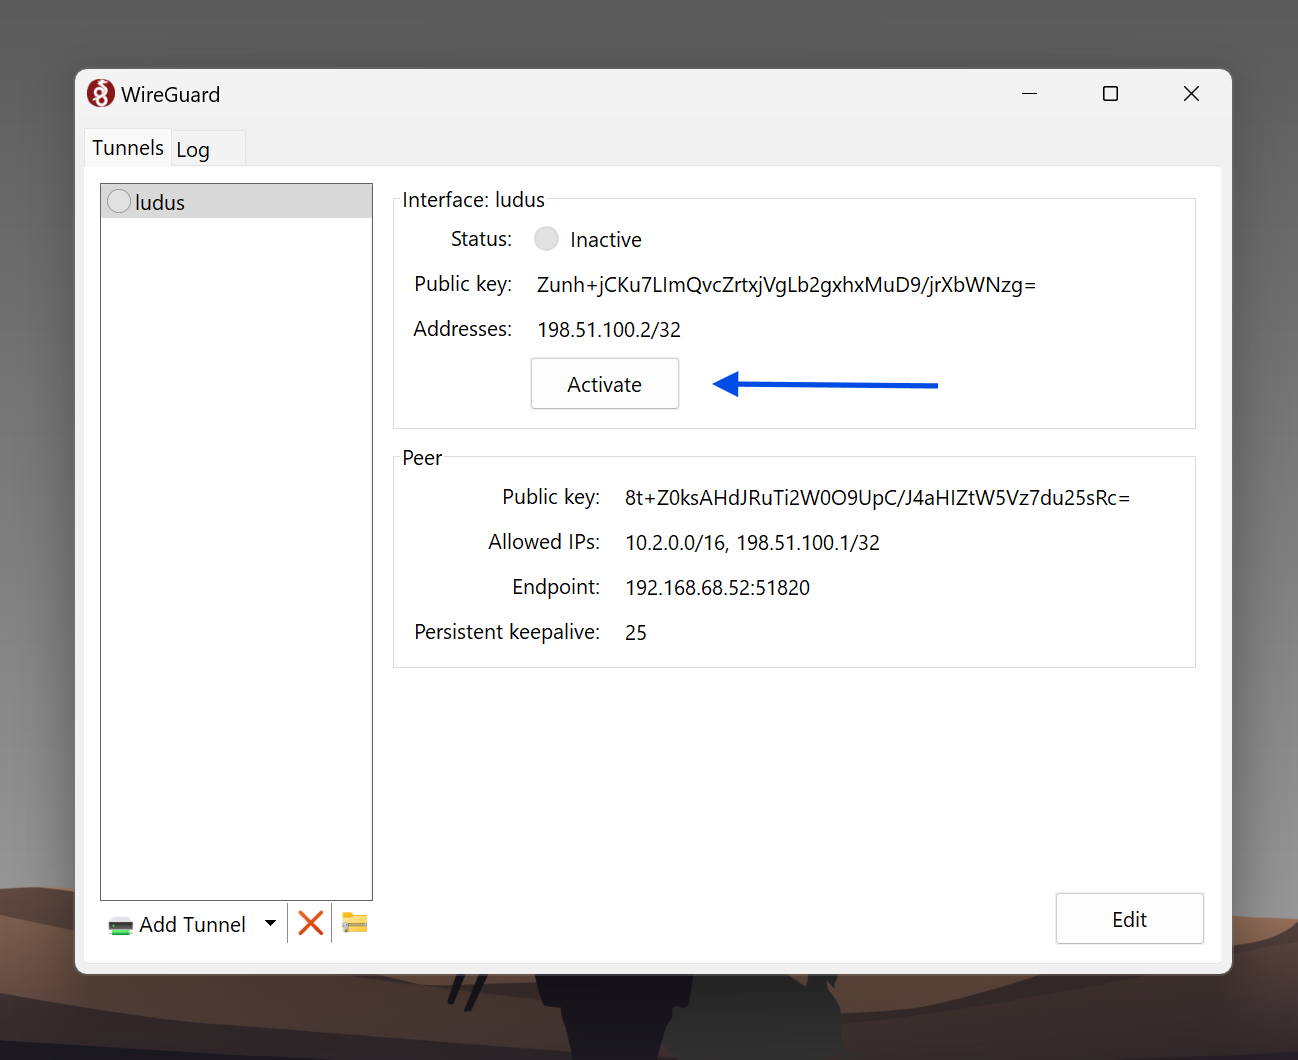
- Activate the Connection
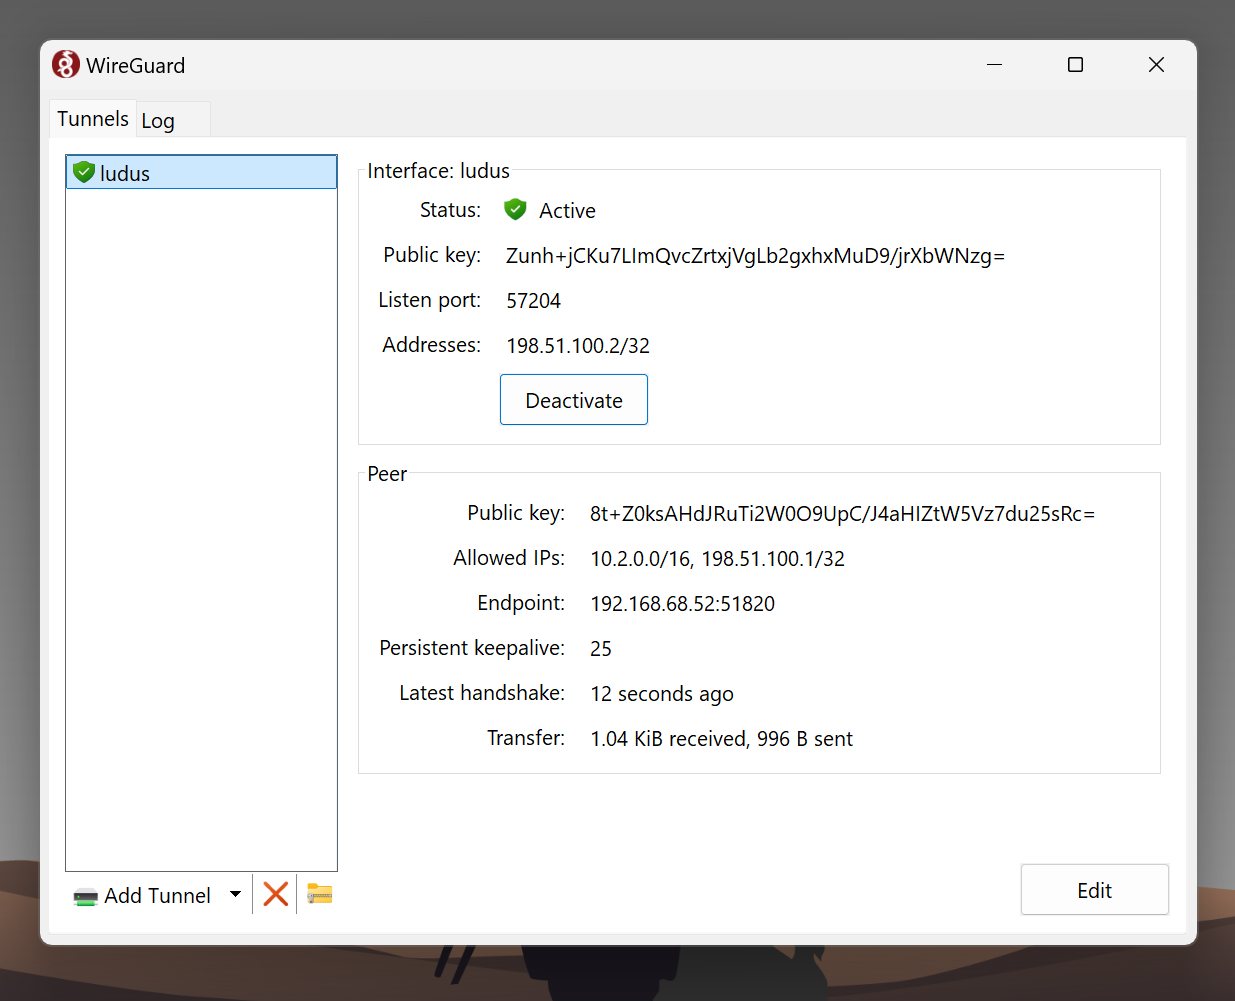
Now you can connect to Kibana from your local Host!
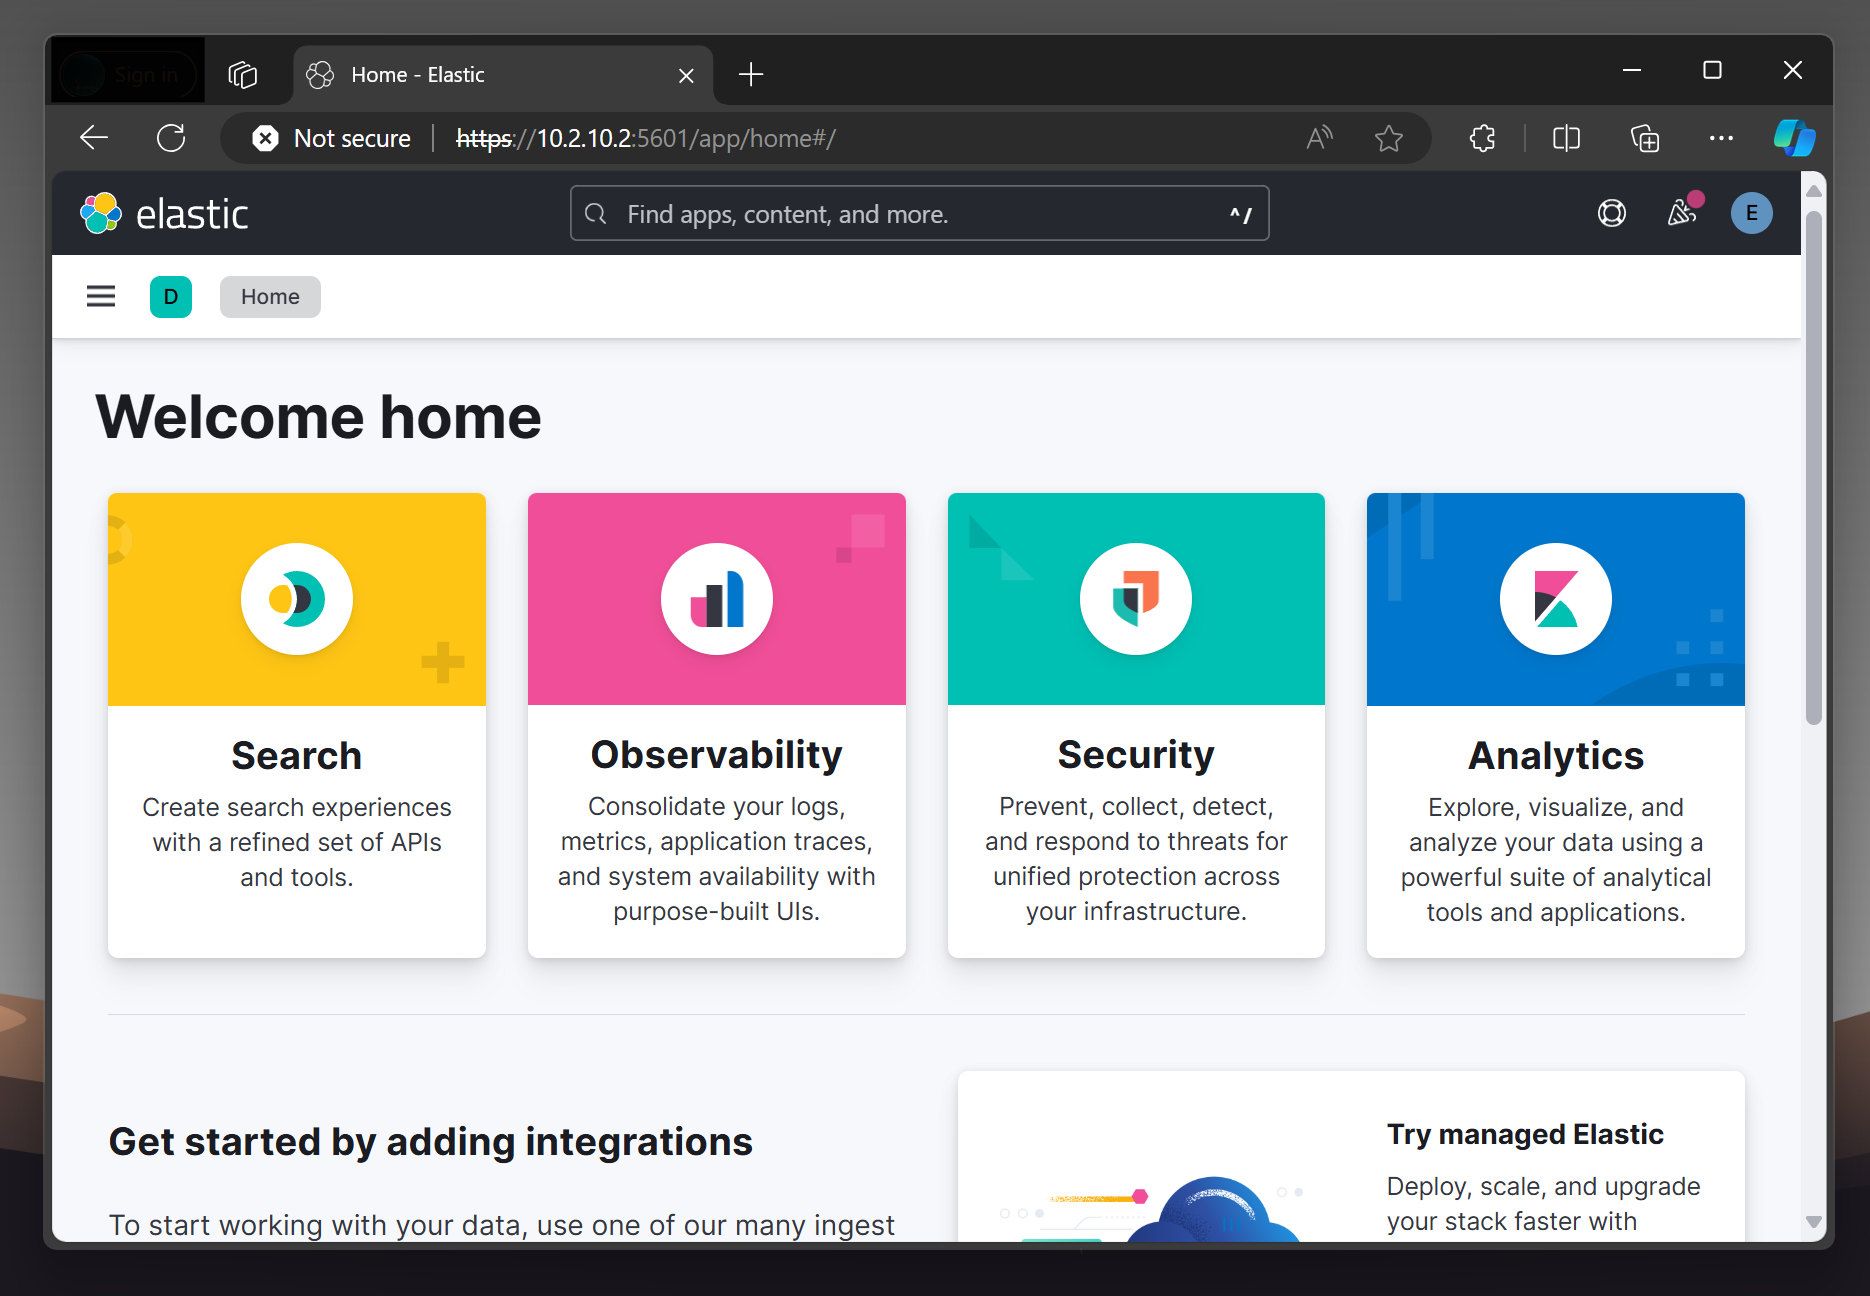
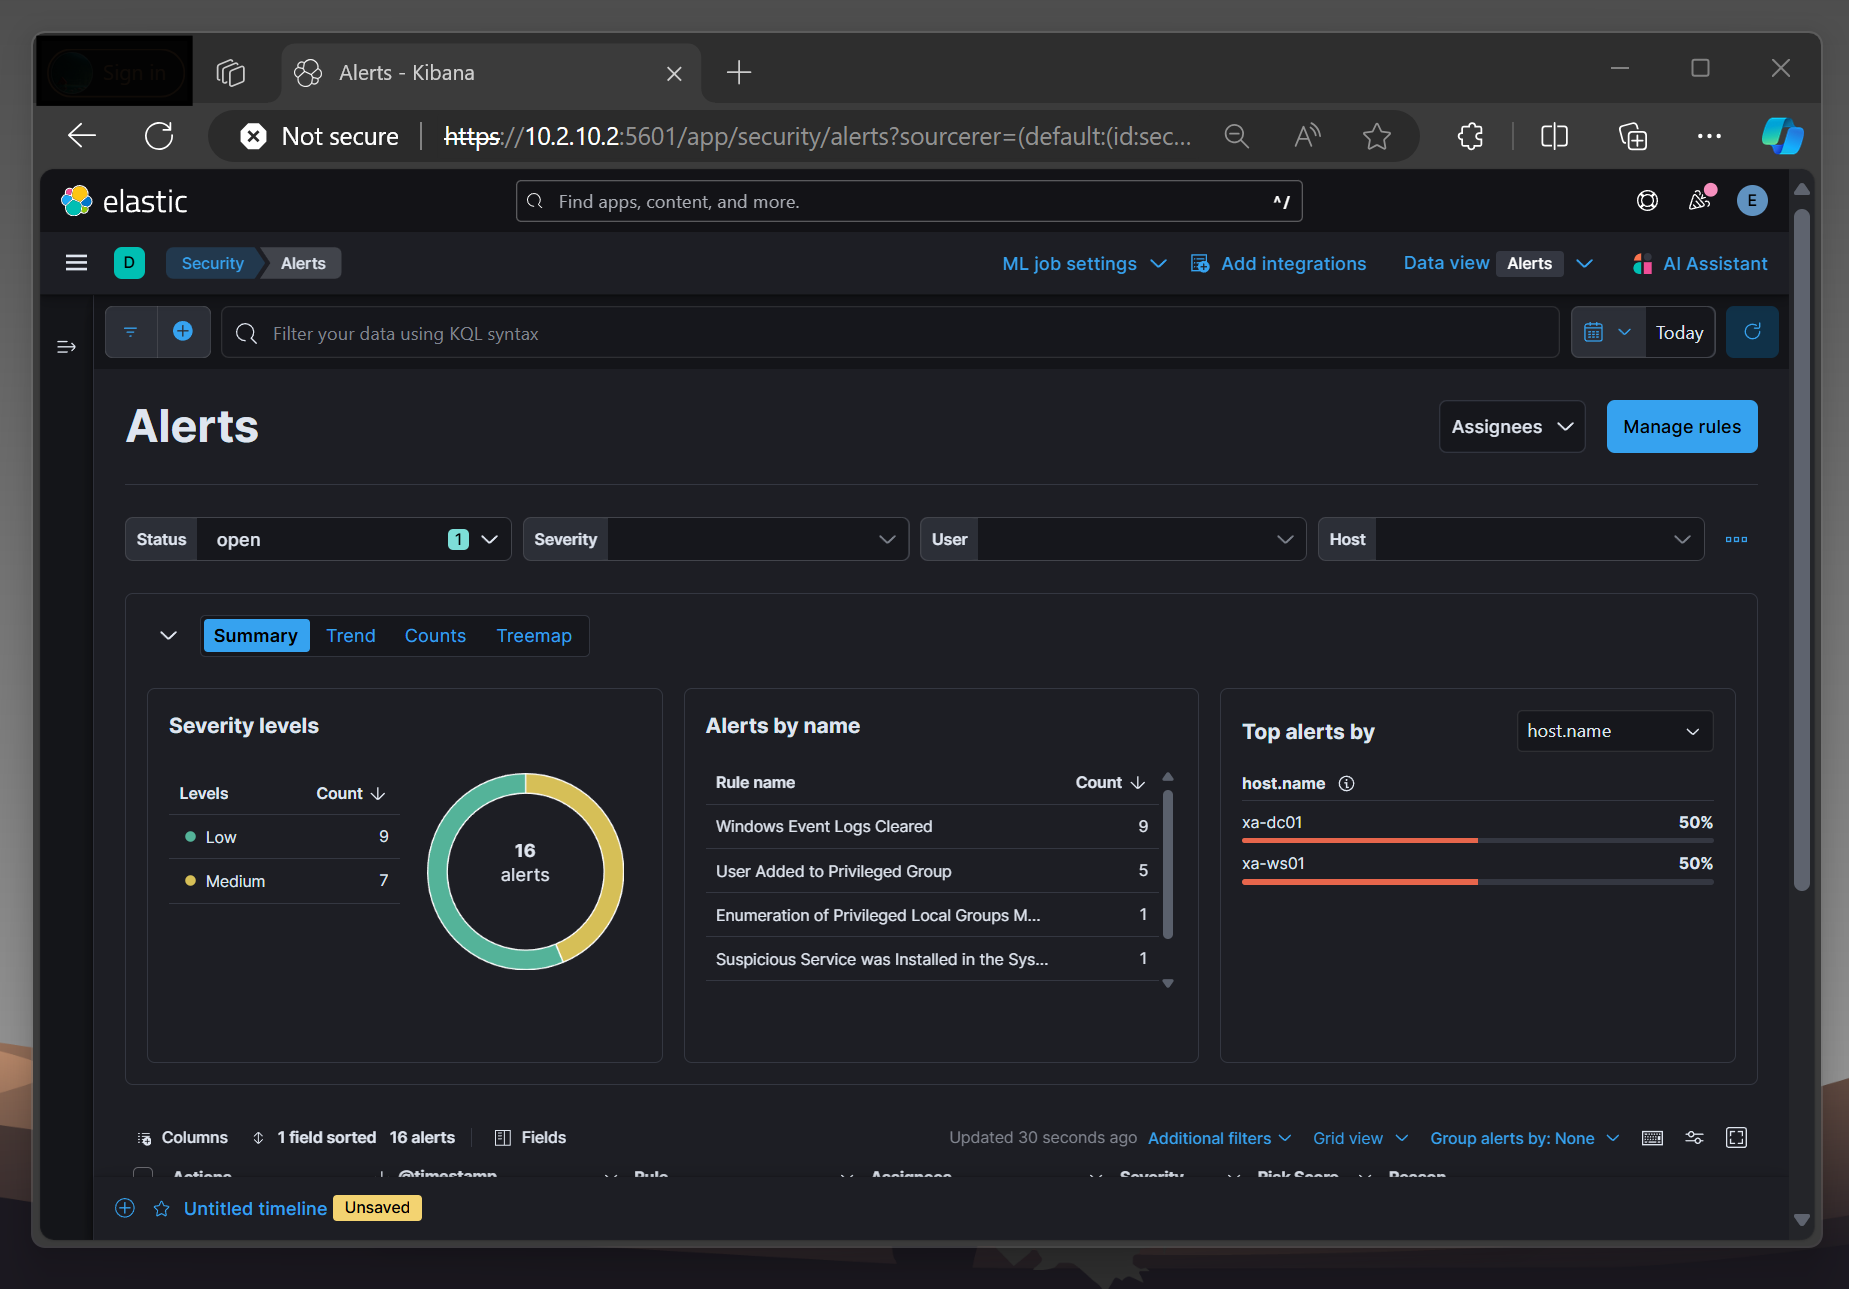
Now that everything has been set up and you're connected to the VPN, you can connect to your VMs. Kibana is available through the Port 5601, so let's connect:
https://10.2.10.2:5601The default credentials configured in the config file should be elastic and you can get the password from your configuration file.
8 - Next Steps
Now that Elastic is configured (and dark mode is turned on), I can start testing and investigating.
Since I am currently taking a course on Maldev Academy and preparing for the HTB CPTS, I plan to write my own malware on the Windows 11 workstation, run it, perform malicious Active Directory actions (AS-REP-Roasting, Kerberoasting, etc.) using an external host, and then analyze the logs. For this, I need to first deploy Sysmon, then find a suitable HIDS solution (thinking about Wazuh) and deploy Velociraptor. If I'm not getting fascinated by another topic in the meantime, I might do a blog post about it!
Thank you so much for reading my post and I hope I could showcase some of Ludus' capabilities!
Sources
[1] https://docs.ludus.cloud/docs/environment-guides/elastic