Setting up and Securing Cross-Tenant Access using Microsoft Entra ID

In this tutorial, I will showcase how to setup and tweak the Cross-Tenant Access Settings to ensure flawless collaboration between tenants.
Understanding Cross-Tenant Access
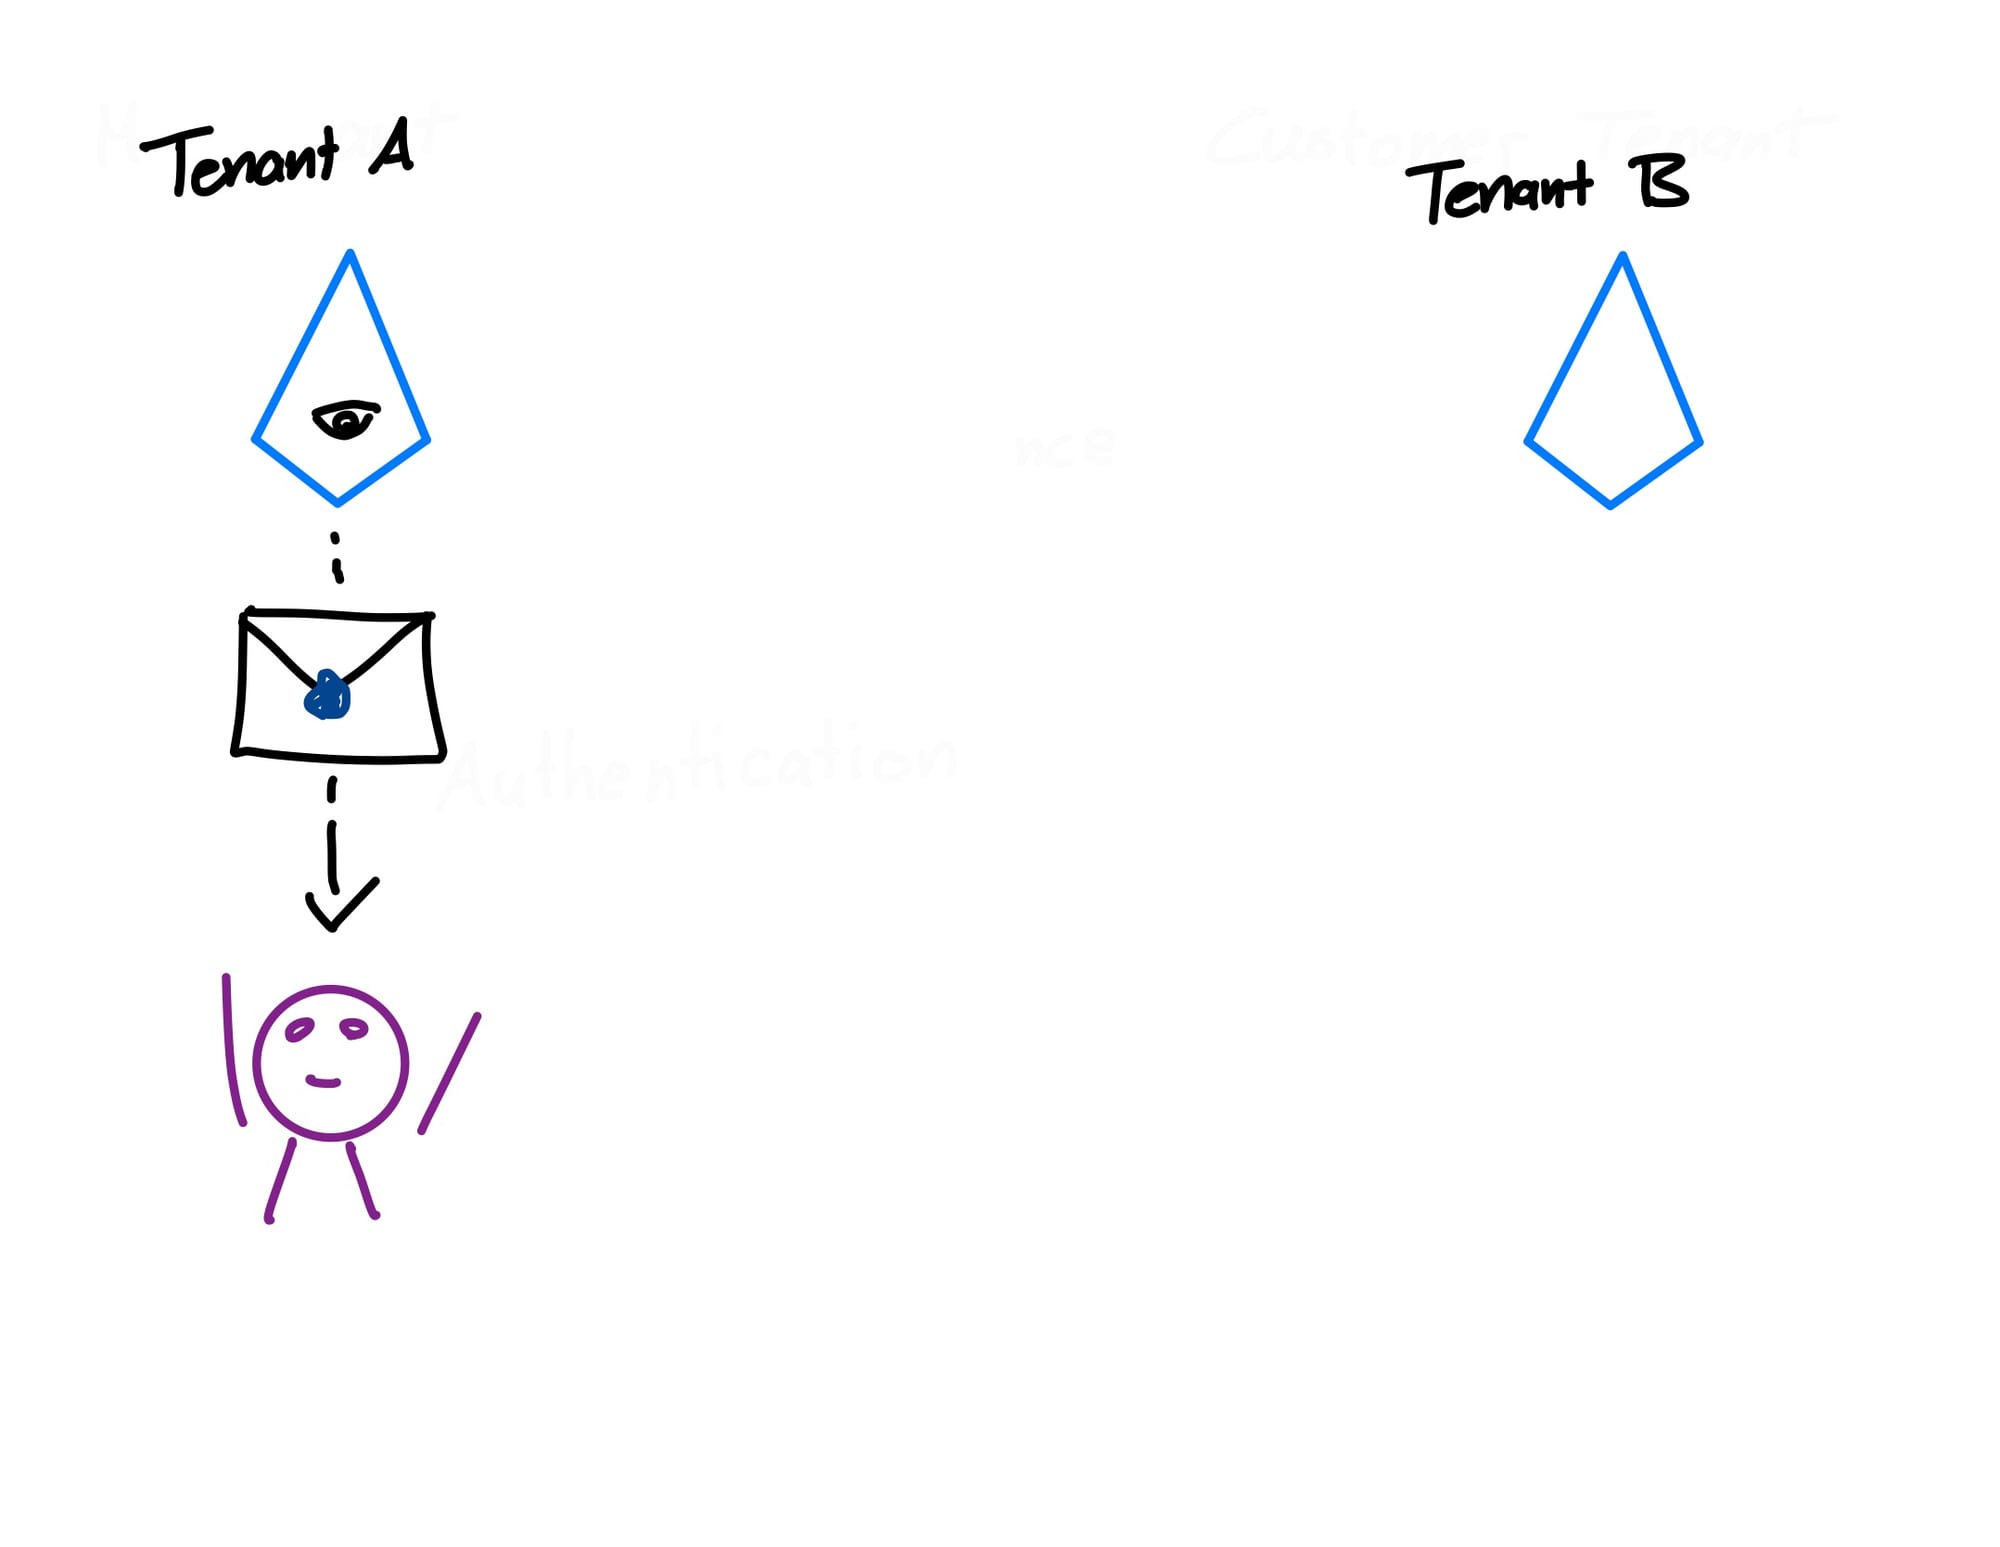
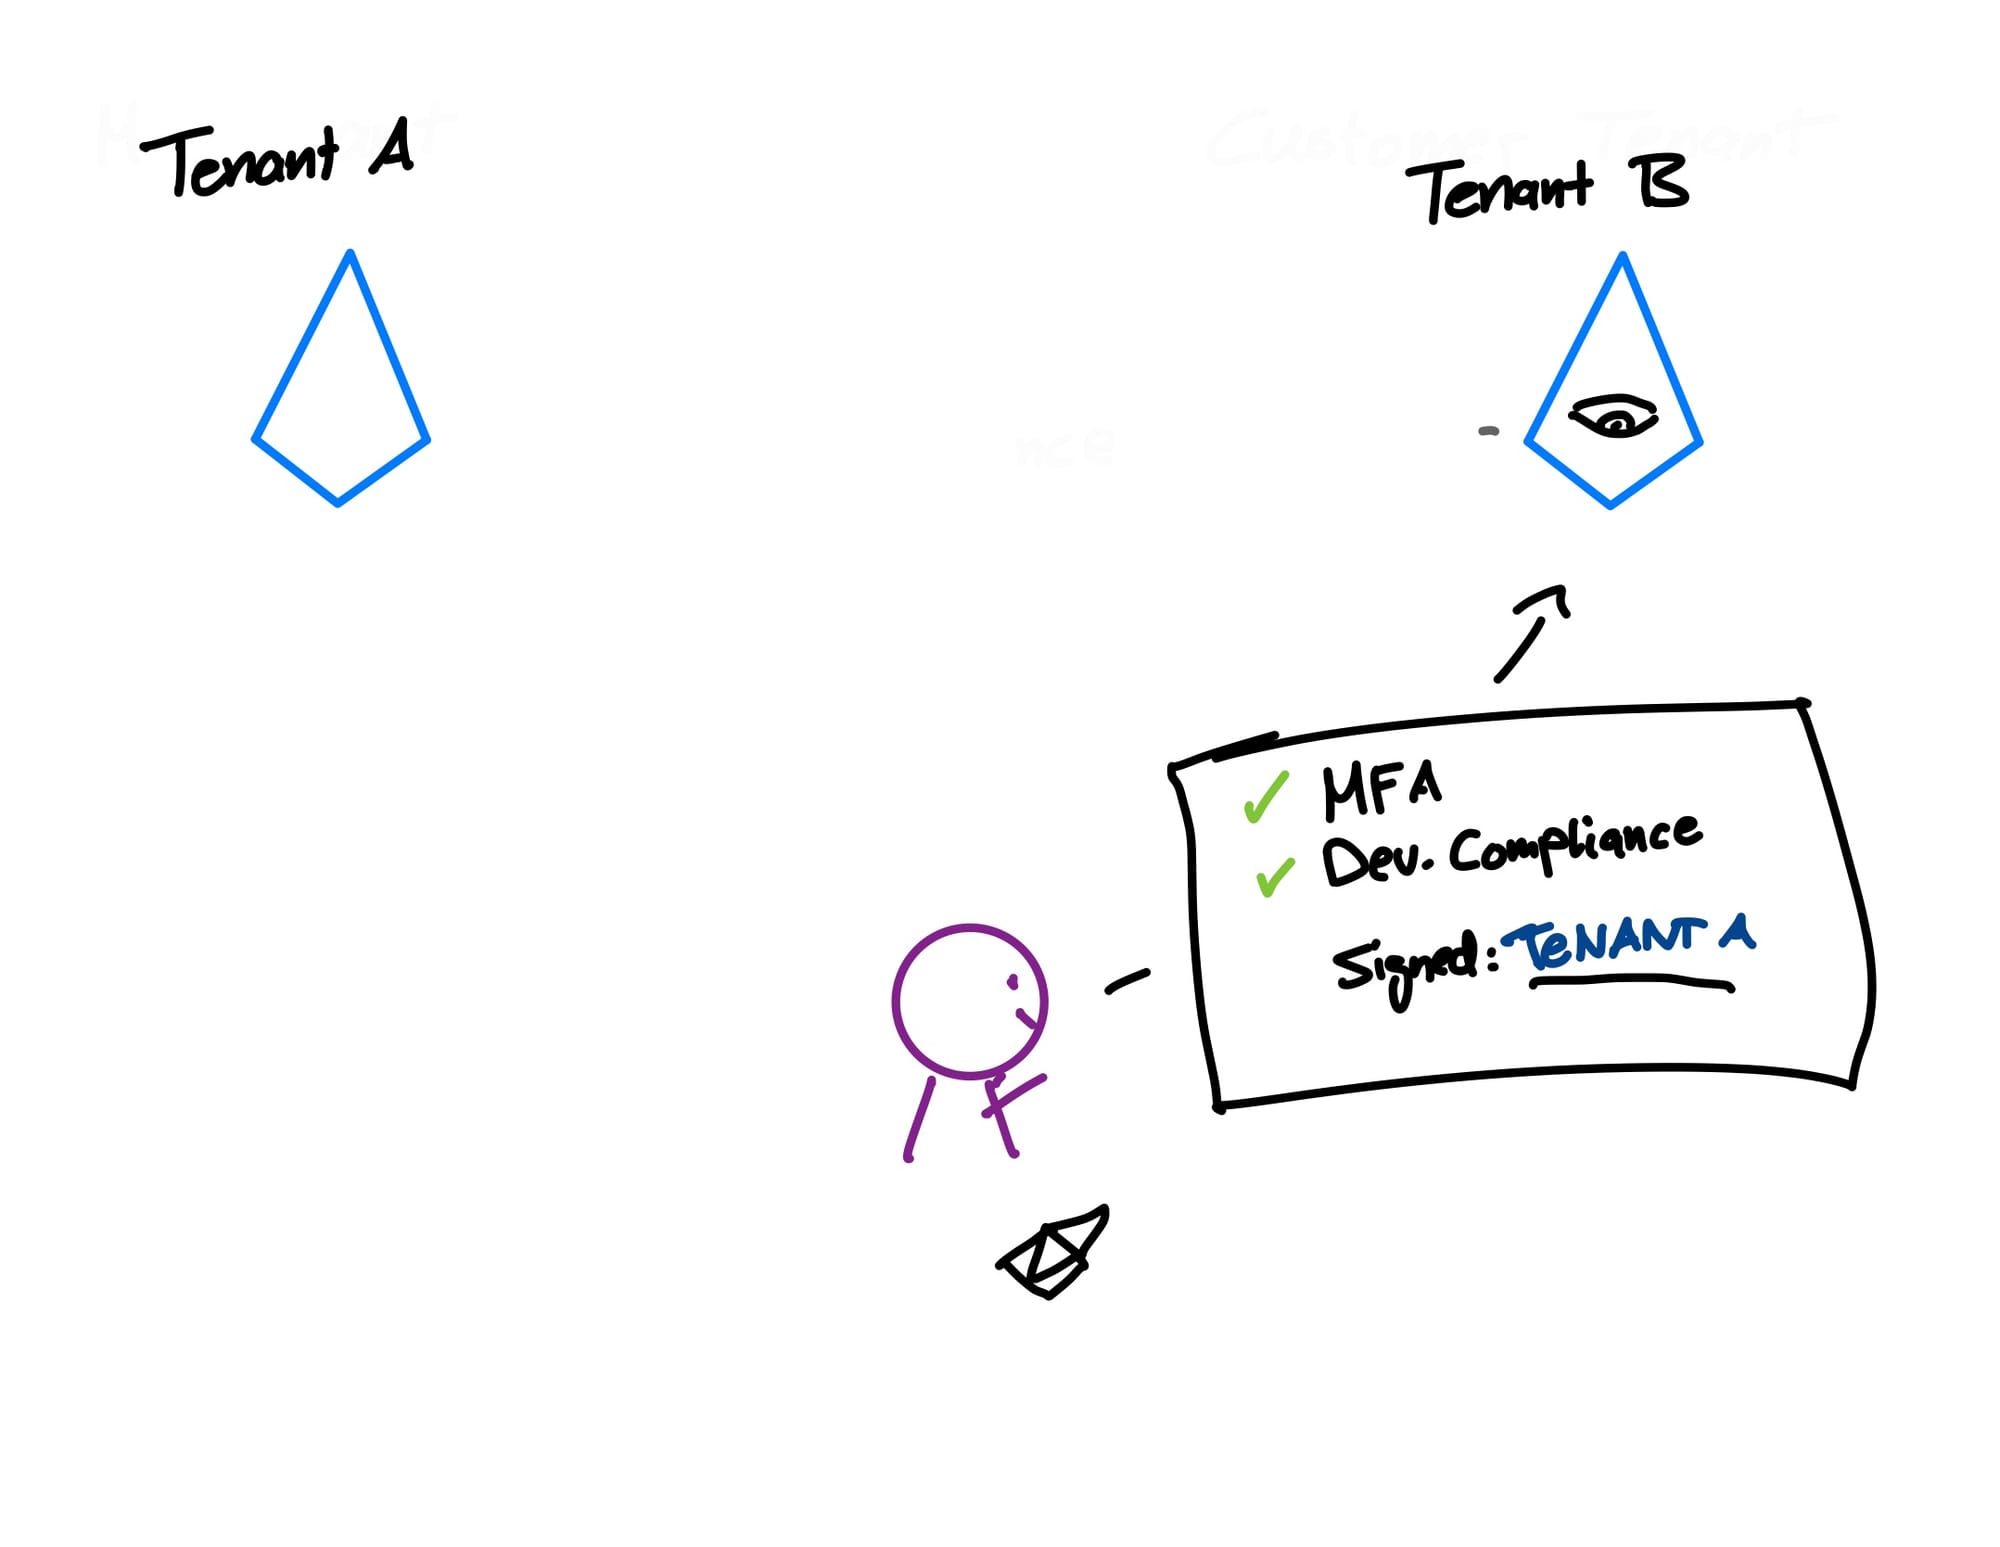
Let's say, when we authenticate to our home tenant A, we have to complete an MFA challenge and the device compliance gets checked. As soon as all the criteria have been met, Entra saves these as successful in form of a cookie.
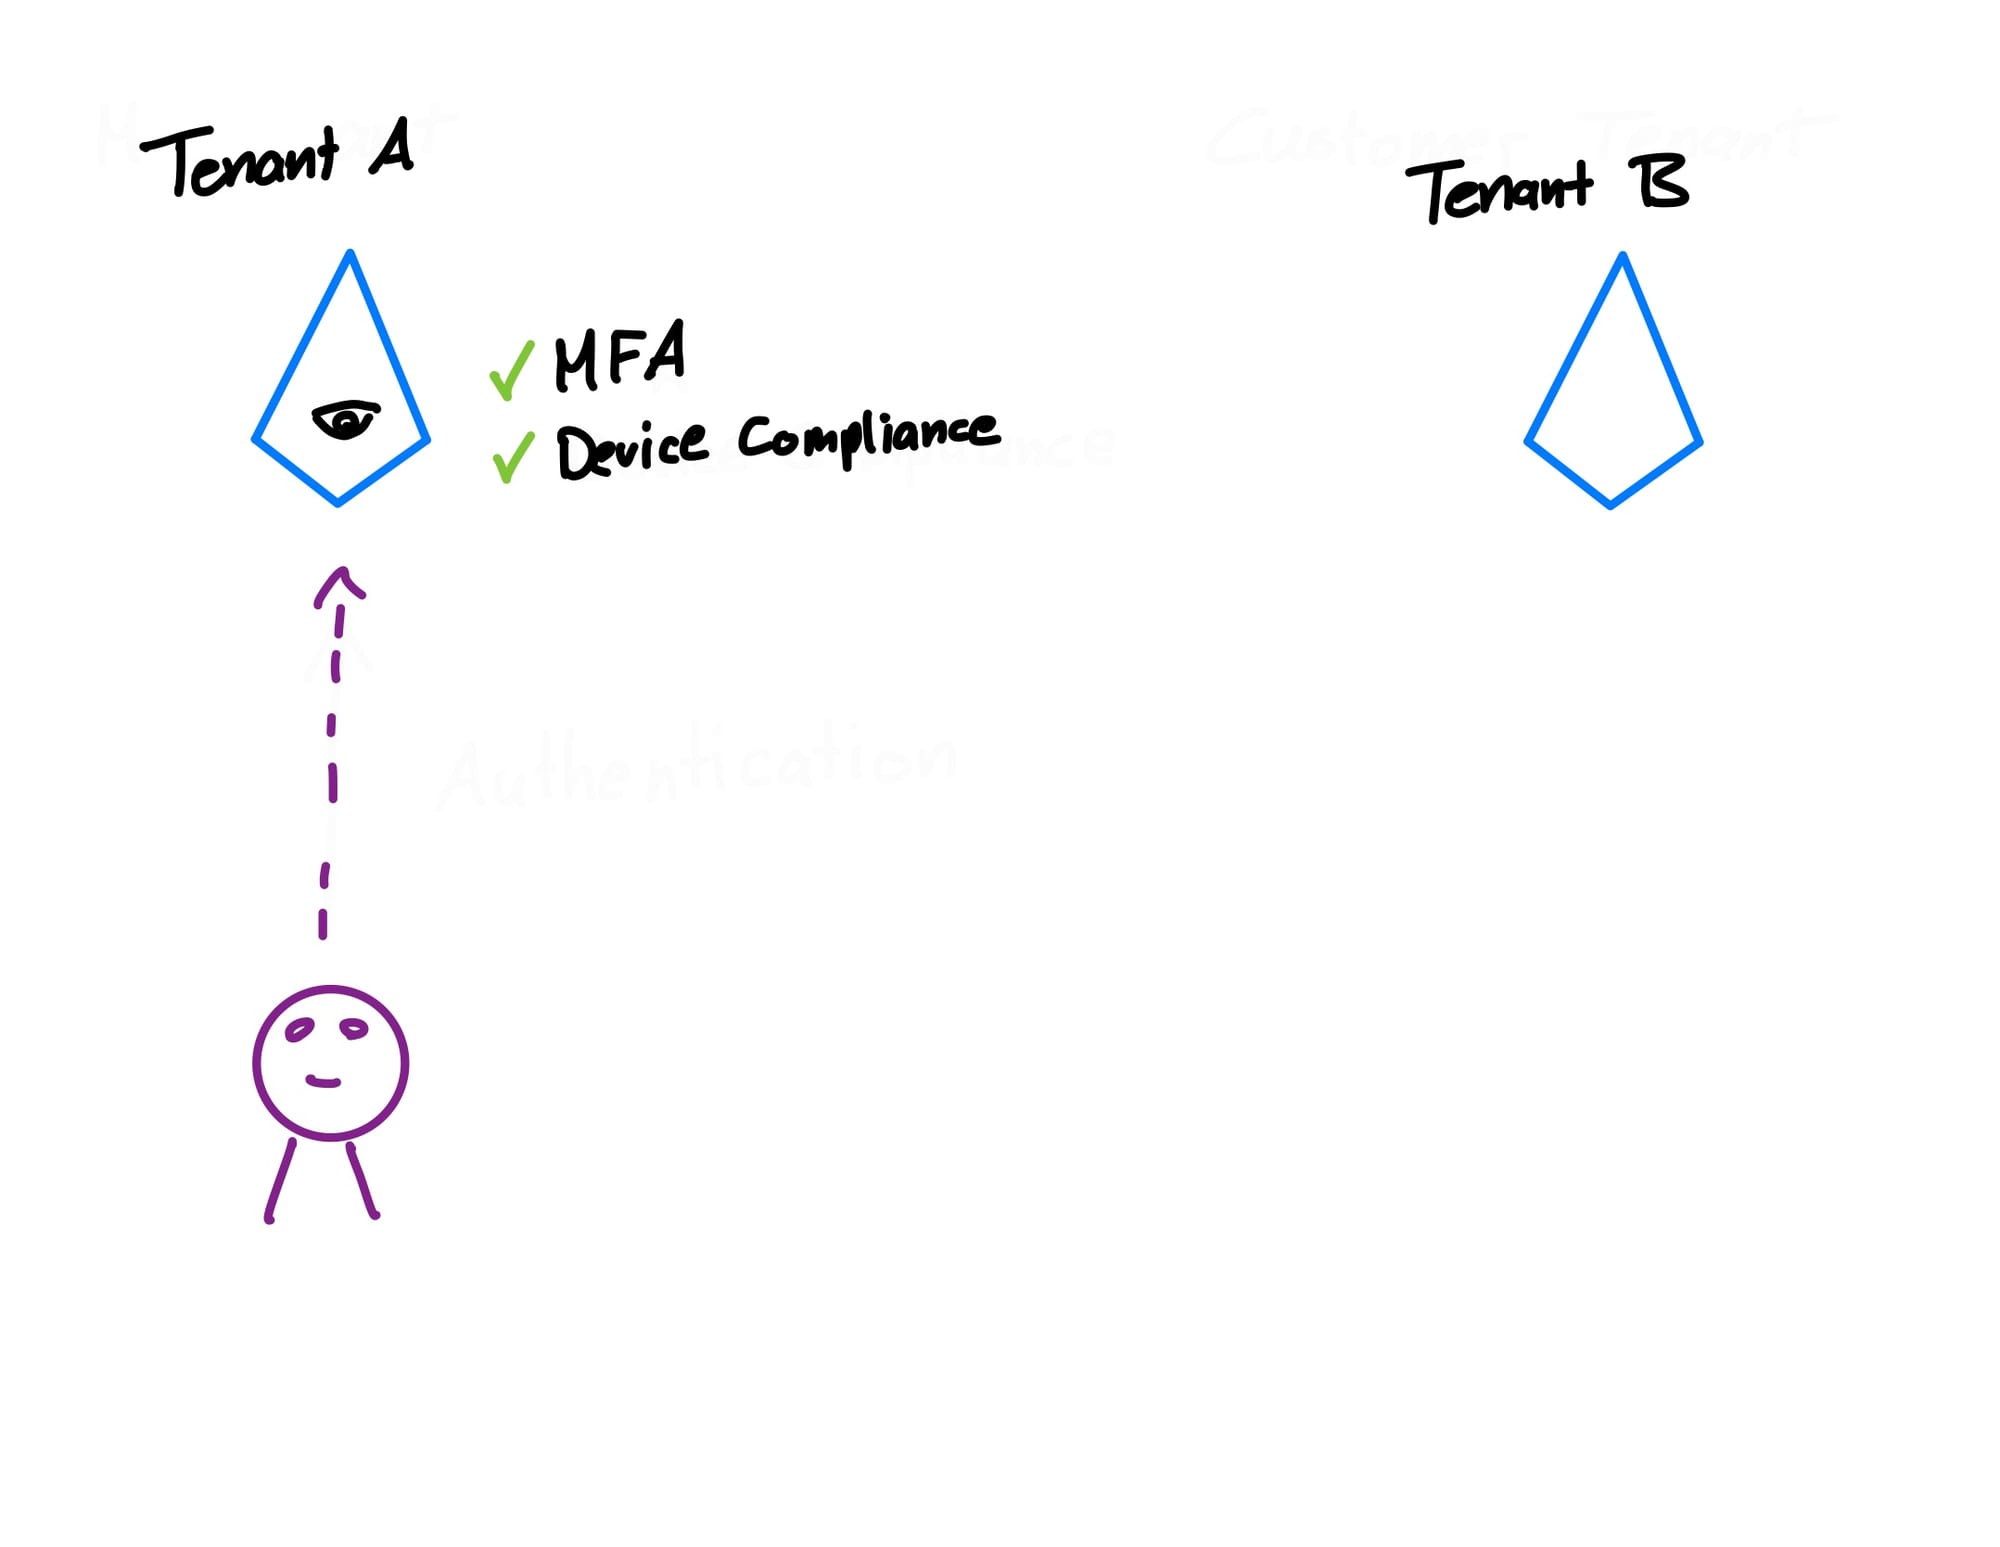
Now, we want to access resources in the target tenant B. Before we advance, our tenant A checks whether or not we are allowed to access that tenant.
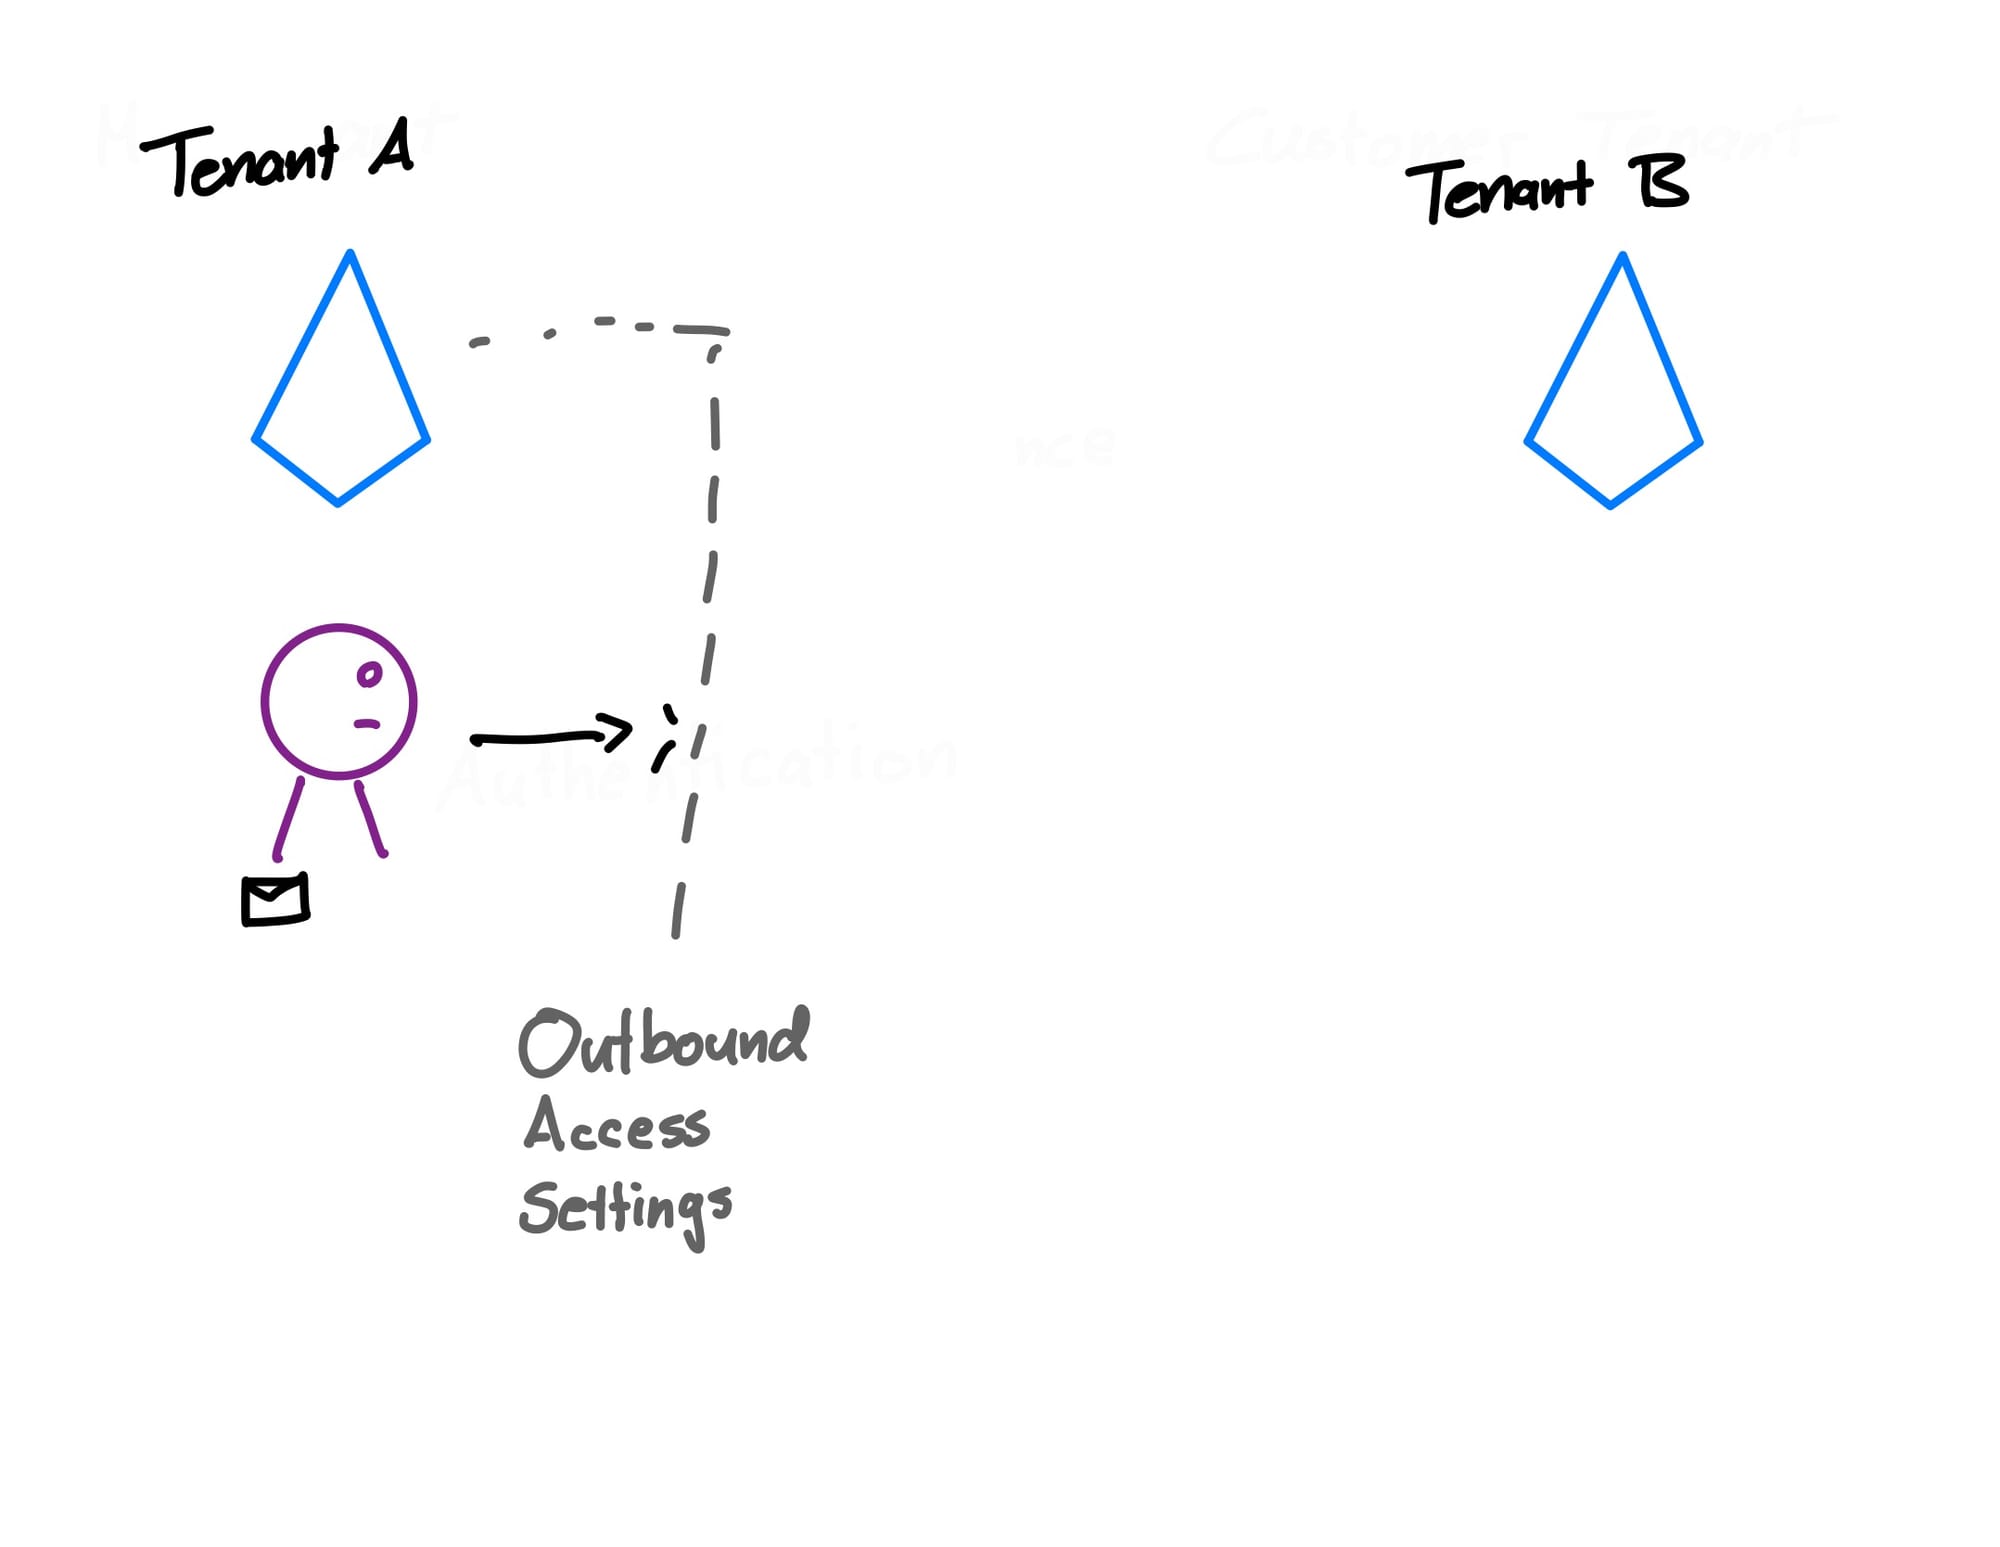
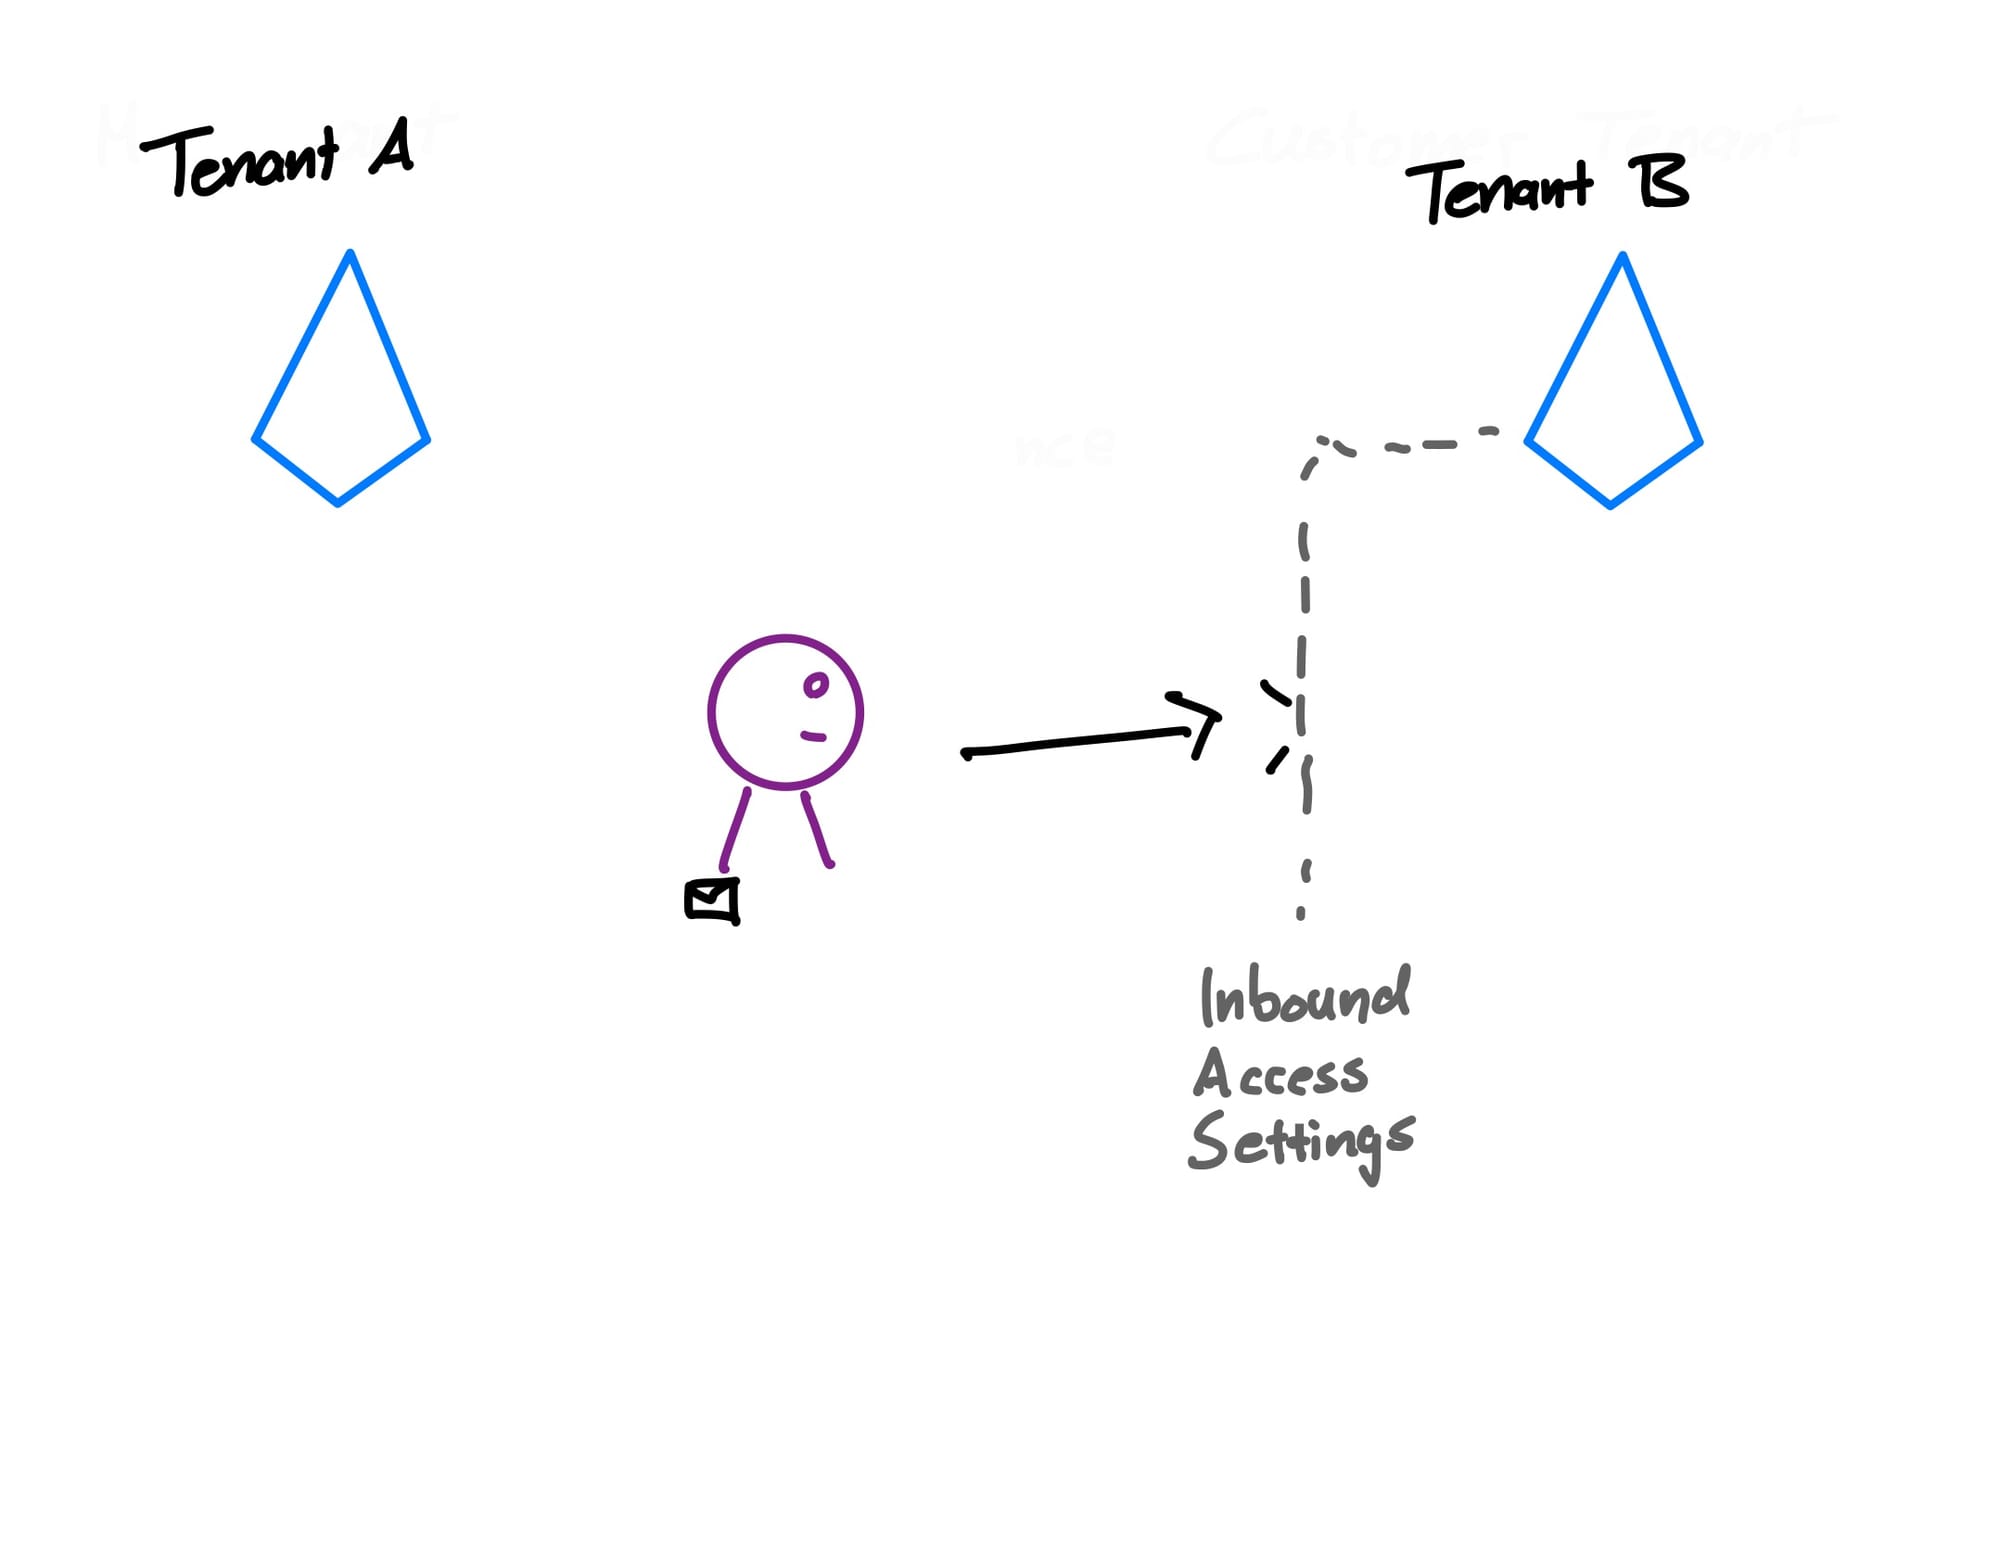
After our tenant A allowed us to access tenant B, tenant B then also has settings either allowing or denying us access. If both tenant A's outbound access settings and tenant B's inbound access settings let us through, we proceed to the next step.
Now, since our tenant A already confirmed that we have a compliant device and completed the MFA challenge, we can forward these claims to tenant B. Tenant B has trust settings, which require external users to have these criteria checked.
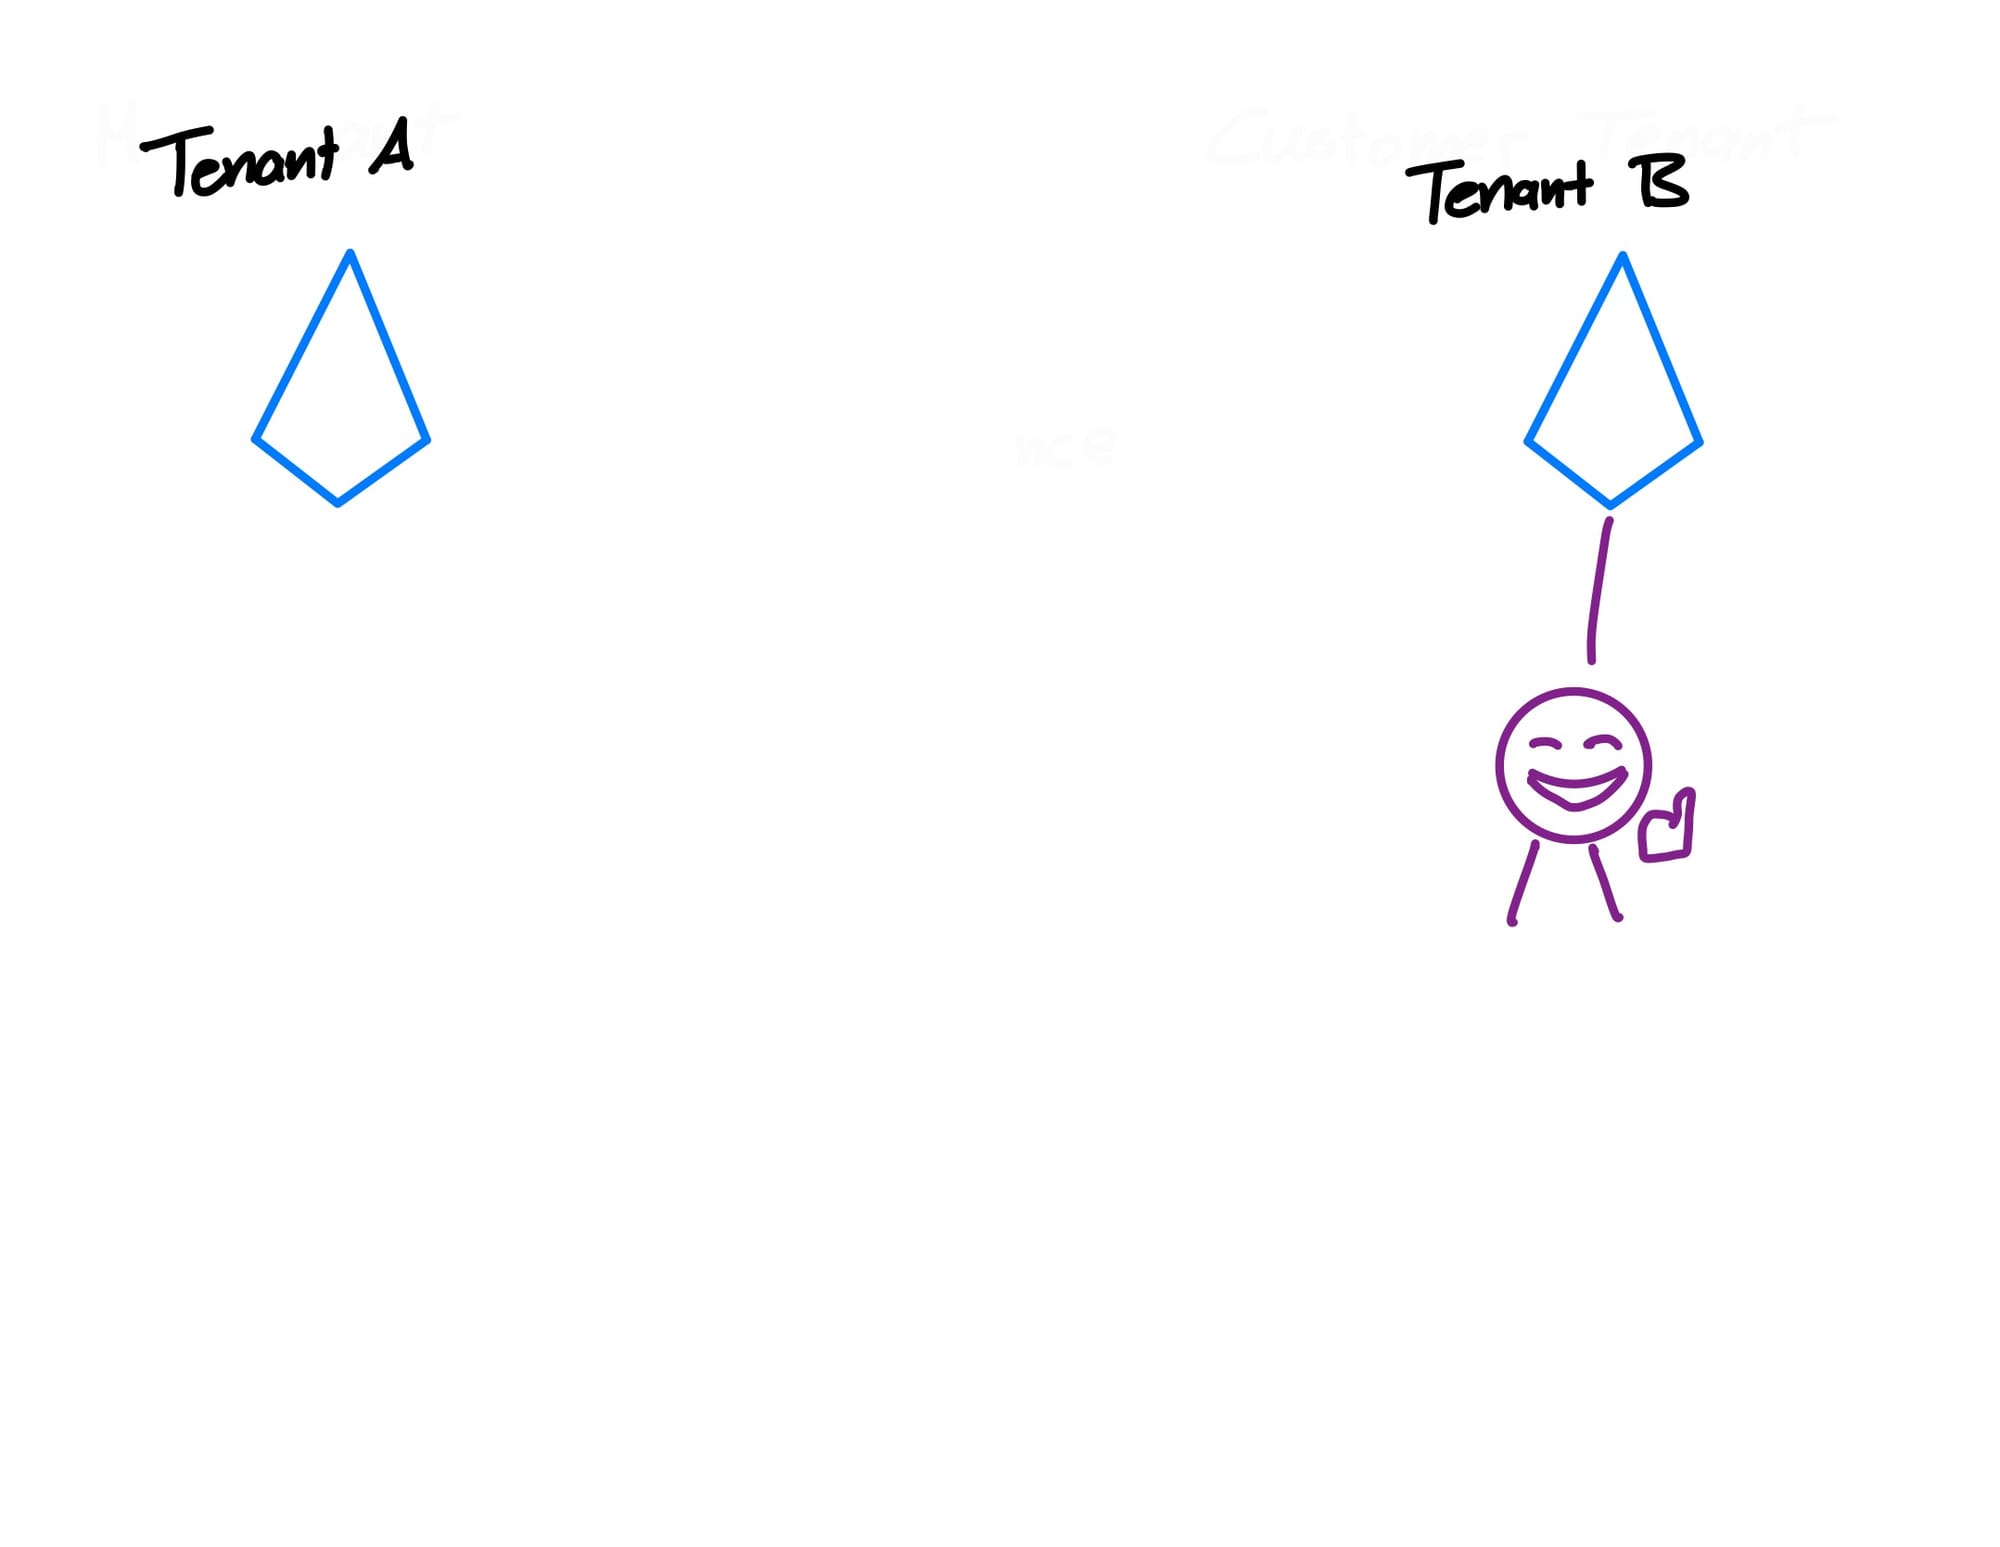
After we passed all of these steps, we can proceed with our workflow and access tenant B's resources!
Now, let's look at how we can achieve a setup with security in mind.
Setting up Cross-Tenant Access securely
Cross-tenant access refers to the ability for users from one Microsoft Entra organization (tenant) to interact with resources in another tenant. Whether it’s sharing files, collaborating on projects, or accessing applications, cross-tenant access enables efficient collaboration between organizations.
Sign in to the Microsoft Entra admin center as a Security administrator.
1 - Verify the Default Access Settings
Before we add an organization and setup Cross-Tenant Access, we should confirm that the default access settings are set according to our security baselines. The Default Access Settings let us configure default security settings for cross-tenant access.
On the Entra Admin Center, navigate to:
Identity > External Identities > Cross-tenant access settings
Once there, it should look something like this:
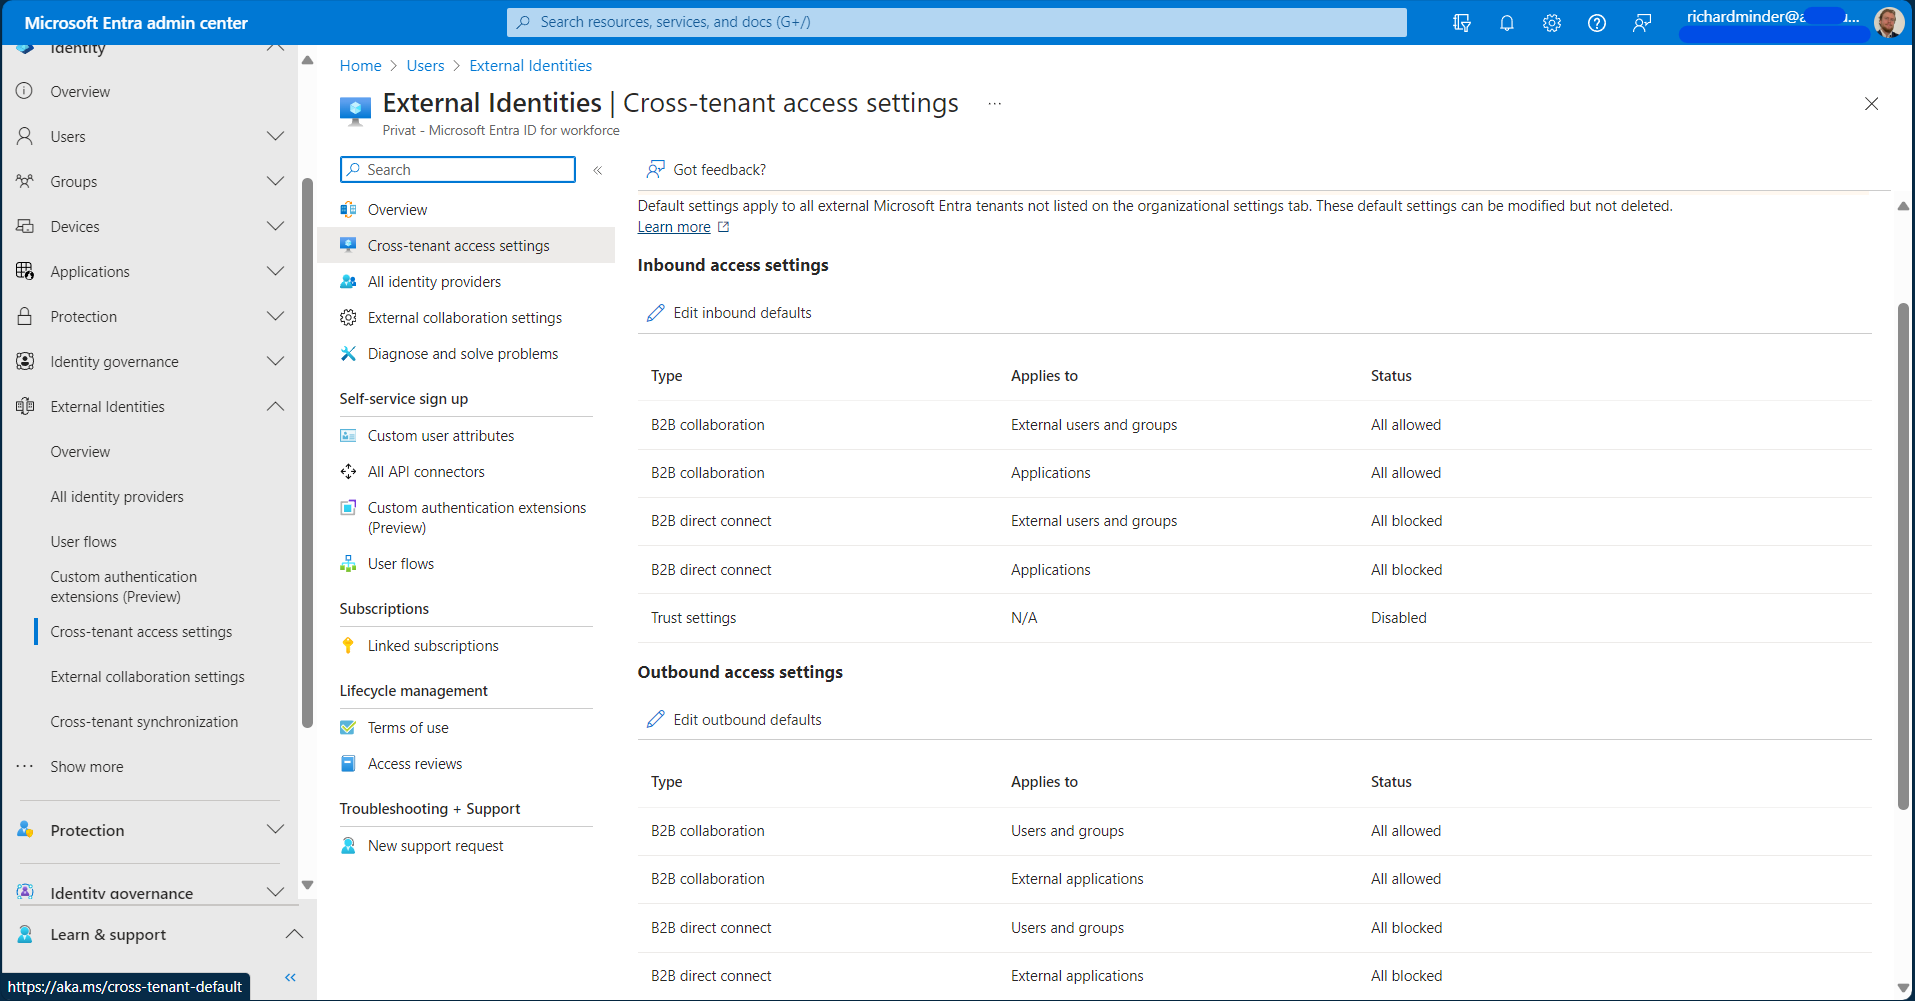
On this page, you can configure the following settings to your liking:
- Inbound Access Settings let you configure:
- Which users, groups or applications are granted access to your tenant
- Redemption order for B2B Collaboration regarding identity providers
- Whether you trust claims from the target tenant regarding MFA, Device Compliance and/or Entra Hybrid joined Devices
- Outbound Access Settings let you configure:
- Which users, groups or applications from your tenant can access the target tenant
- Whether you request MFA, Device Compliance and/or Entra Hybrid joined Devices when accessing the target tenant
- Tenant Restrictions let you configure:
- Whether your users can access external applications from your network or devices using external accounts
- Including accounts issued to them by external organizations and accounts they've created in unknown tenants.
Since these are default settings, they will automatically apply to all organizations without specific configuration profiles.
2 - Adding an Organization
After we configured the default inbound and outbound access settings, we can add our first organization. This can be done by switching from the Default Settings Tab to the Organizational Settings Tab.
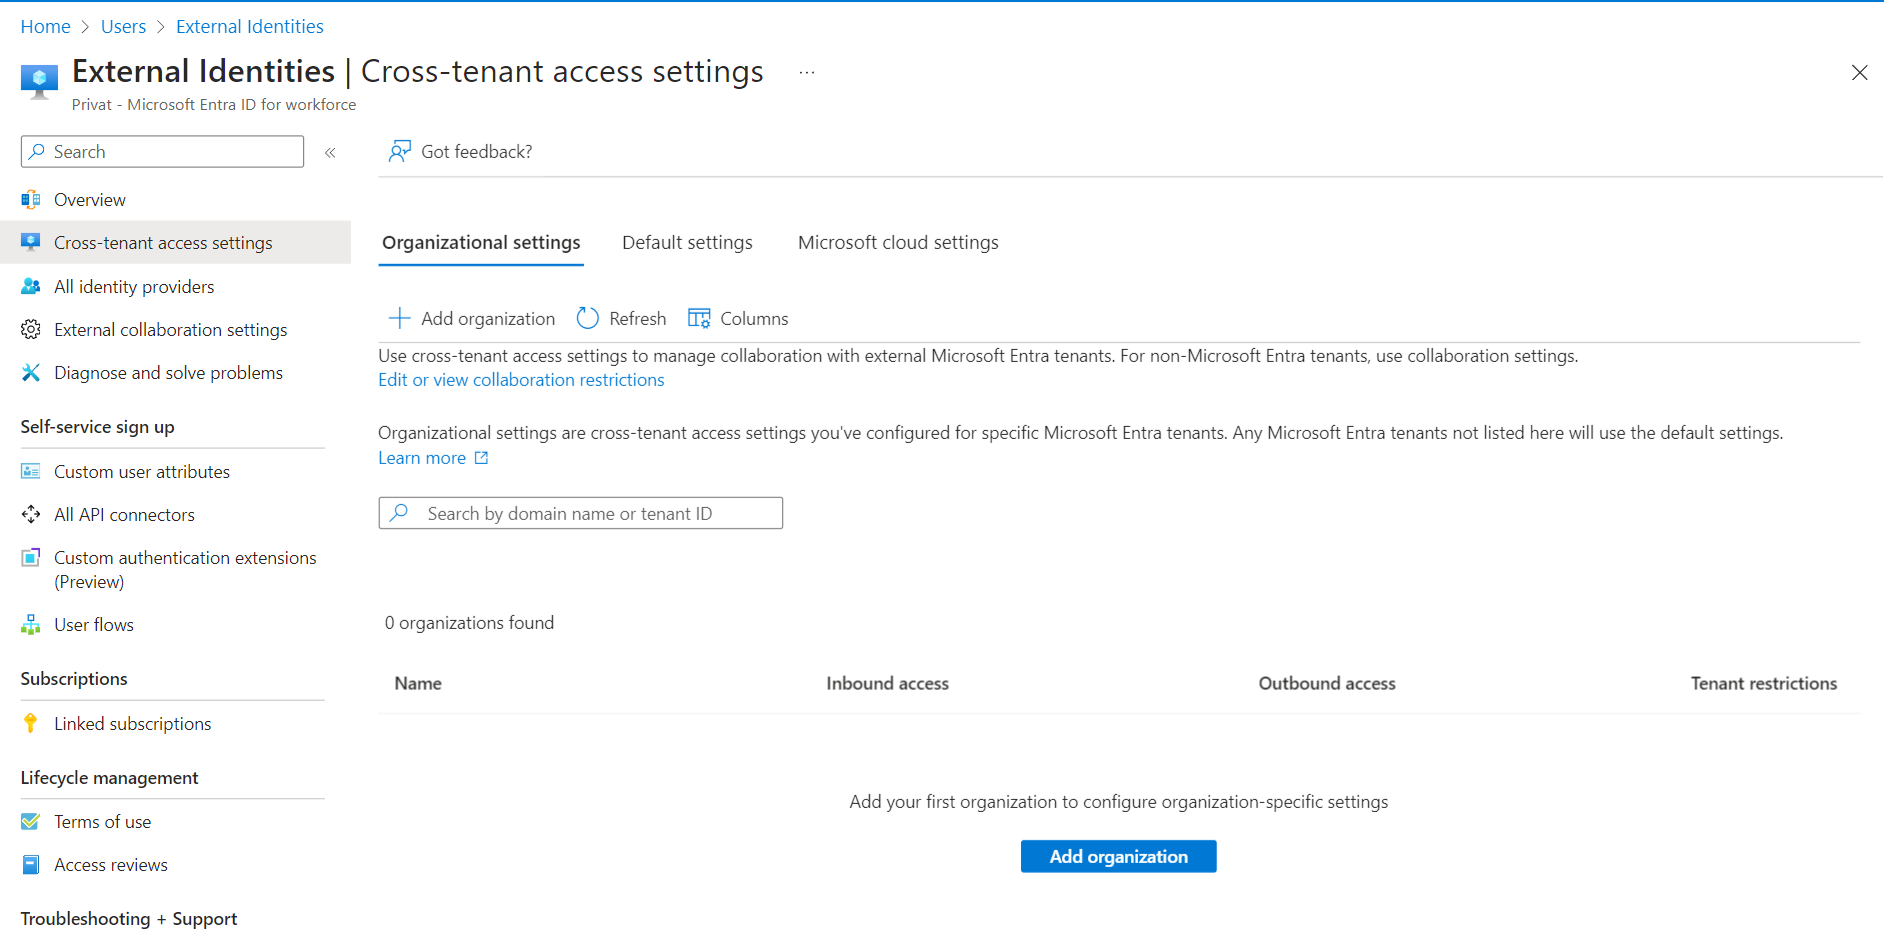
Once there, you can click on "Add Organization".
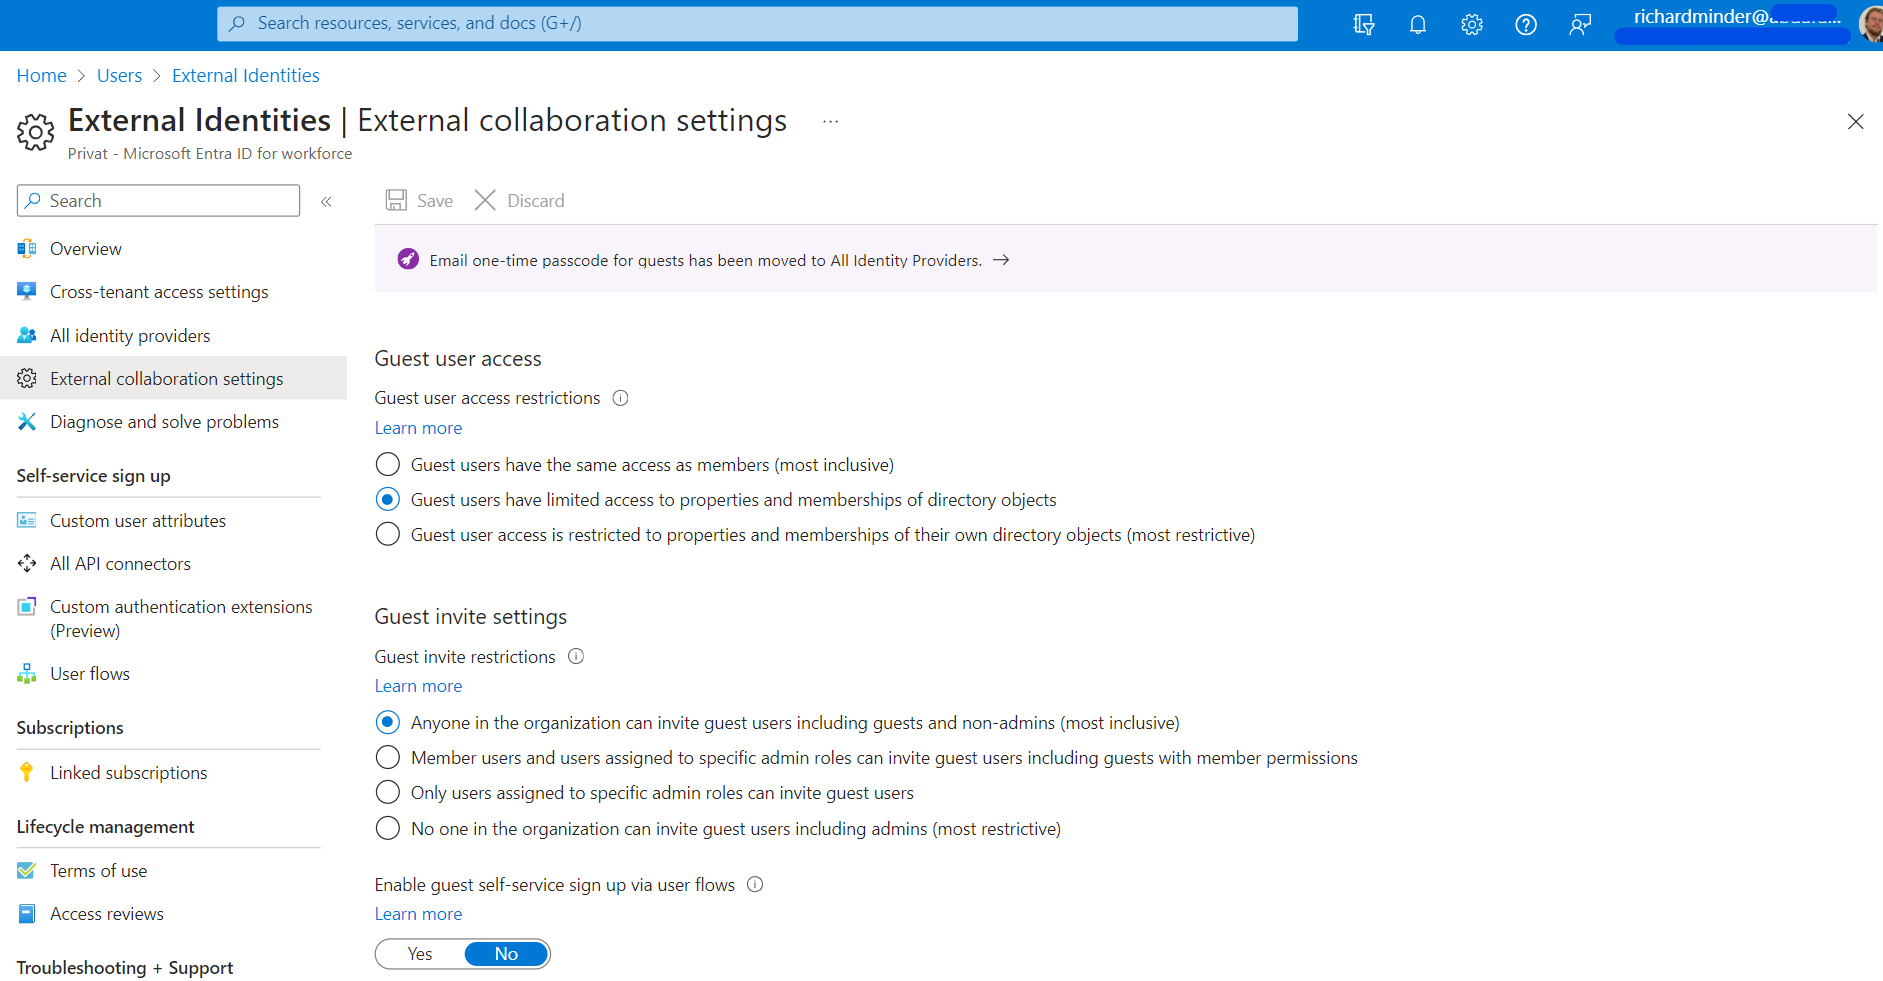
3 - Reviewing External Collaboration Settings
Now we ensure, that we know and decide:
- What access do the Guest Users have?
- Who can invite Guests?
- Can Guests signup via Self-Service Signup?
- Can Guests remove themselves?
- Which Domains can be invited?
On the left menu bar, navigate to External Collaboration Settings:
4 - Inviting Users
Now that we configured the Default Access Settings, the Collaboration Settings and added our first organization, we can start inviting users.
The invitation happens through an invite link which gets sent via email. You can configure a custom invite message for that mail.
Navigate to Identity > Users > All Users.
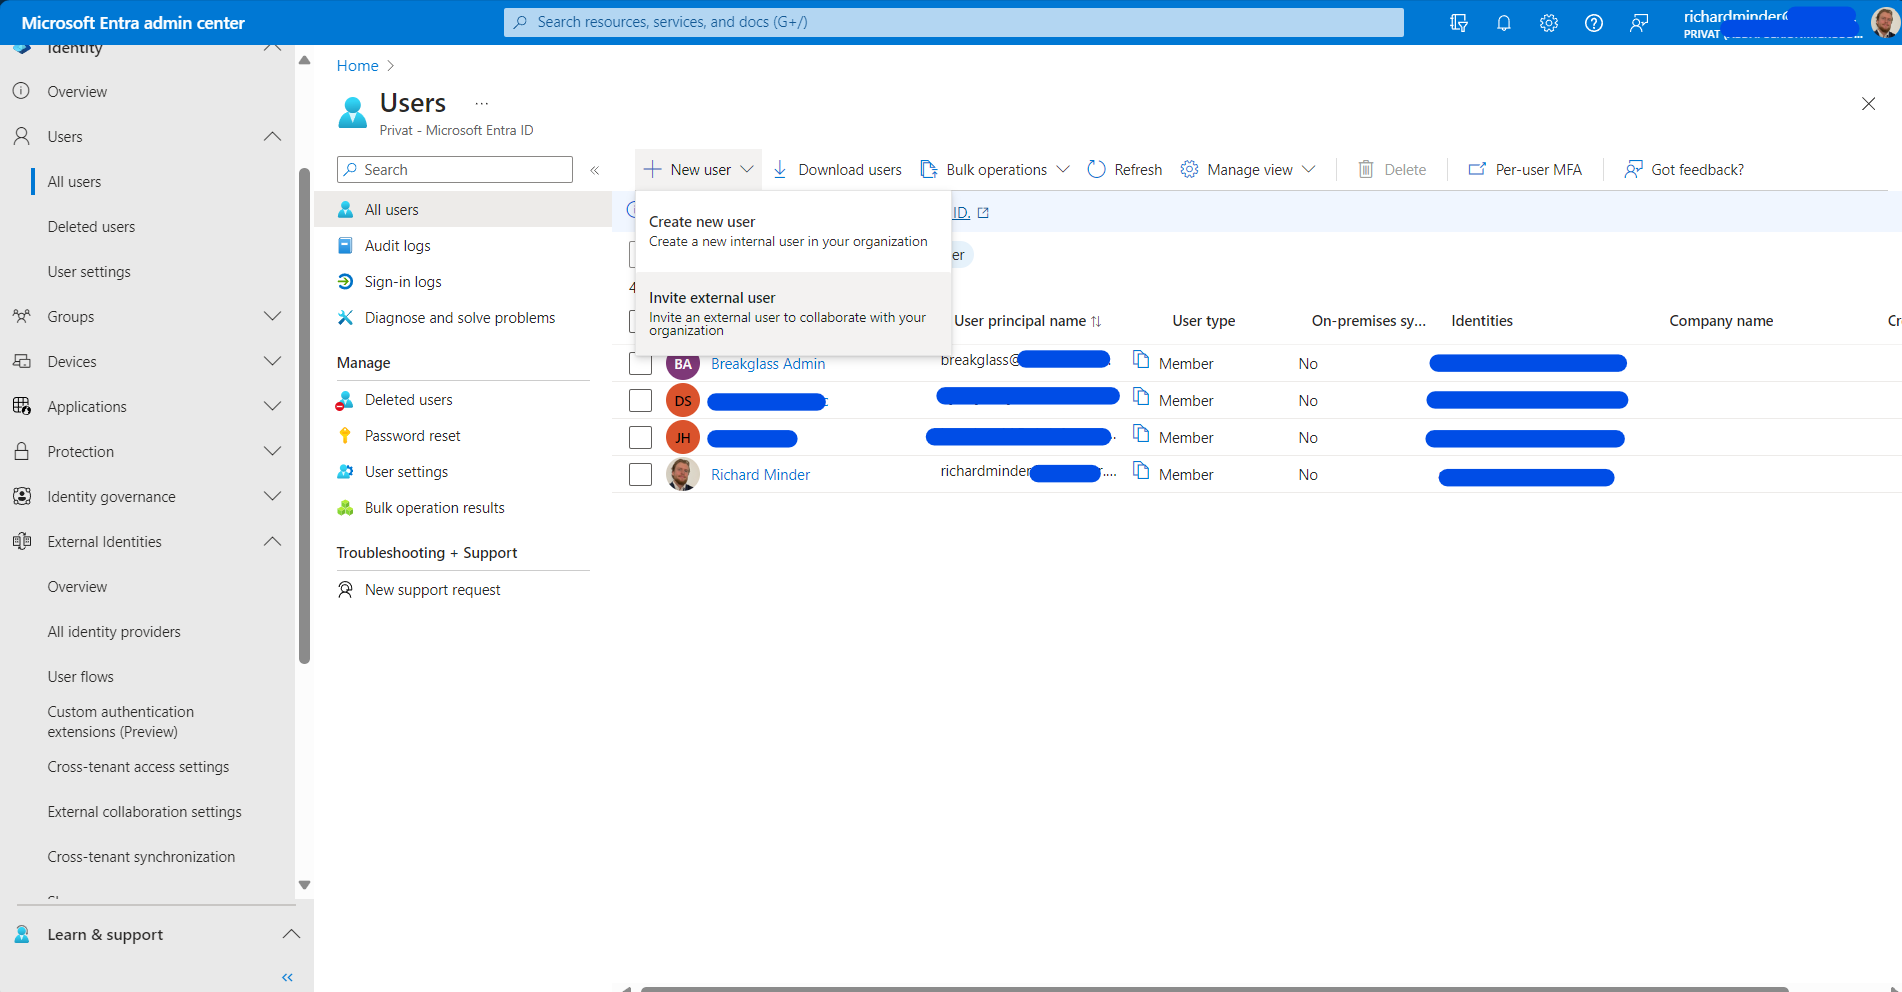
Then, add a new user and select Invite External User.
Deep Dive - How does it work?
Similar to on-premises Active Directory networks, authentication and authorization within and across tenants works using tickets.
These tickets come in the form of a cookie stored in our webbrowser. This cookie contains information about our identity in the form of an Access Token, which is a JSON Web Token, or JWT. JWT's are a suitable solution for this job, since they can be signed.
A signed JWT consists of three parts:
- The header, which contains information about the JWT, such as which signing algorithm was used.
- The payload contains information in form of a JSON object.
- The signature is used to verify the integrity of the JWT.
The issuer of the JWT signs it using his private key. Thanks to Public Key Encryption, the integrity of the JWT can be checked using the public key of our tenant.
Azure JWT Tickets
Our home tenant stores information about our session inside the JWT and then signs it. The signing process ensures that the cookie cannot be tampered with using public-key cryptography. Our home tenant simply generates the JWT, hashes it and then uses its private key to encrypt the hash.
The mechanism is similar to an employee walking through an office complex with his ID card. When we want to open a door and access an office room, we have to hold our card against the scanner next to the door. Some doors open, others don't, depending on our access level.
Just like that access card, we use our JWT to move throughout our cloud resources. As soon as we try to access a resource, we submit our JWT using a web request. The resource then checks whether our identity is supposed to have access, and then either grants us access or denies it.
Let's see for ourselves. Open Developer Tools in your browser of choice, go to the Network-Tab and search for the "GetEarlyUserData"-Post request. Then head into the Payload-Tab:
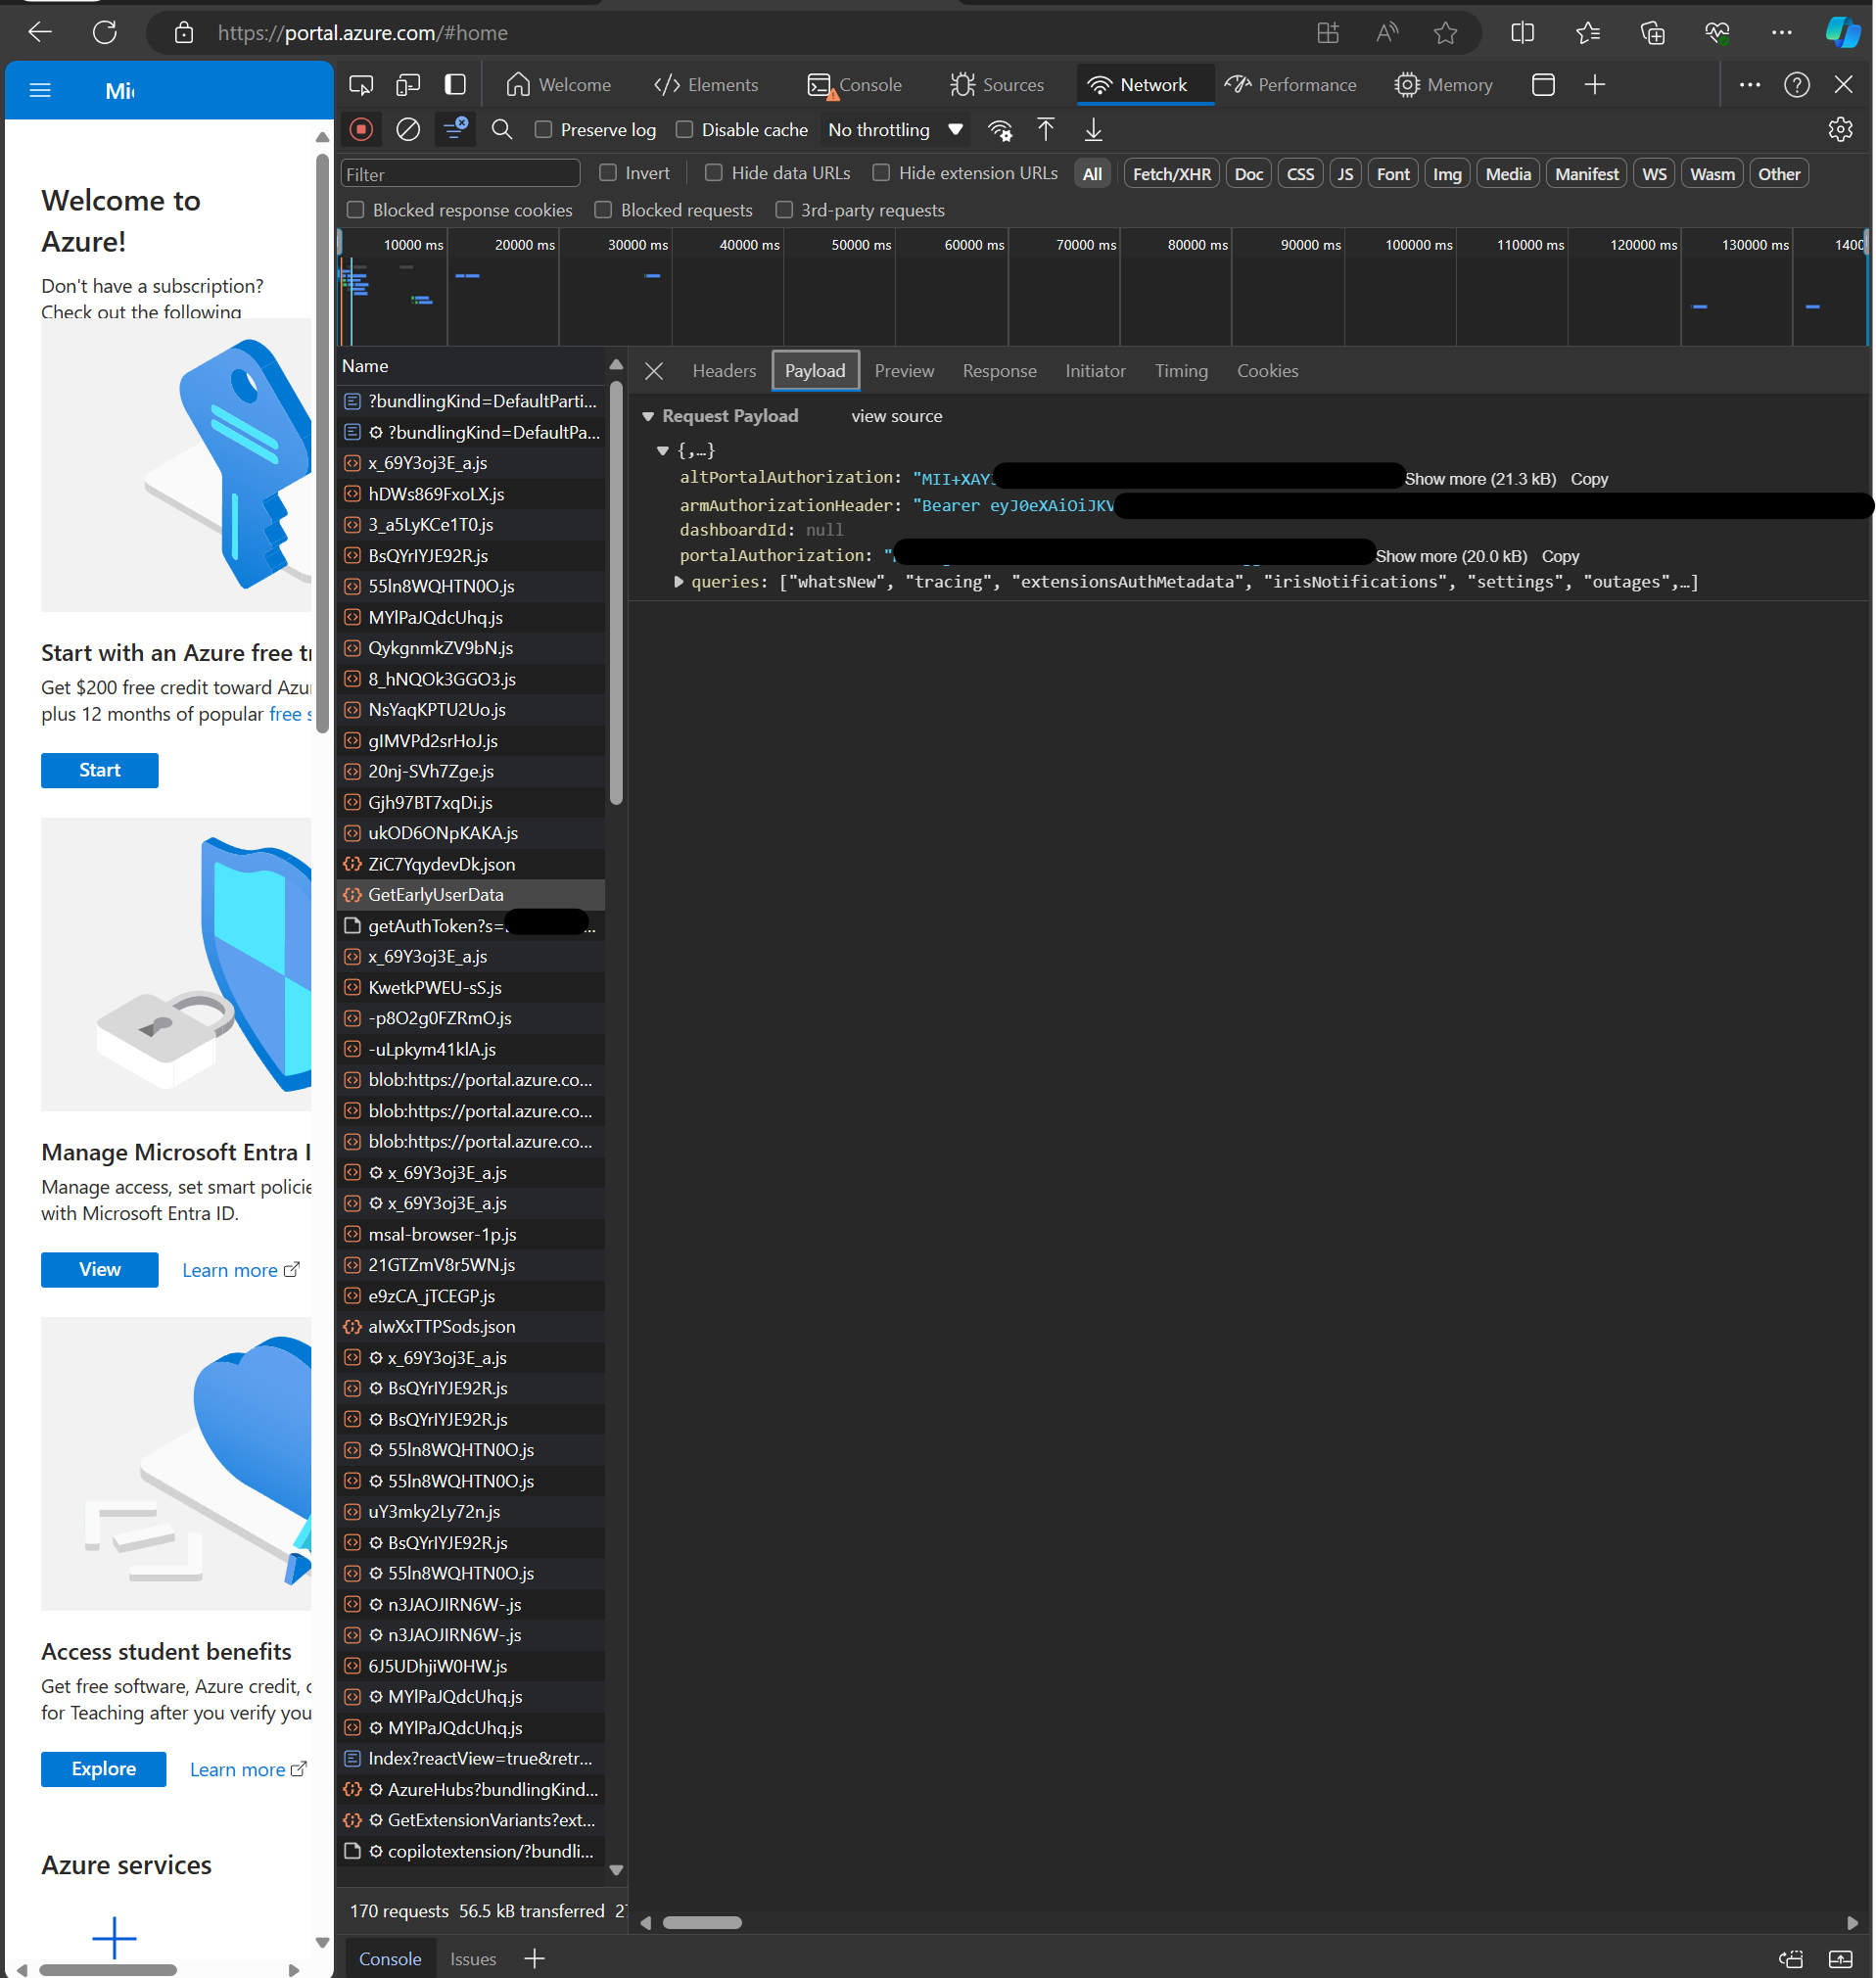
The armAuthorizationHeader is holding our "Ticket". Copy the value and remove the "Bearer "-String in front of the actual JWT, then post it into your JWT-Analyzing tool of choice. I chose jwt.ms, since this JWT was issued by Microsoft and I just feel more comfortable sharing it only with Microsoft:
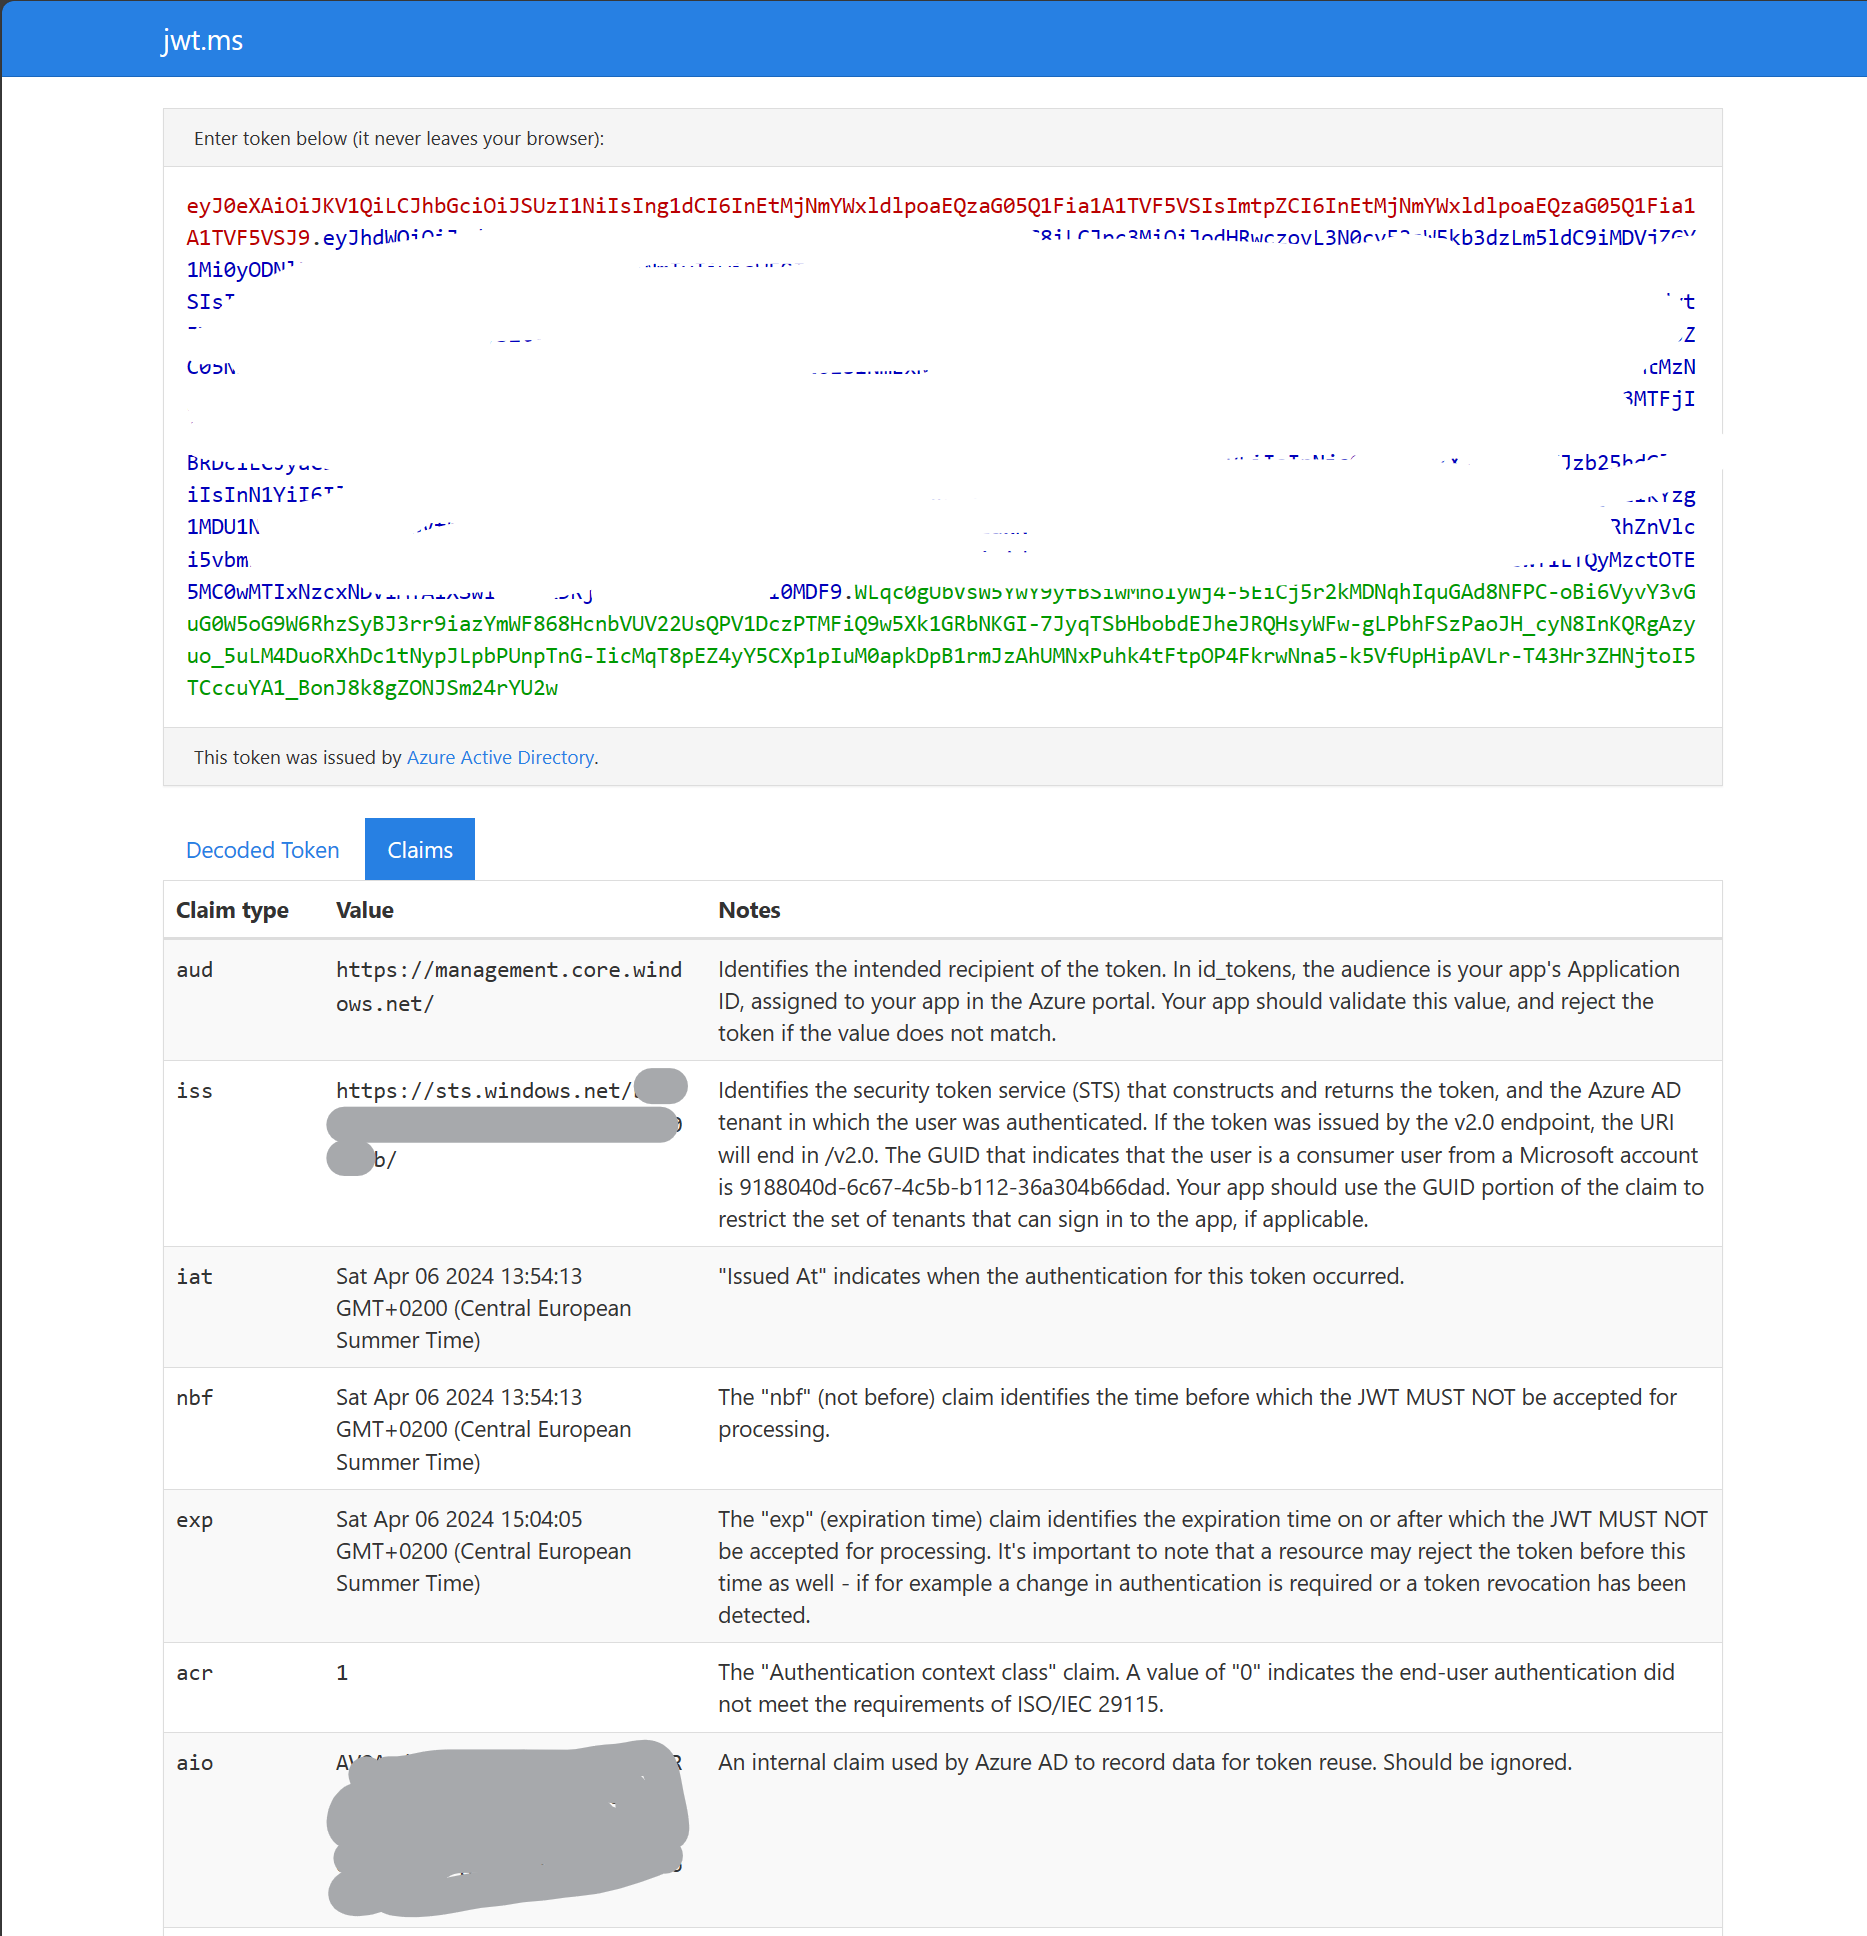
The red part of the JWT represents the header, the blue part the payload and the green part the signature.
Claims
The JWT issued by our tenant stores so-called "Claims". These claims are very important when accessing resources in our tenant, as well as when accessing other tenants.
In the first picture above, you can see:
- The intended recipient
- The ISS, which is the tenant in which my account was authenticated
- The expiration date
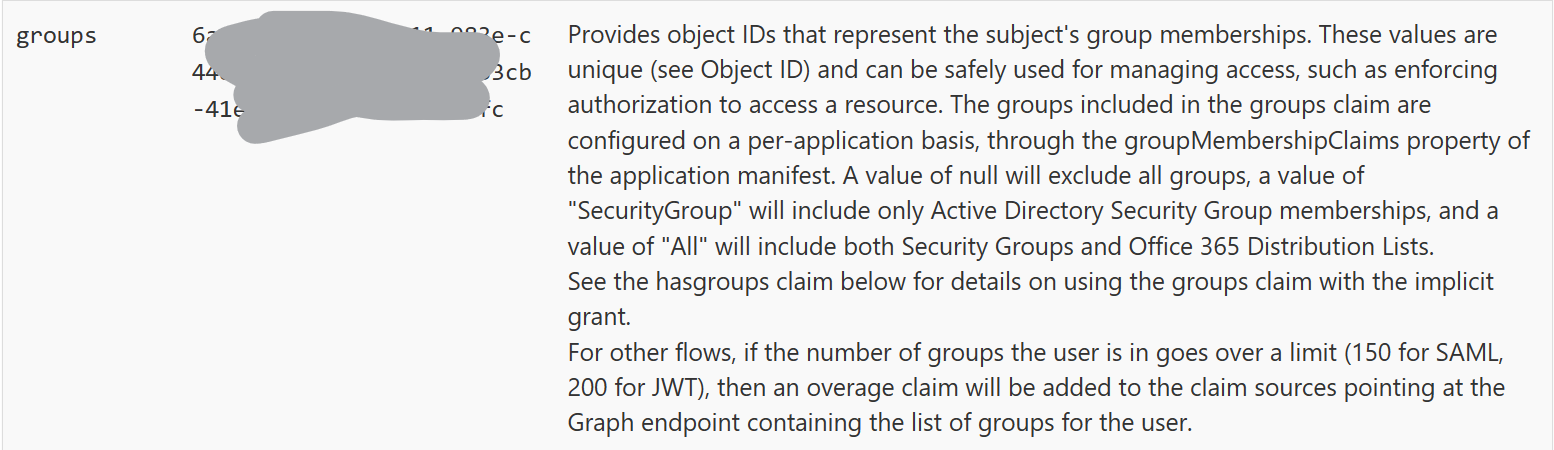
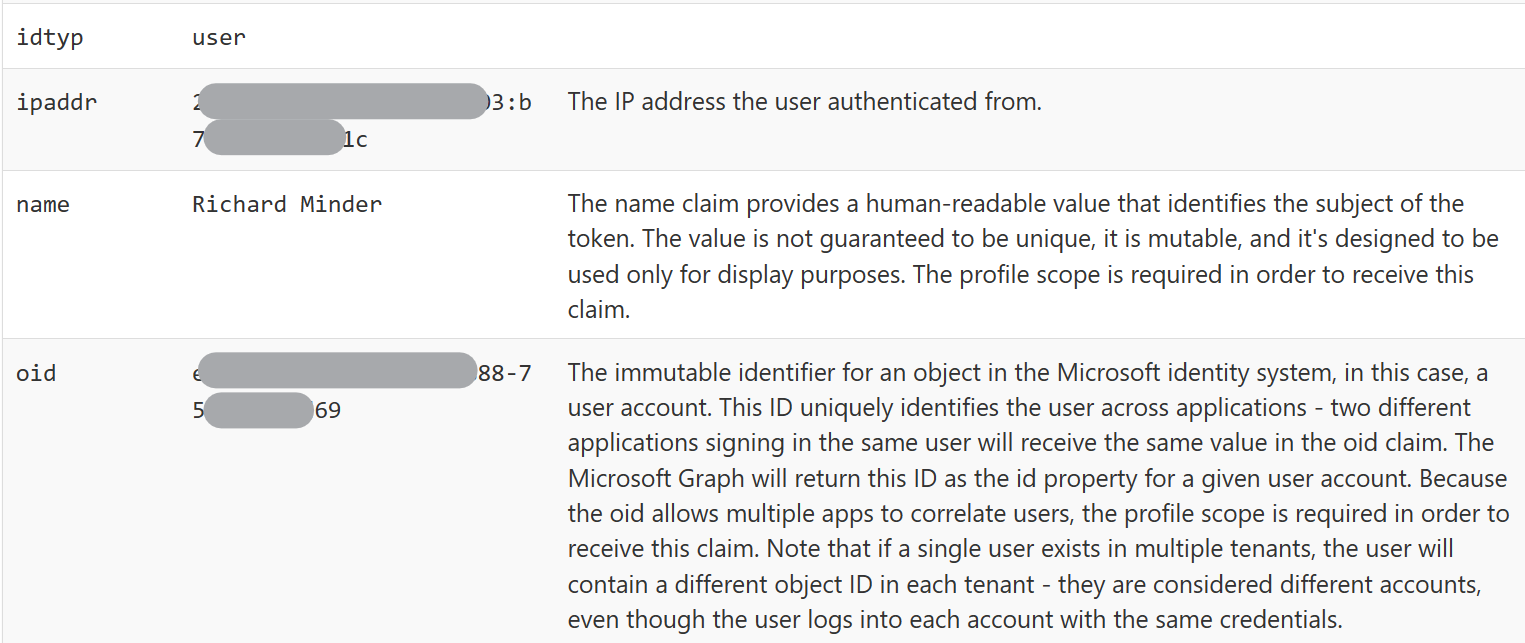
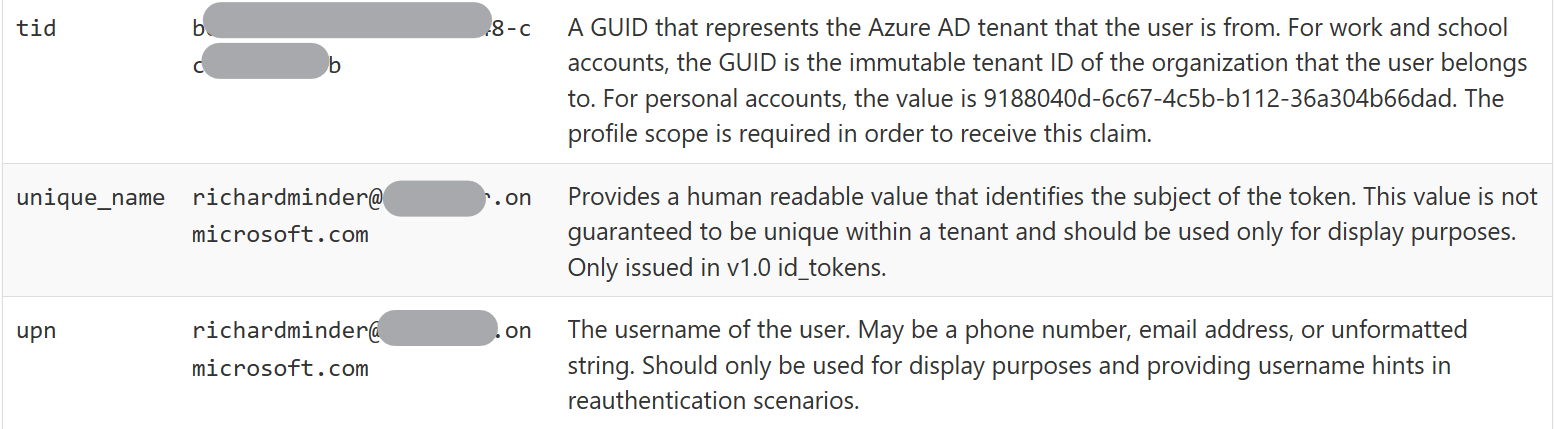
When scrolling down, we can find further claims which are important for Cross-Tenant Access:
Group Memberships
Authentication Tokens (Here, Password and MFA)

IP-Address, Name, Identifier
Tenant-ID, Unique Name, UPN
When accessing another tenant, these claims will still be stored in our JWT. As soon as we try to access resources from that tenant, our JWT will be checked.
Thank you for reading my Post, I hope you learned something new and are now able to implement a secure Cross-Tenant Access solution!